Appearance
Contact Form 7
Asli is compatible with the popular plugin Contact Form 7 for sending messages through your website.
TIP
This plugin is recommended by the Asli theme, so you are likely to already have it installed. If not, just search for it and install it from the WordPress Plugins directory in Plugins → Add Plugin.
Let’s set up the plugin.
▶️ Step 1.
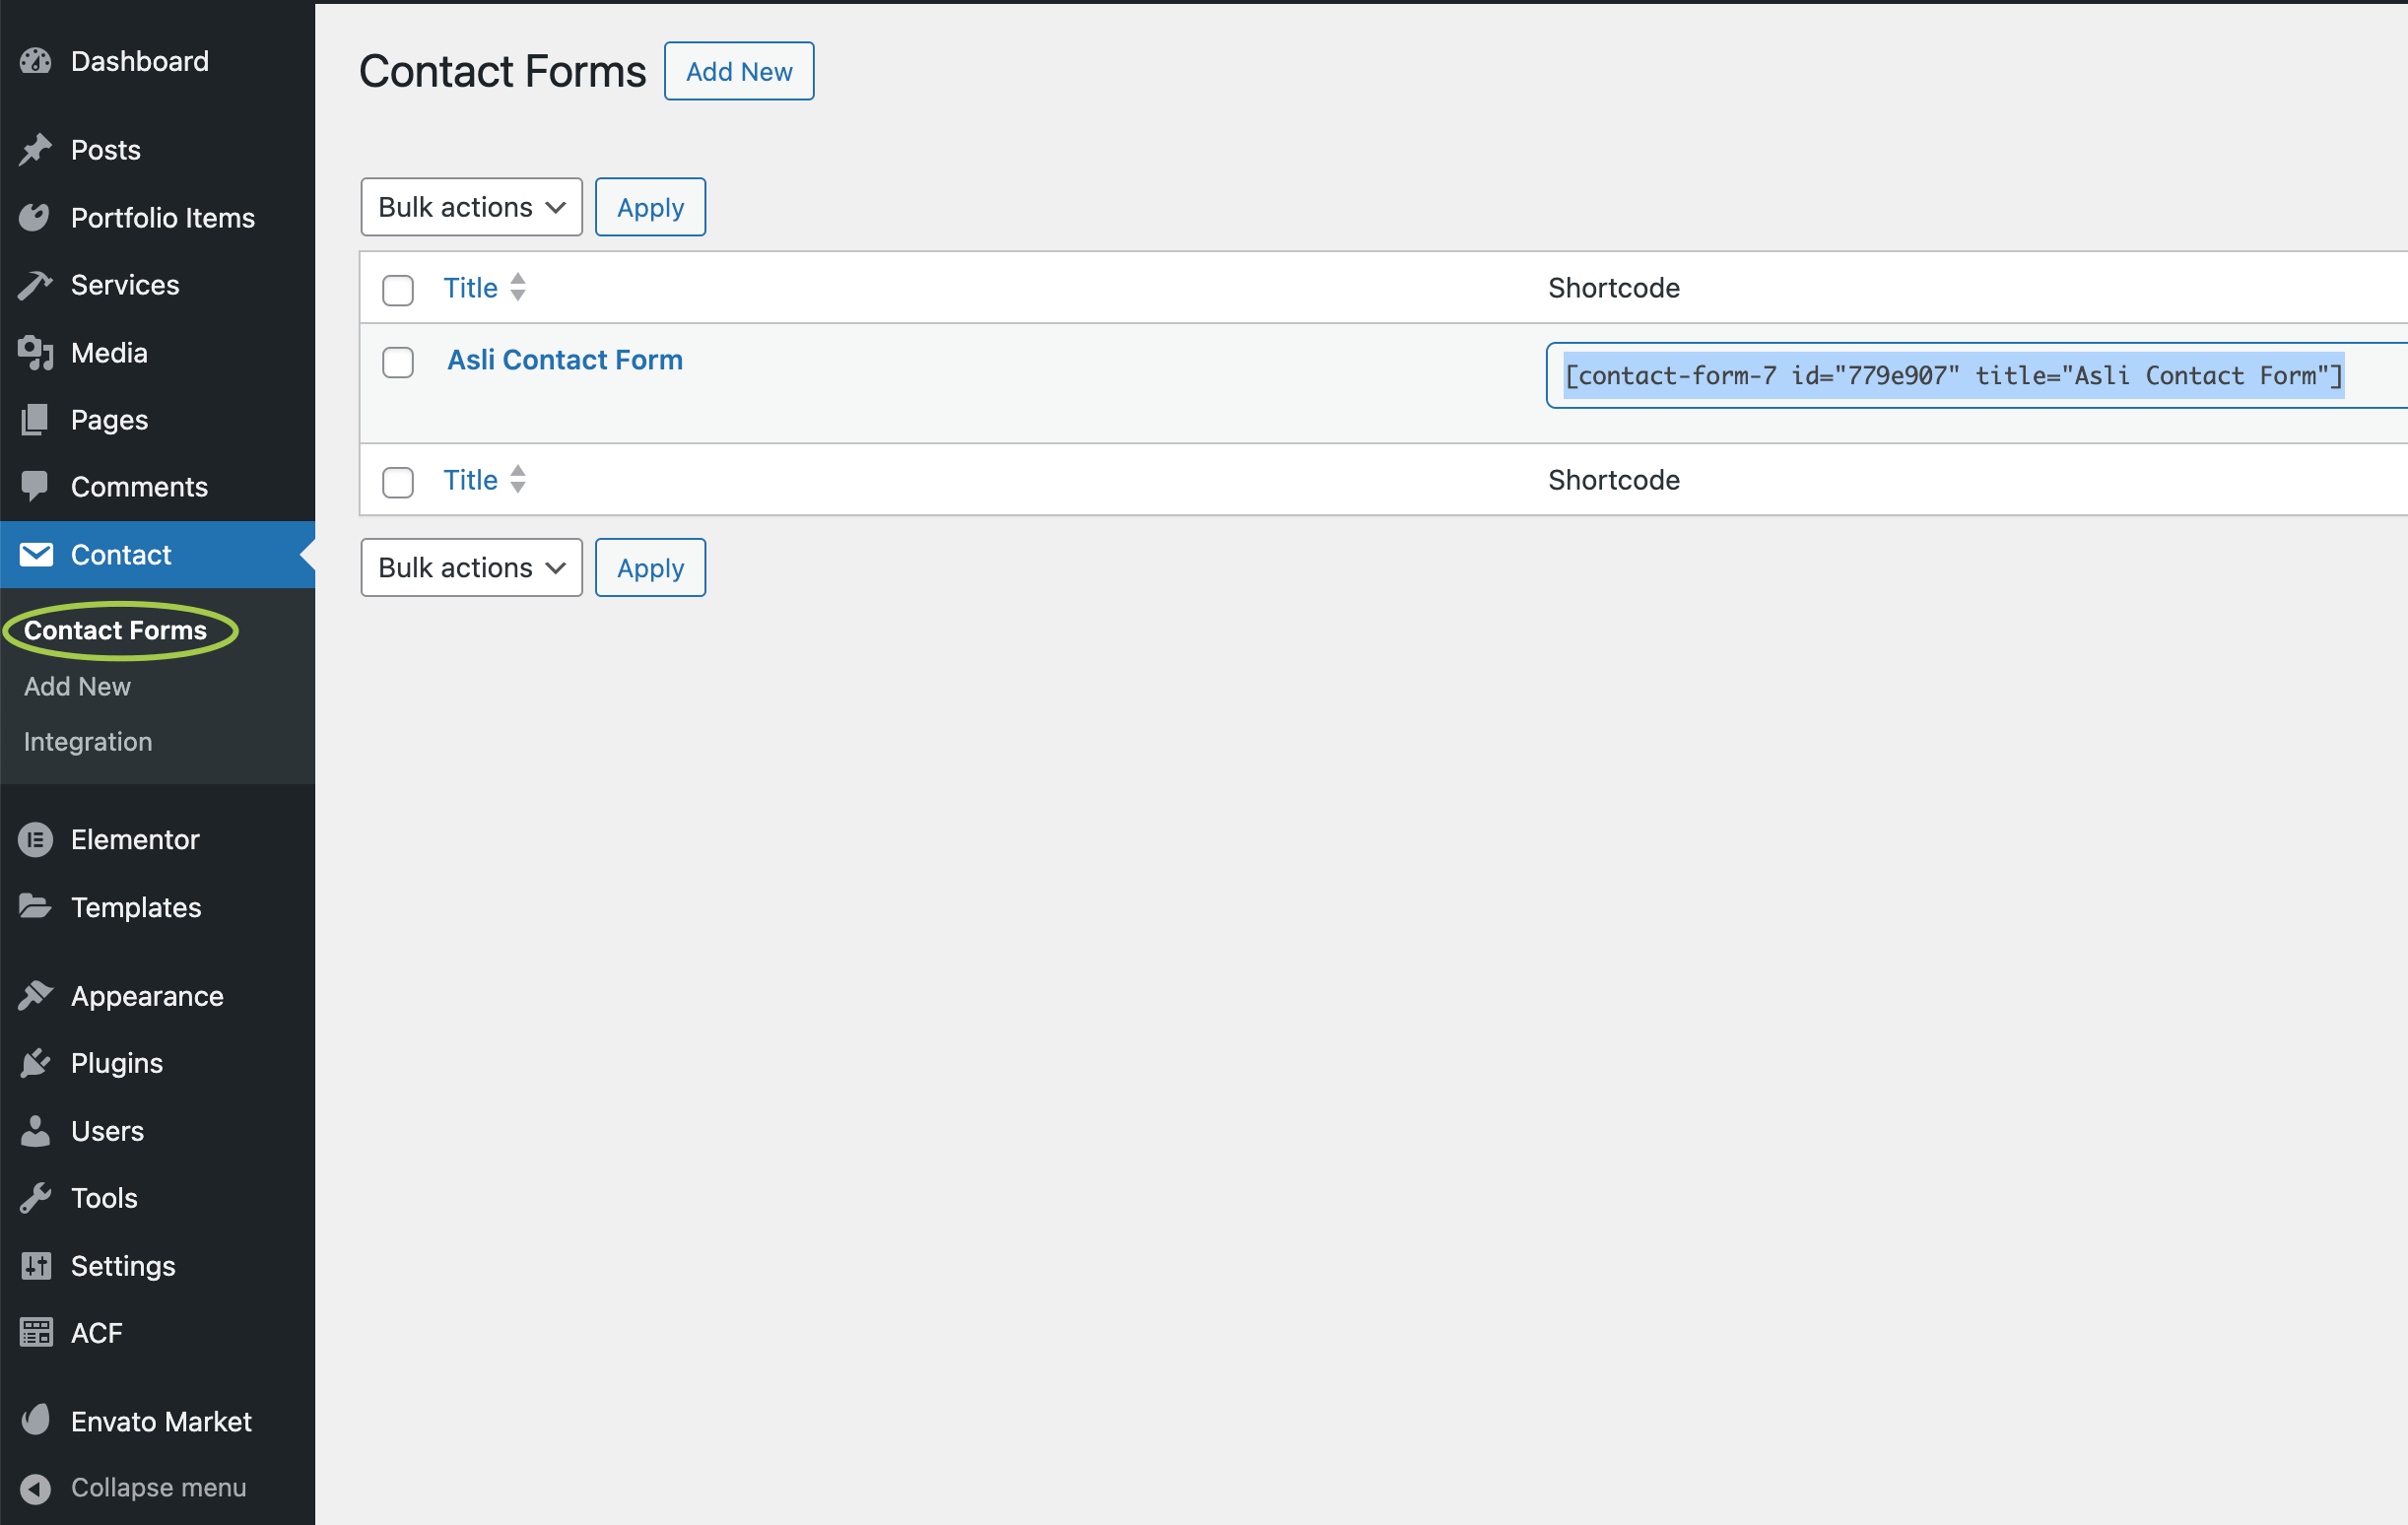
From the admin panel, go to Contact → Contact Forms. If you have correctly imported the demo data, you should see a form with a shortcode here.
▶️ Step 2.
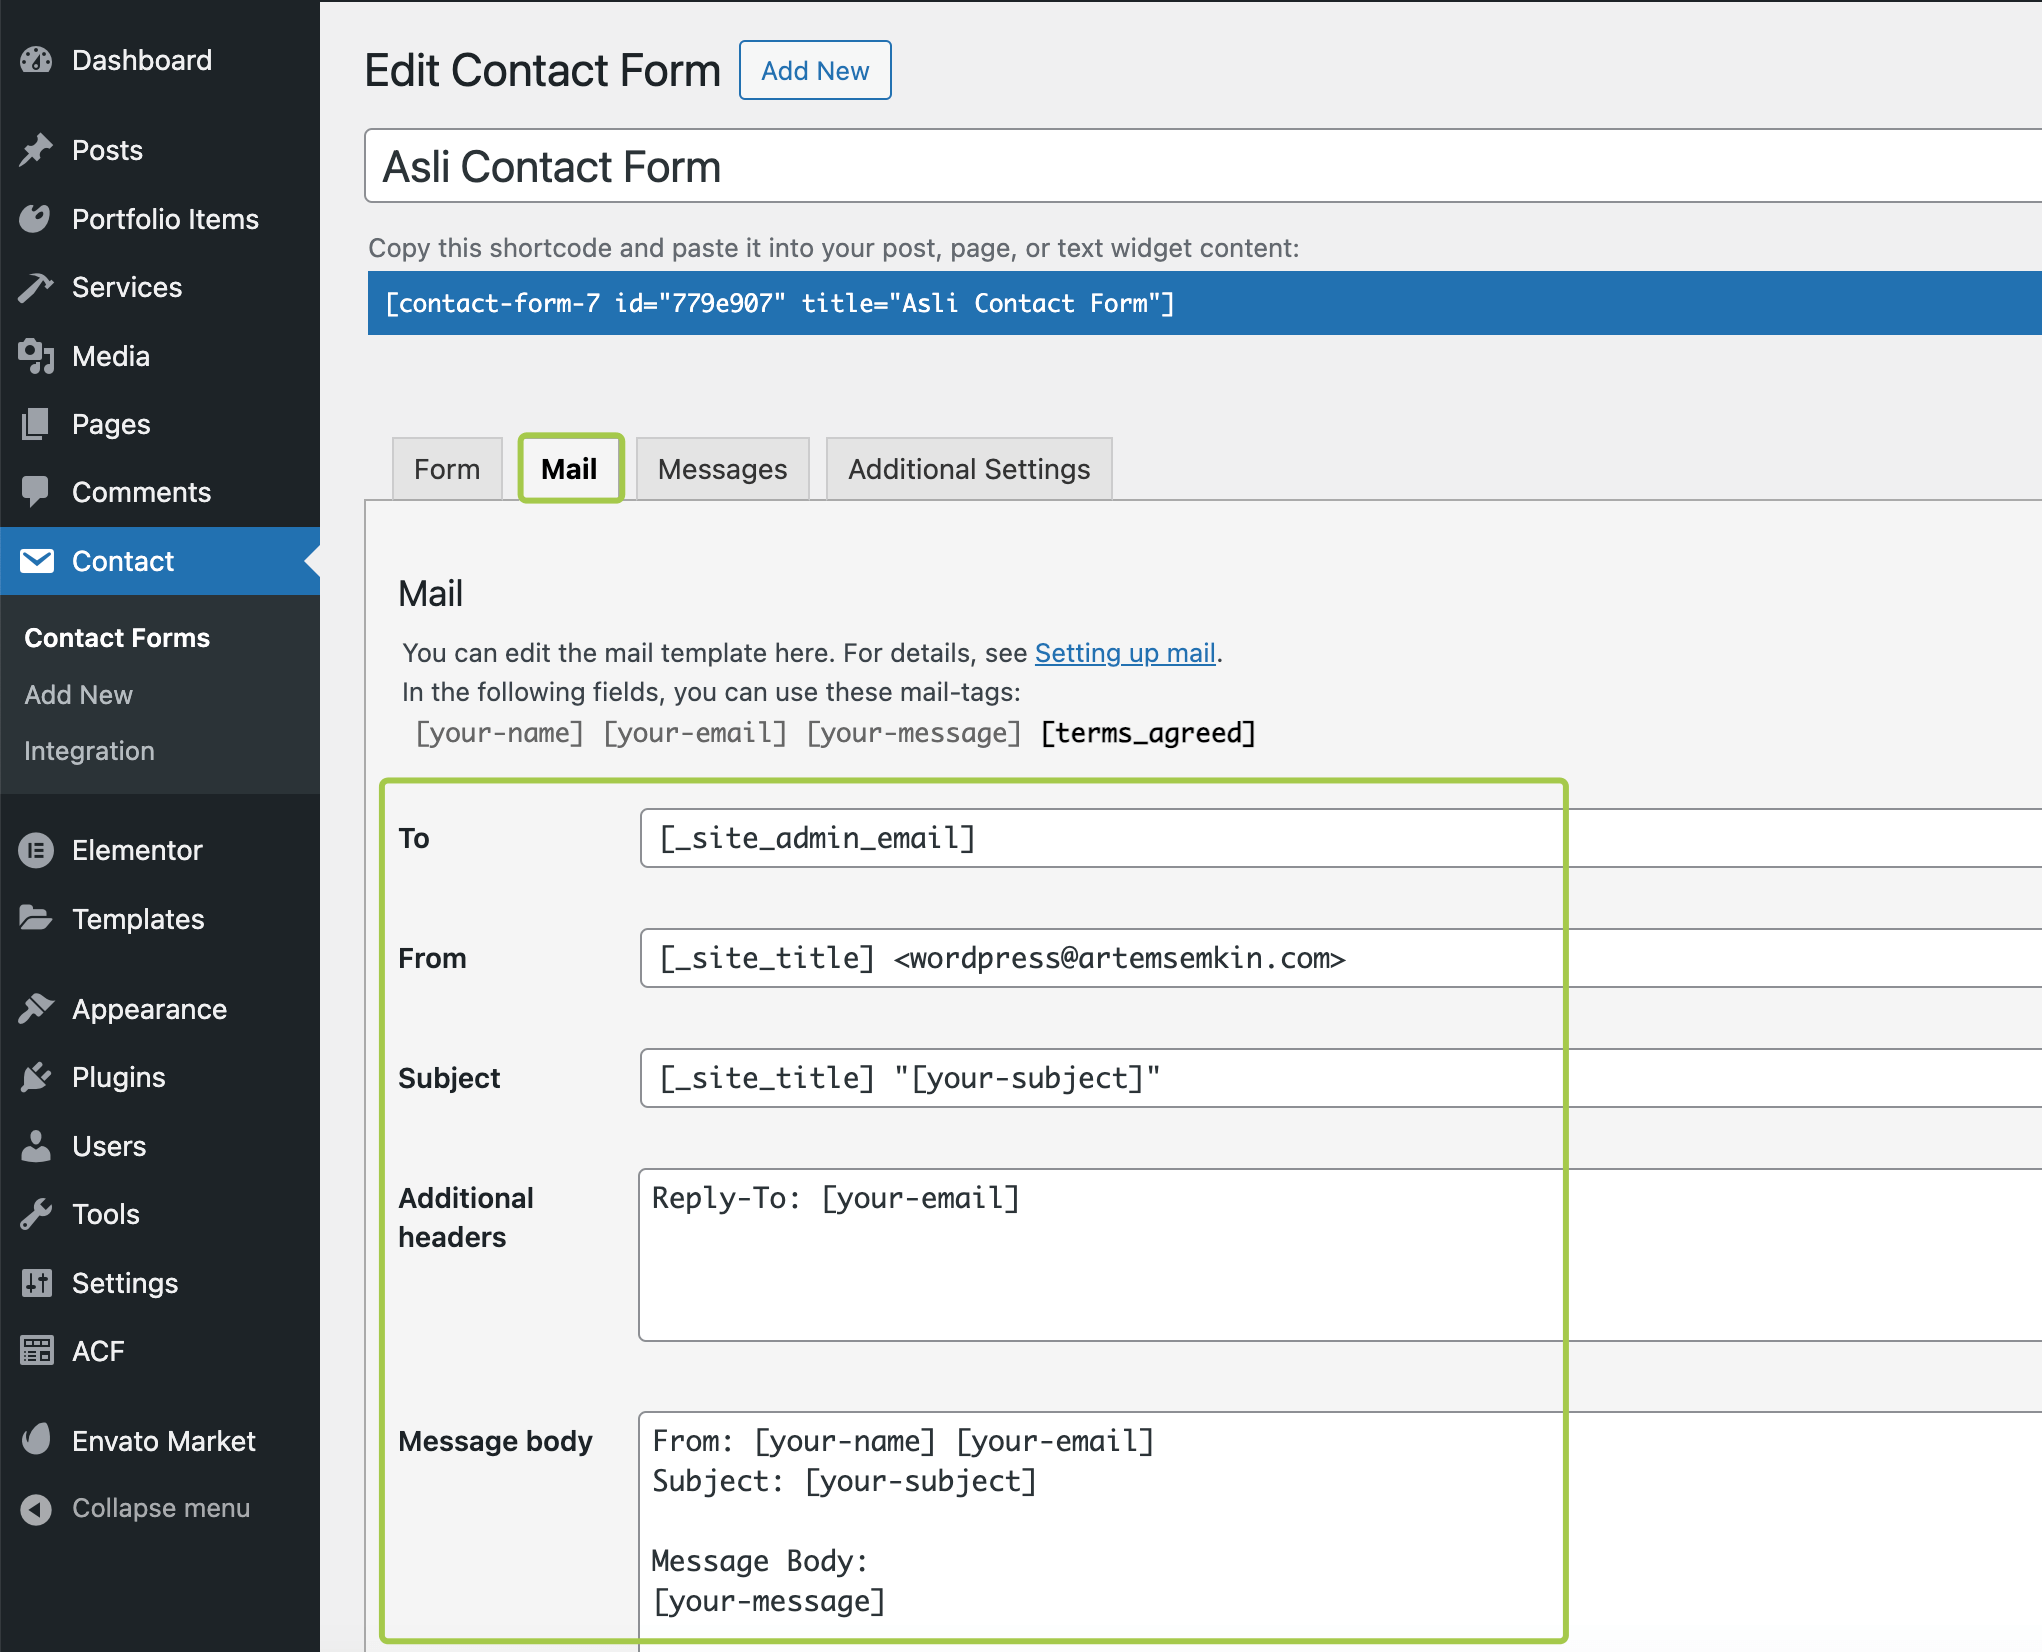
Click on the form <ThemeName /> Contact Form and open the Mail tab.
Here you can configure where your messages from the contact form will be sent.
Save button▶️ Step 3.
Copy the form shortcode. This is just an example. The ID and title may be different in your panel, and that's normal.
[contact-form-7 id="779e907" title="Asli Contact Form"]▶️ Step 4.
Now edit a page with Elementor where you want to place your contact form. Use the standard Shortcode Elementor widget.
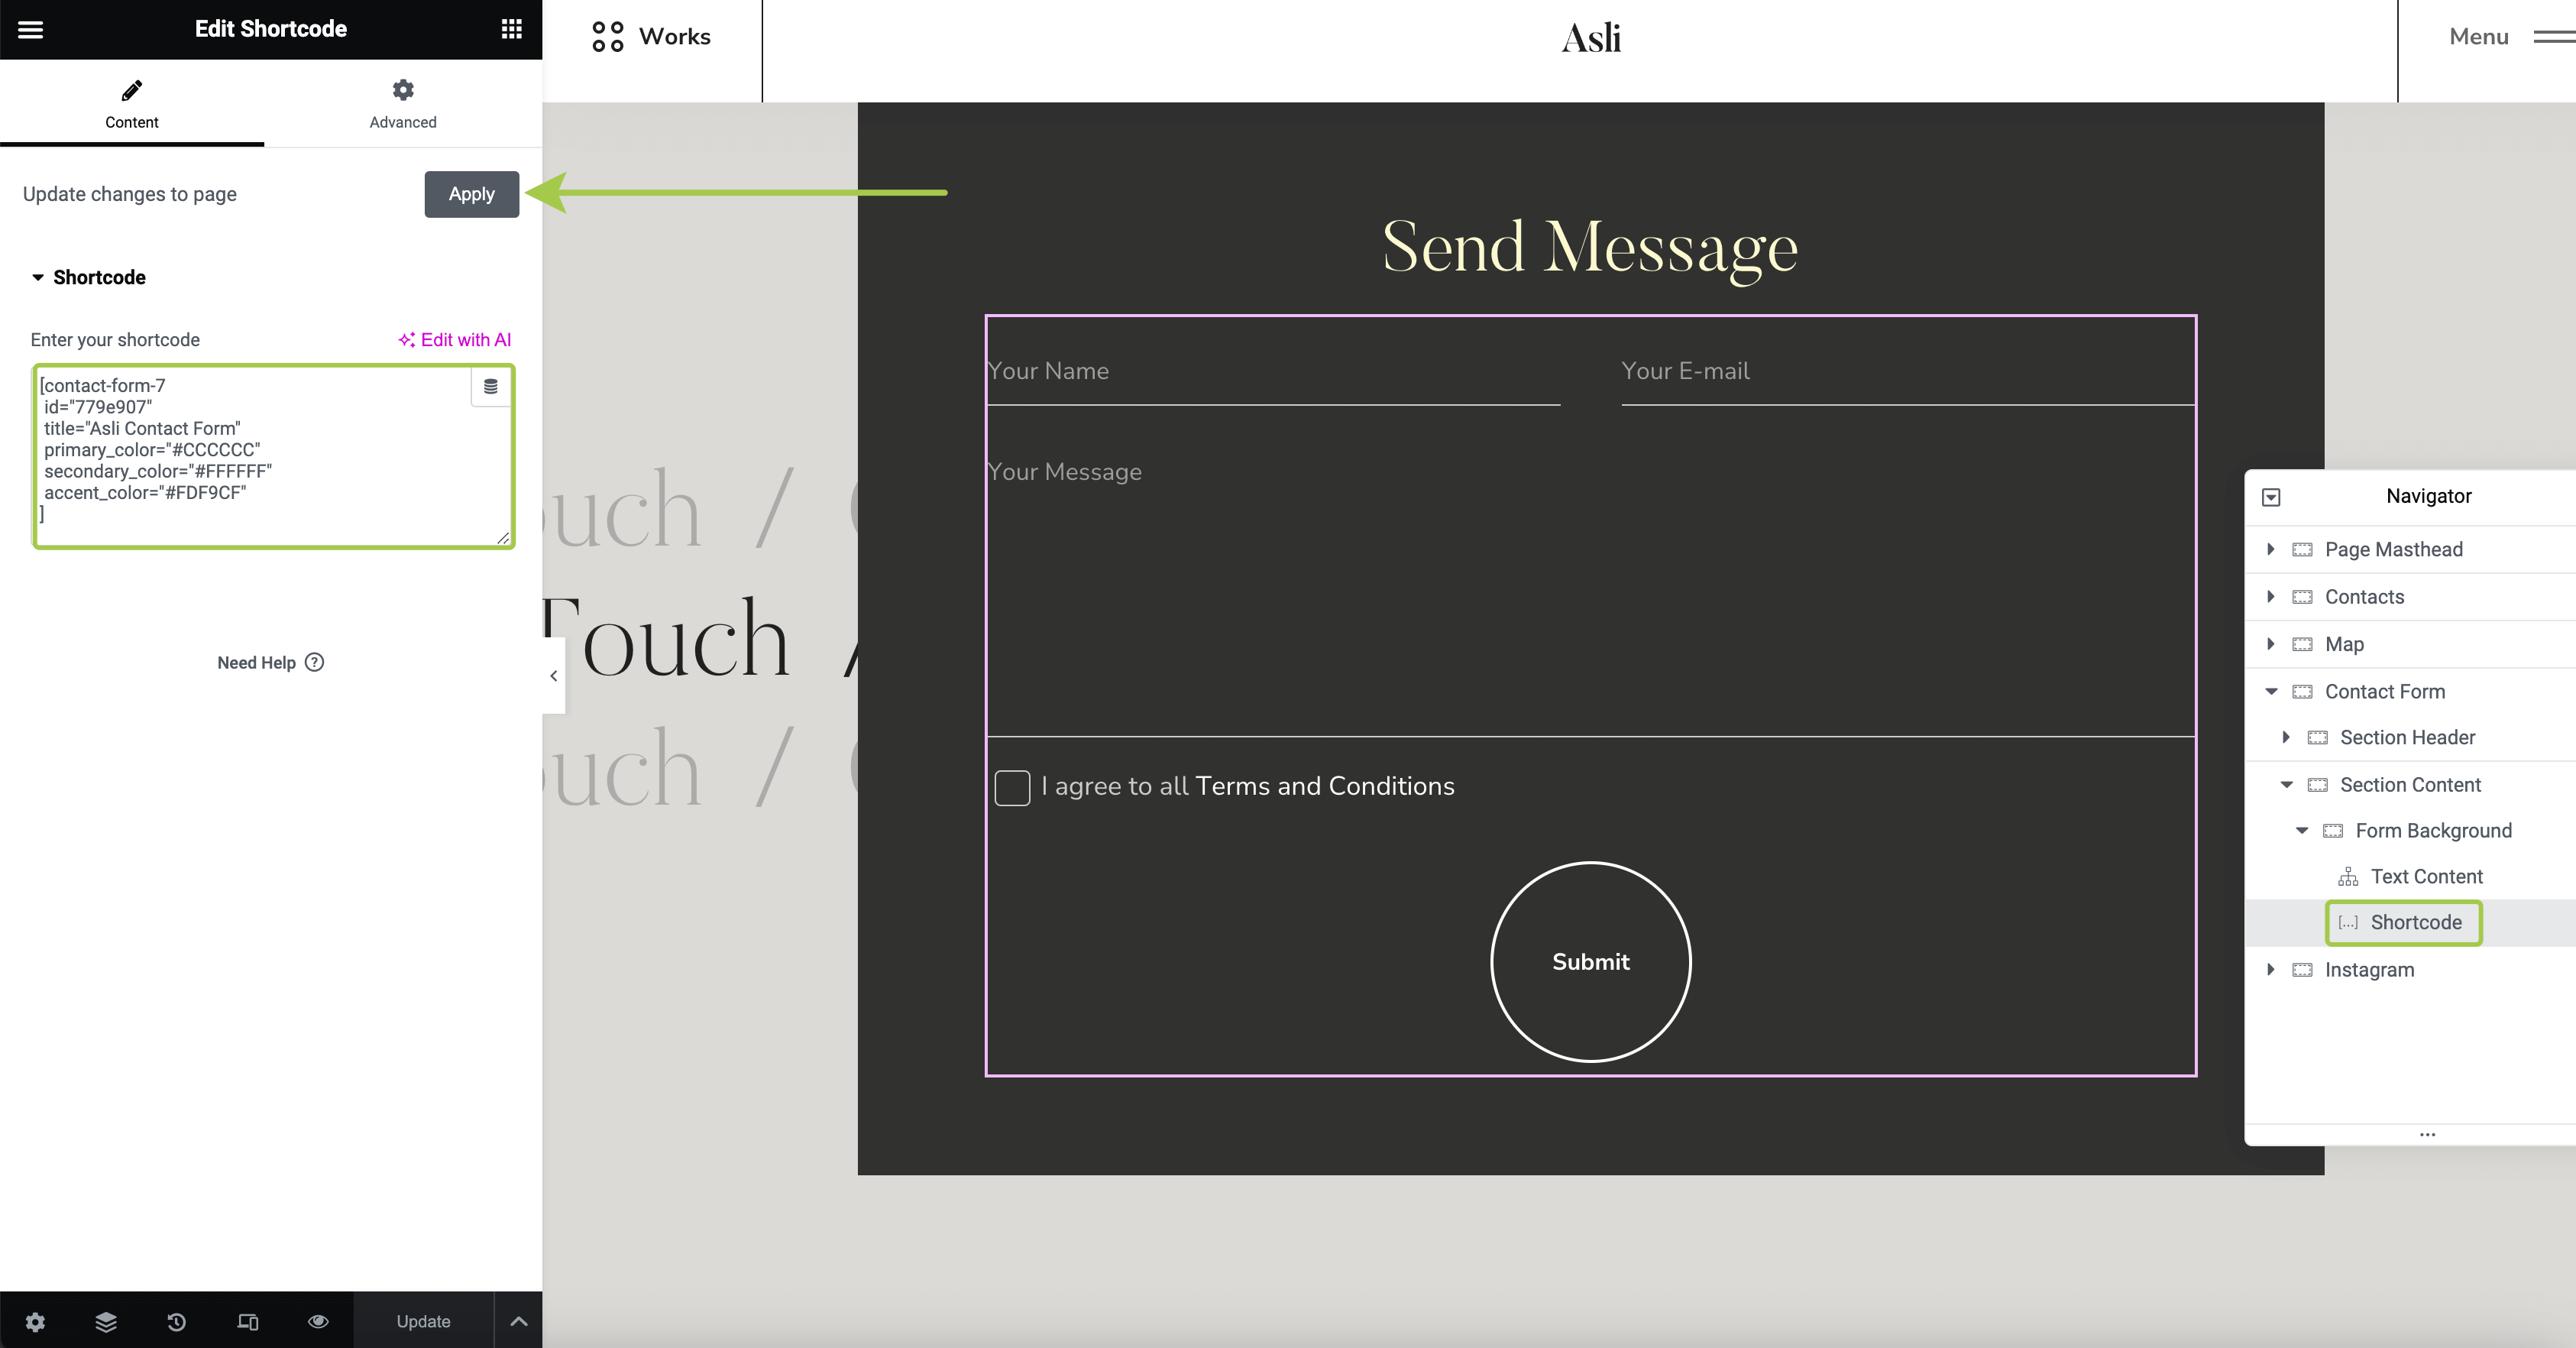
Apply▶️ Step 5.
Now your contact form is ready, and you can test if it works. If you'd like to change labels for the fields, button, or heading, you can do this by going back to the admin panel to Contact → Contact Forms → <ThemeName /> Contact Form.
SaveMissing the form shortcode?
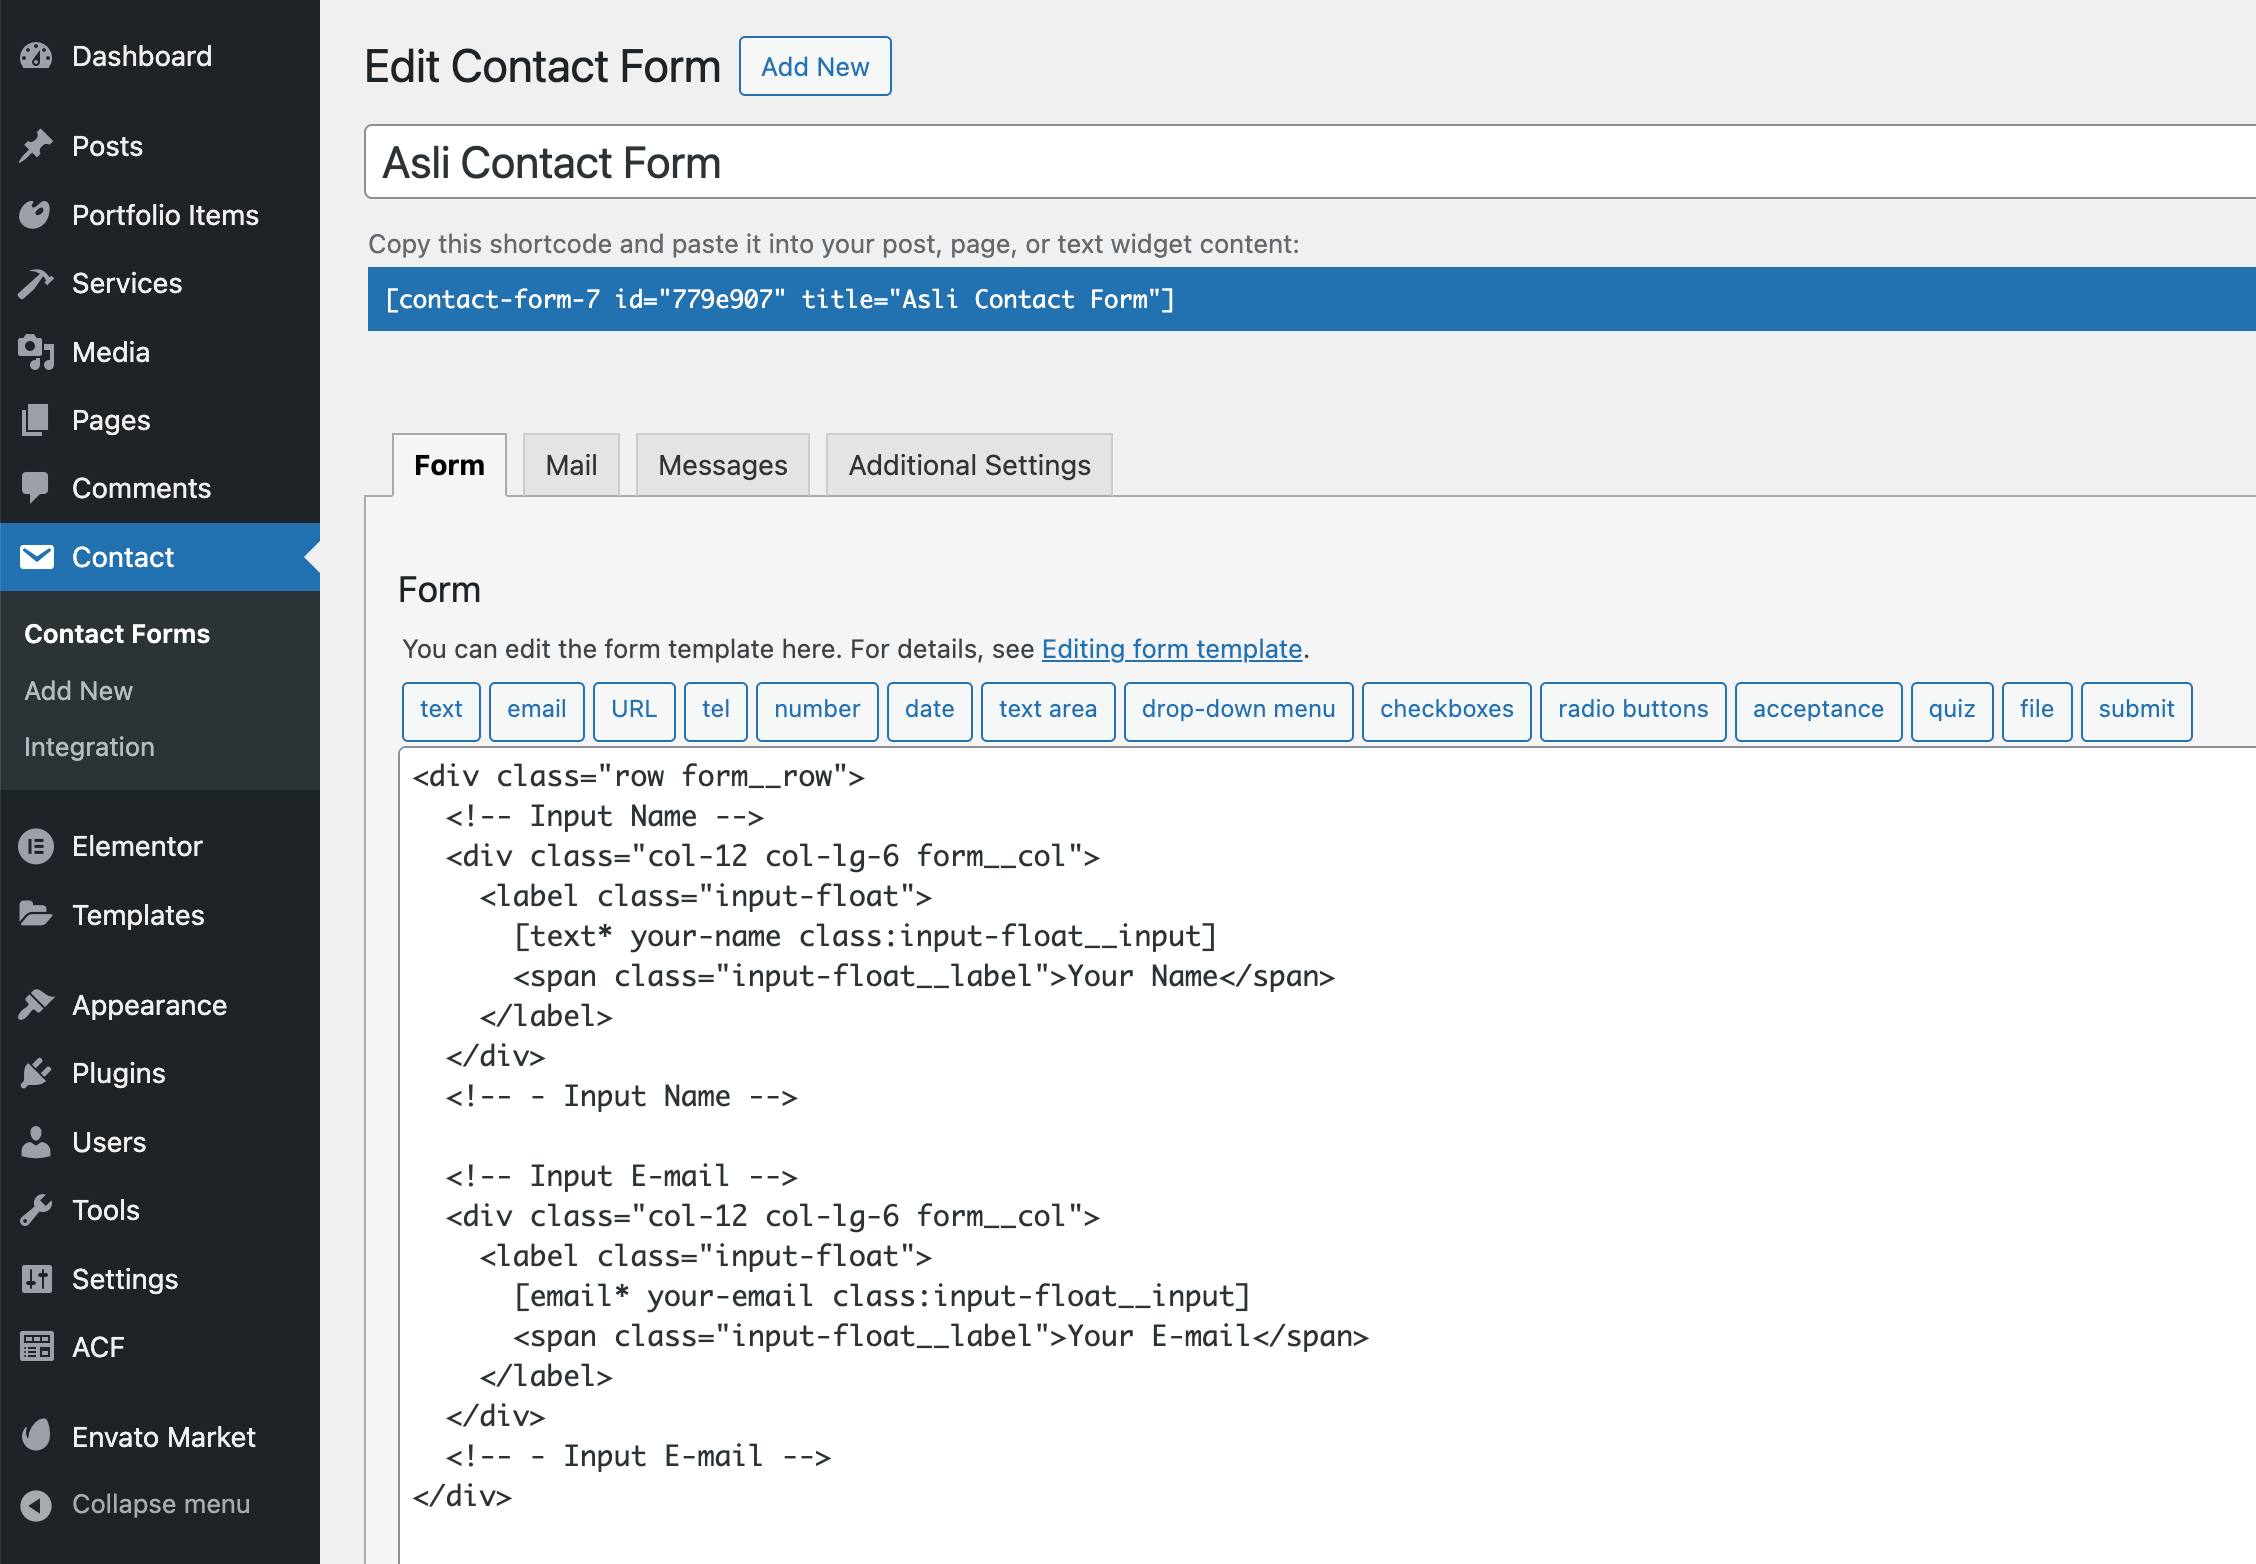
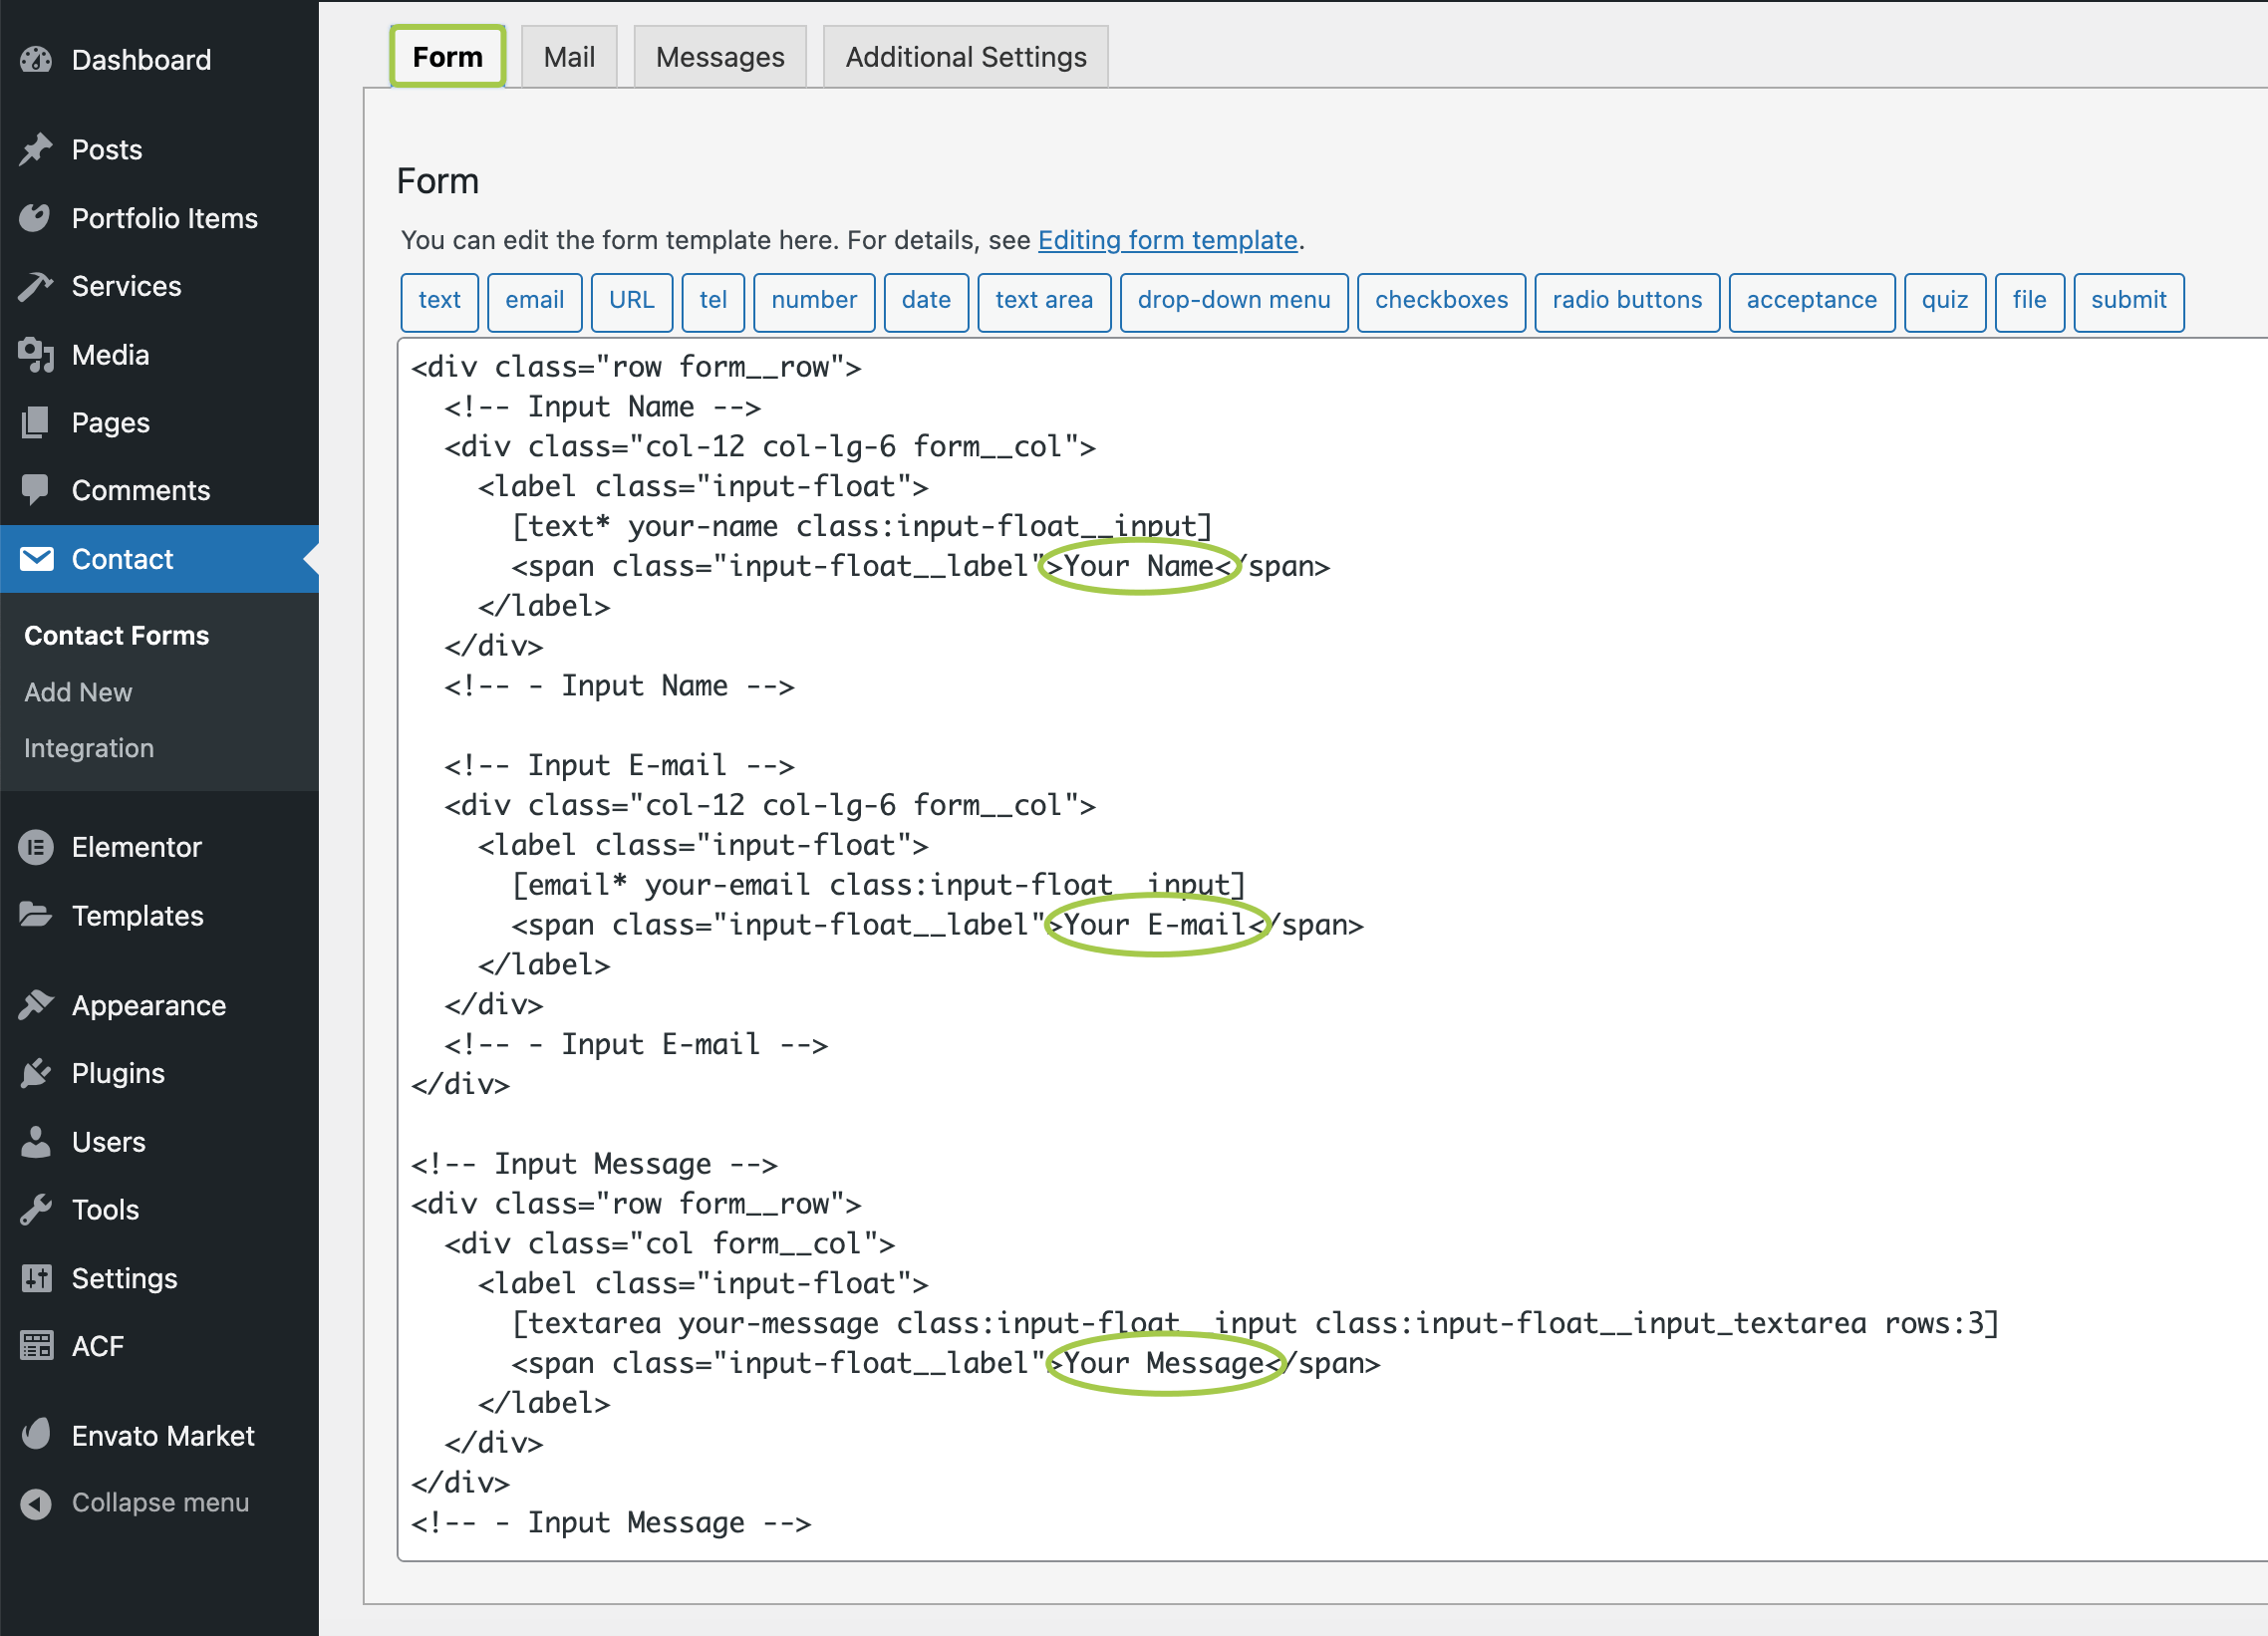
In case you don’t see an imported shortcode (which ships together with the demo content), you can create a new one by yourself. Just add a new contact form in Contact → Contact Forms and paste this HTML code in the Form tab:
html
<div class="row form__row">
  <!-- Input Name -->
  <div class="col-12 col-lg-6 form__col">
    <label class="input-float">
      [text* your-name class:input-float__input]
      <span class="input-float__label">Your Name</span>
    </label>
  </div>
  <!-- - Input Name -->

  <!-- Input E-mail -->
  <div class="col-12 col-lg-6 form__col">
    <label class="input-float">
      [email* your-email class:input-float__input]
      <span class="input-float__label">Your E-mail</span>
    </label>
  </div>
  <!-- - Input E-mail -->
</div>

<!-- Input Message -->
<div class="row form__row">
  <div class="col form__col">
    <label class="input-float">
      [textarea your-message class:input-float__input class:input-float__input_textarea rows:3]
      <span class="input-float__label">Your Message</span>
    </label>
  </div>
</div>
<!-- - Input Message -->

<!-- Checkbox -->
<div class="row form__row">
  <div class="col form__col text-start">
    <label class="input-checkbox input-float">
      [acceptance terms_agreed class:input-float__input class:input-checkbox__checkbox]
      <span class="input-checkbox__label">I agree to all <a href="#">Terms and Conditions</a></span>
    </label>
  </div>
</div>
<!-- - Checkbox -->

<!-- Submit -->
<div class="row form__row">
  <div class="col form__col form__col_submit text-center">
    <button class="button button_icon button-circle elementor-button elementor-size-md" type="submit" data-arts-cursor-follower-target="{color: '#FDF9CF', scale: 'current', magnetic: 0.25}">
      <span class="button__label button__label-normal">
        <span class="button__title">Submit</span>
      </span>
      <span class="button__label button__label-hover">
        <span class="button__title">Submit</span>
      </span>
    </button>
  </div>
</div>
<!-- - Submit -->
For more information on how to set up your e-mail settings and templates, please check the official Contact Form 7 Documentation.