Appearance
Templates Display Conditions
While navigating the theme demo, you may have noticed that different headers, footers, and site parts appear on different pages. This is achieved using Elementor's Display Conditions feature in Theme Builder. Conditions determine where templates are displayed on a site. This guide explains how to access and use this feature.
Understanding the System
Why Do Multiple Templates Exist?
The theme demo includes multiple header and footer variations (dark, light, burger menu, classic menu) so different pages can have different appearances. Each template is completely independent - changes to one template do not affect others.
Key concept: You're not stuck with this complexity. You can use a single header/footer across your entire site, or leverage multiple templates for contextual design.
Two Common Approaches
Approach 1: Single Site-Wide Template (Simpler)
Best for: Sites where all pages should look identical
Setup:
- Keep ONE header template with condition: "Include → Entire Site"
- Delete unused header variations (or clear their conditions)
- Result: Consistent header across all pages
Approach 2: Contextual Templates (Advanced)
Best for: Sites with distinct page styles (portfolio, shop, blog)
Example setup:
- Light header → Assigned to bright pages
- Dark header → Assigned to dark pages
- Shop header → Assigned to WooCommerce pages
- Each template targets specific pages via Include rules
How Display Logic Works
Display conditions use Include and Exclude rules:
| Condition | Result |
|---|---|
| Include: Entire Site | Shows on all pages |
| Include: Entire Site + Exclude: Contact | Shows everywhere EXCEPT Contact page |
| Include: Page A, Page B | Shows ONLY on pages A and B (OR logic) |
| Include: Blog Posts + Exclude: Category X | Shows on blog posts except Category X |
Priority: When multiple templates could match a page, Elementor uses the most specific condition. Exclude rules always override Include rules on the same template.
Accessing Display Conditions
Via Backend Panel
▶️ Step 1.
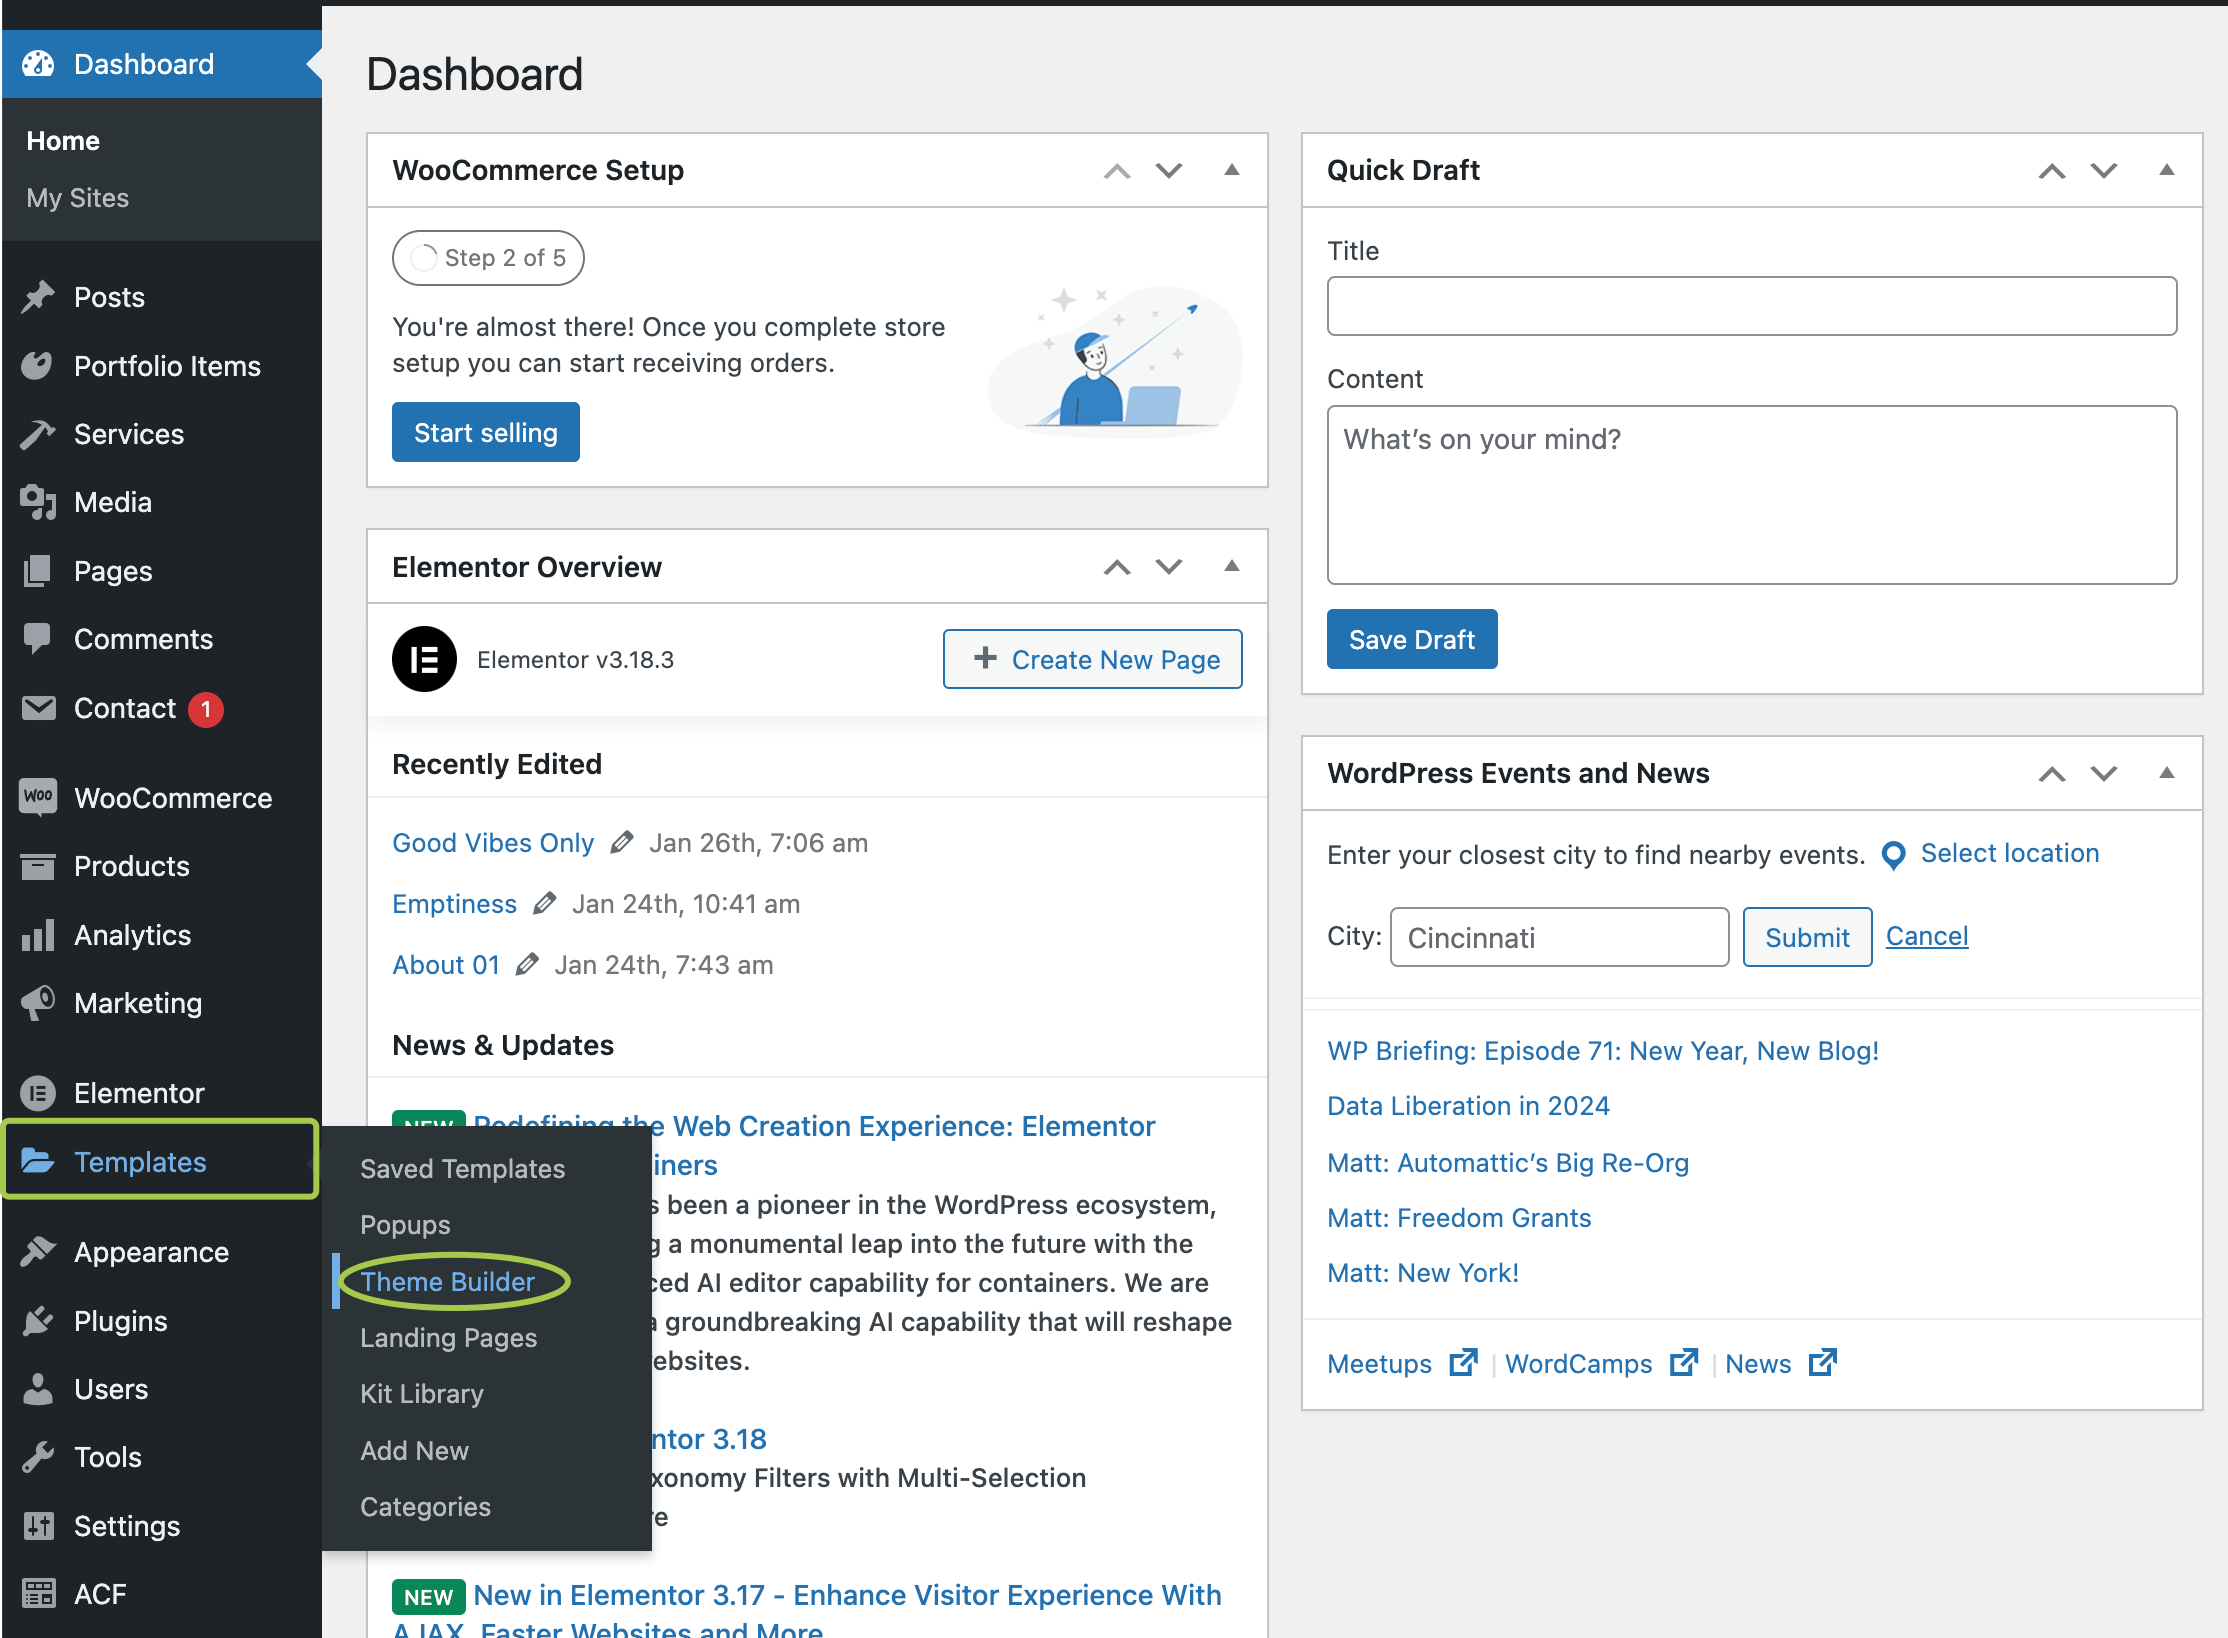
In the admin panel, hover over the Templates menu and click Theme Builder.
▶️ Step 2.
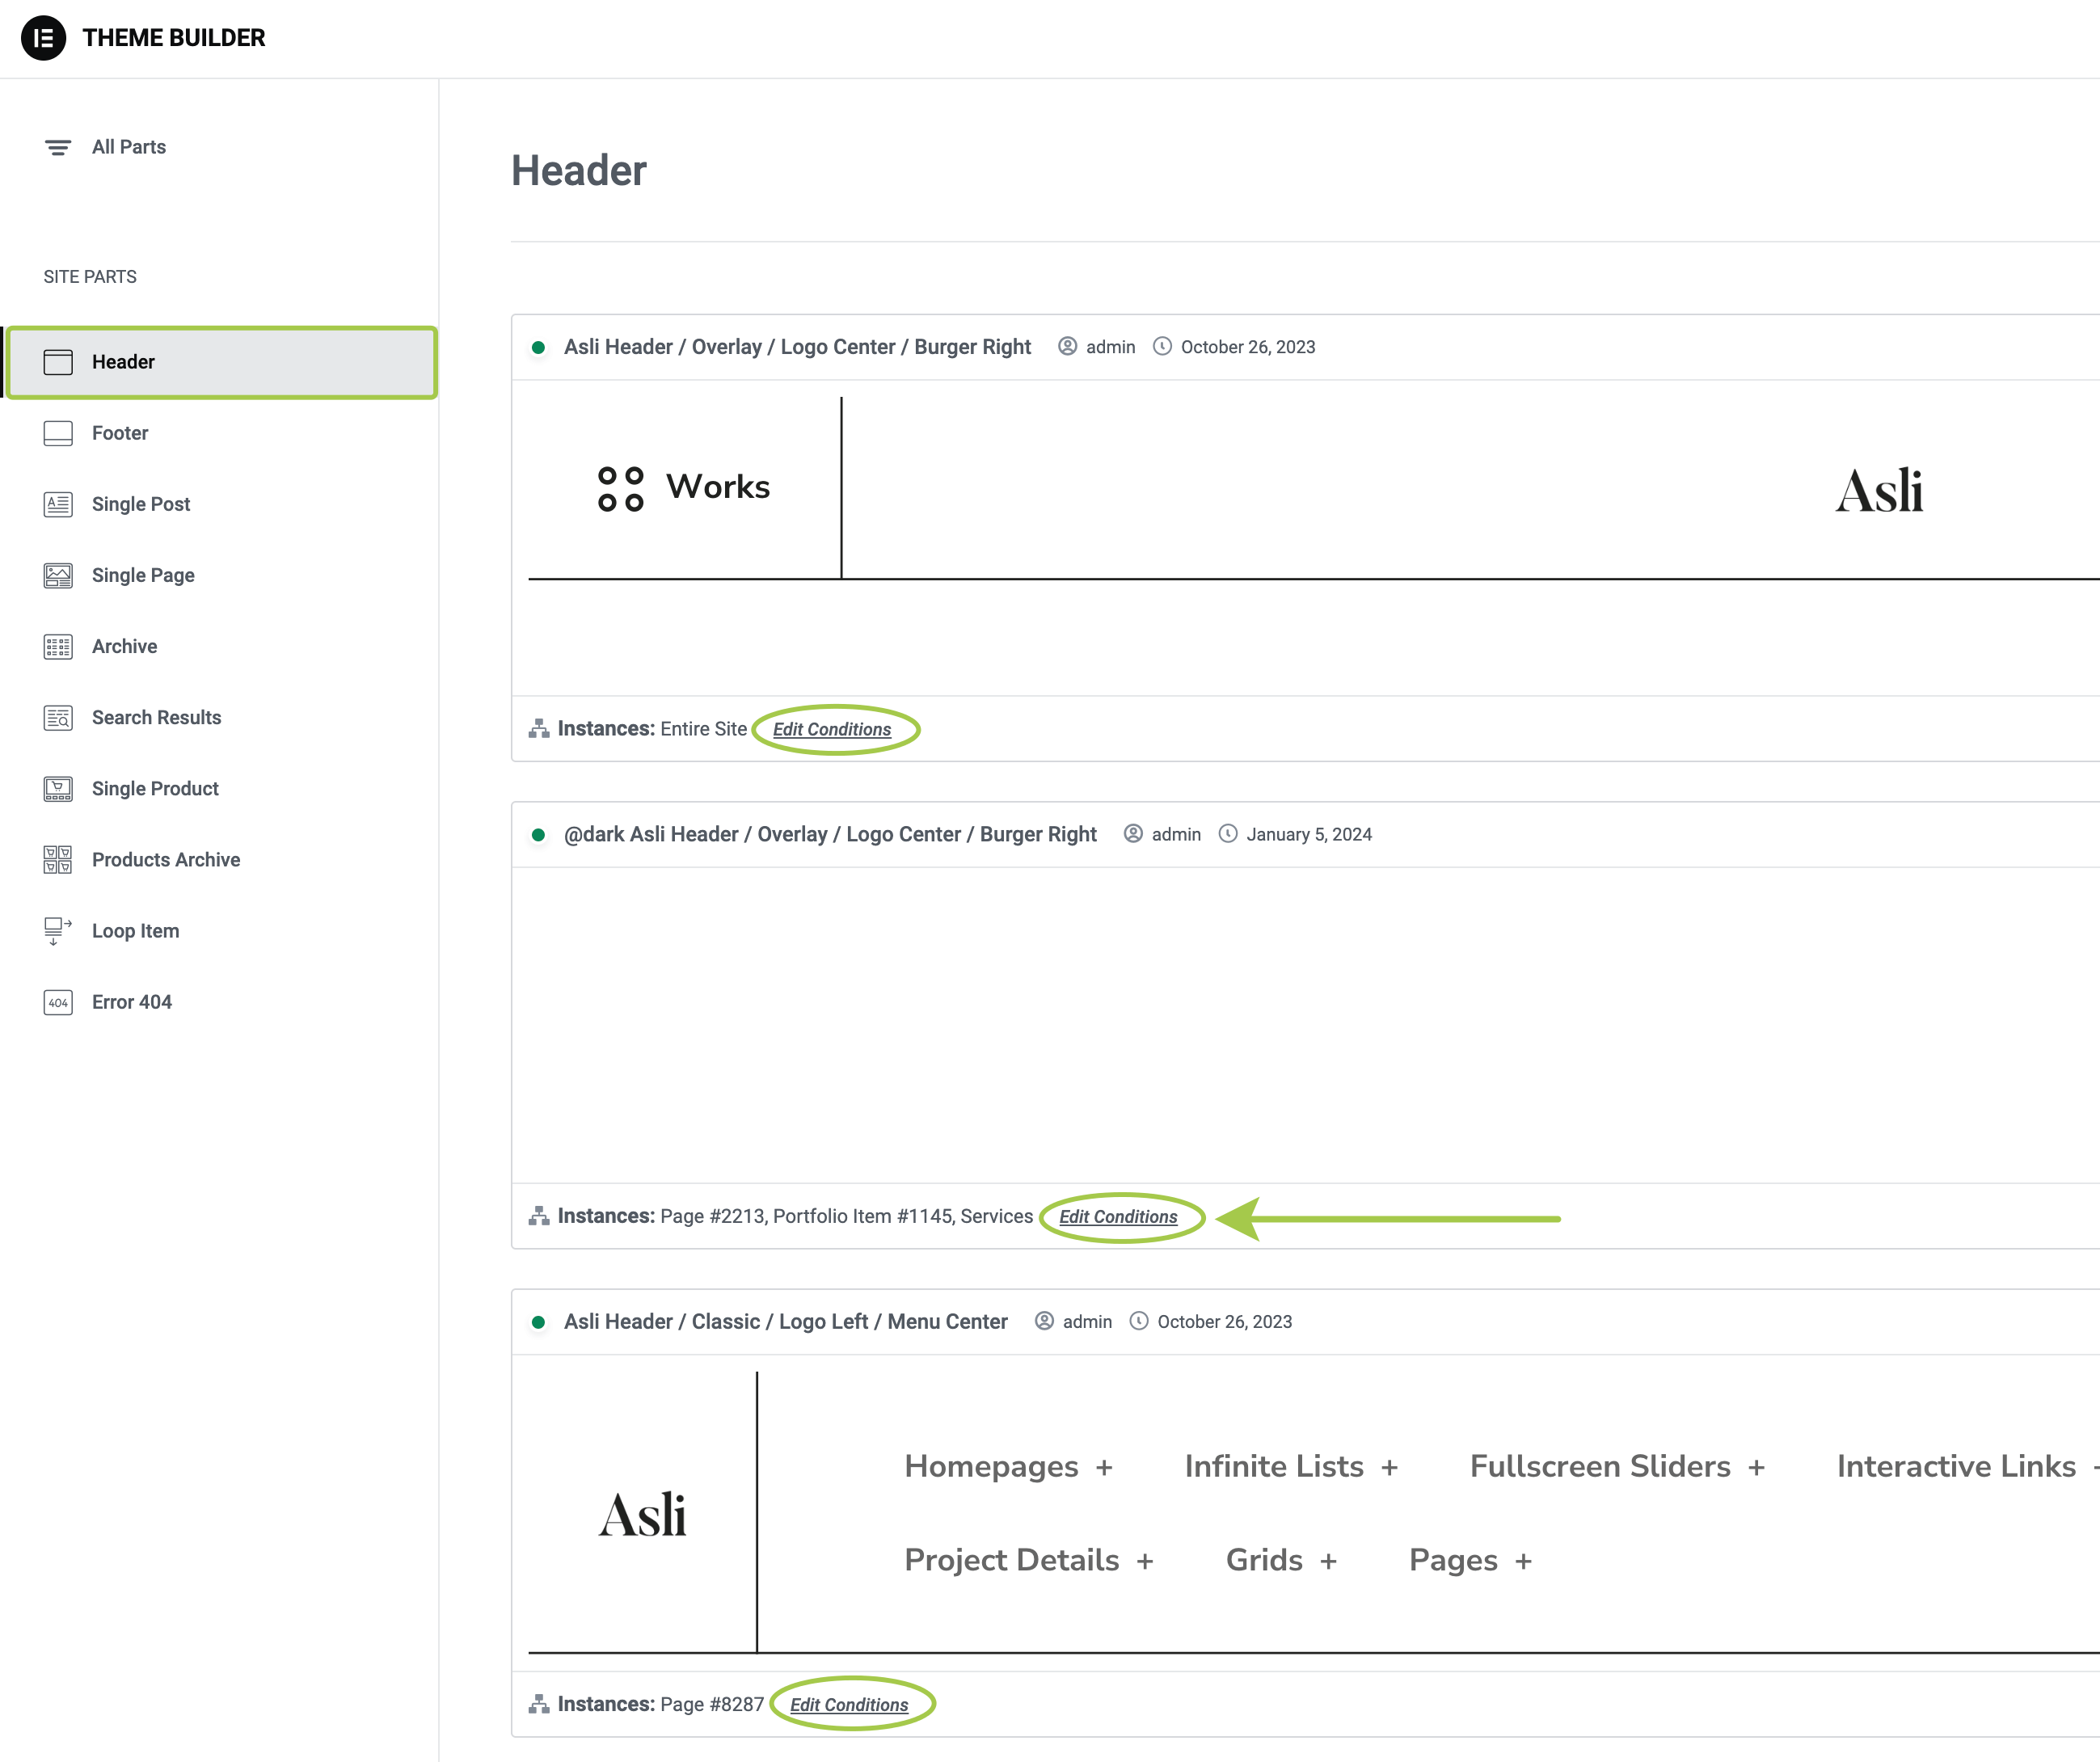
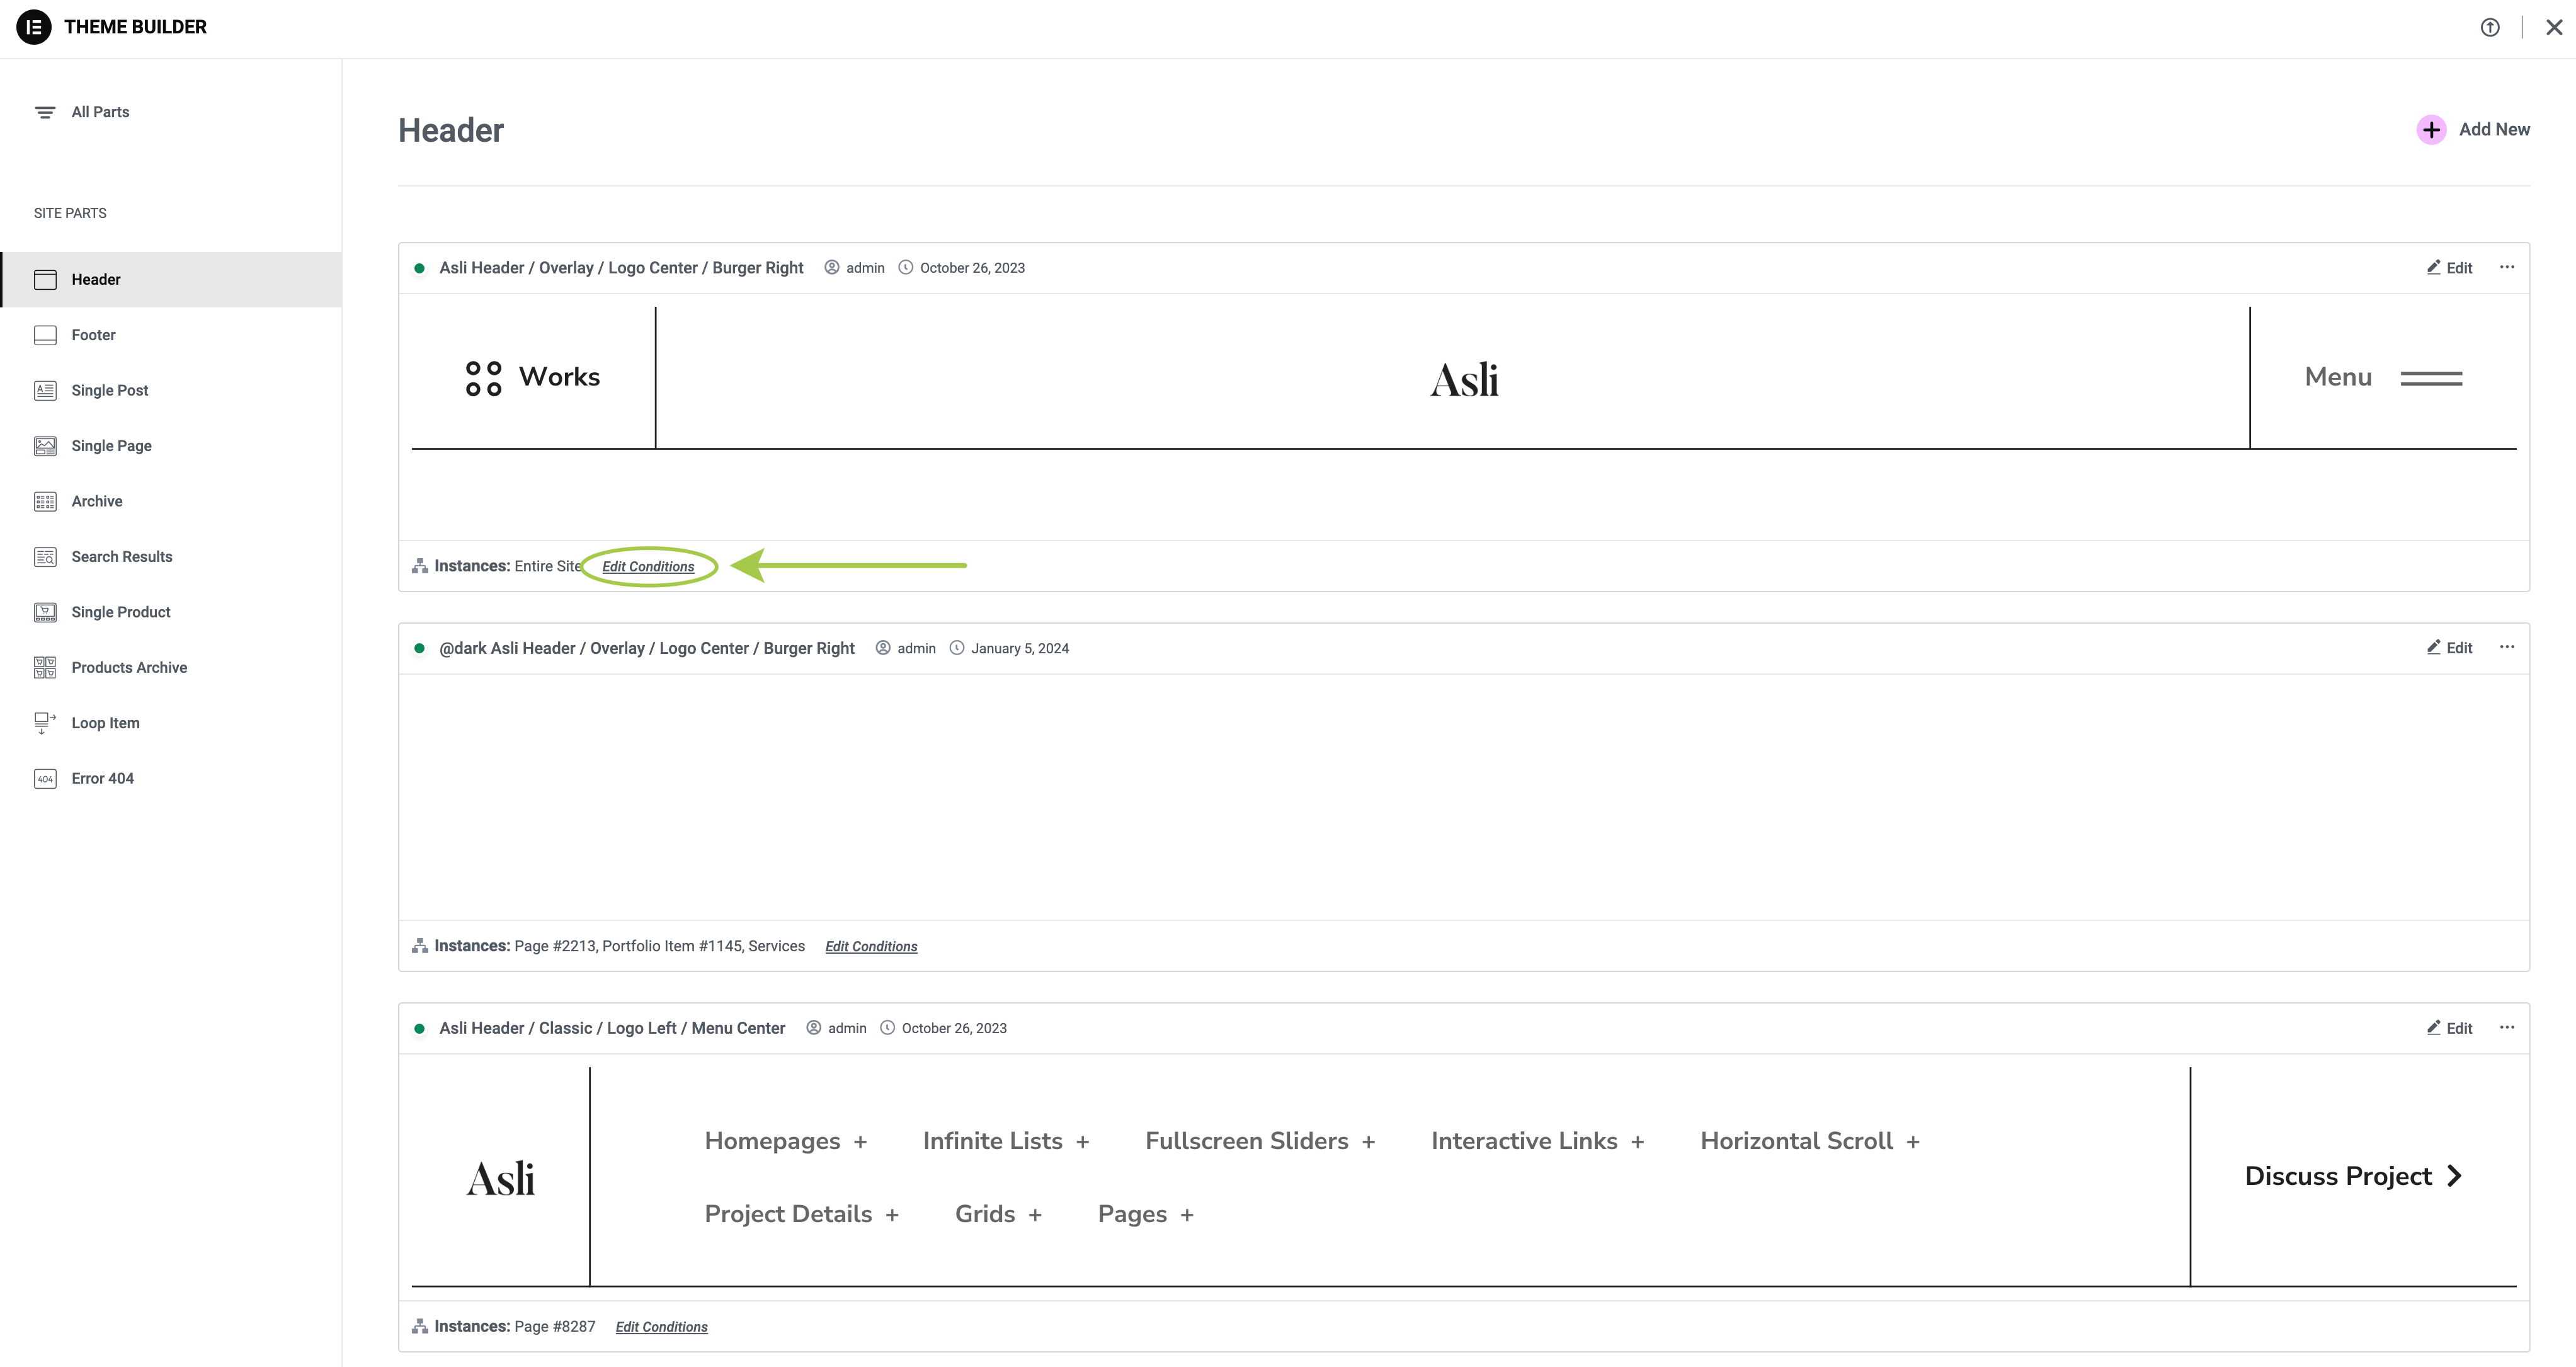
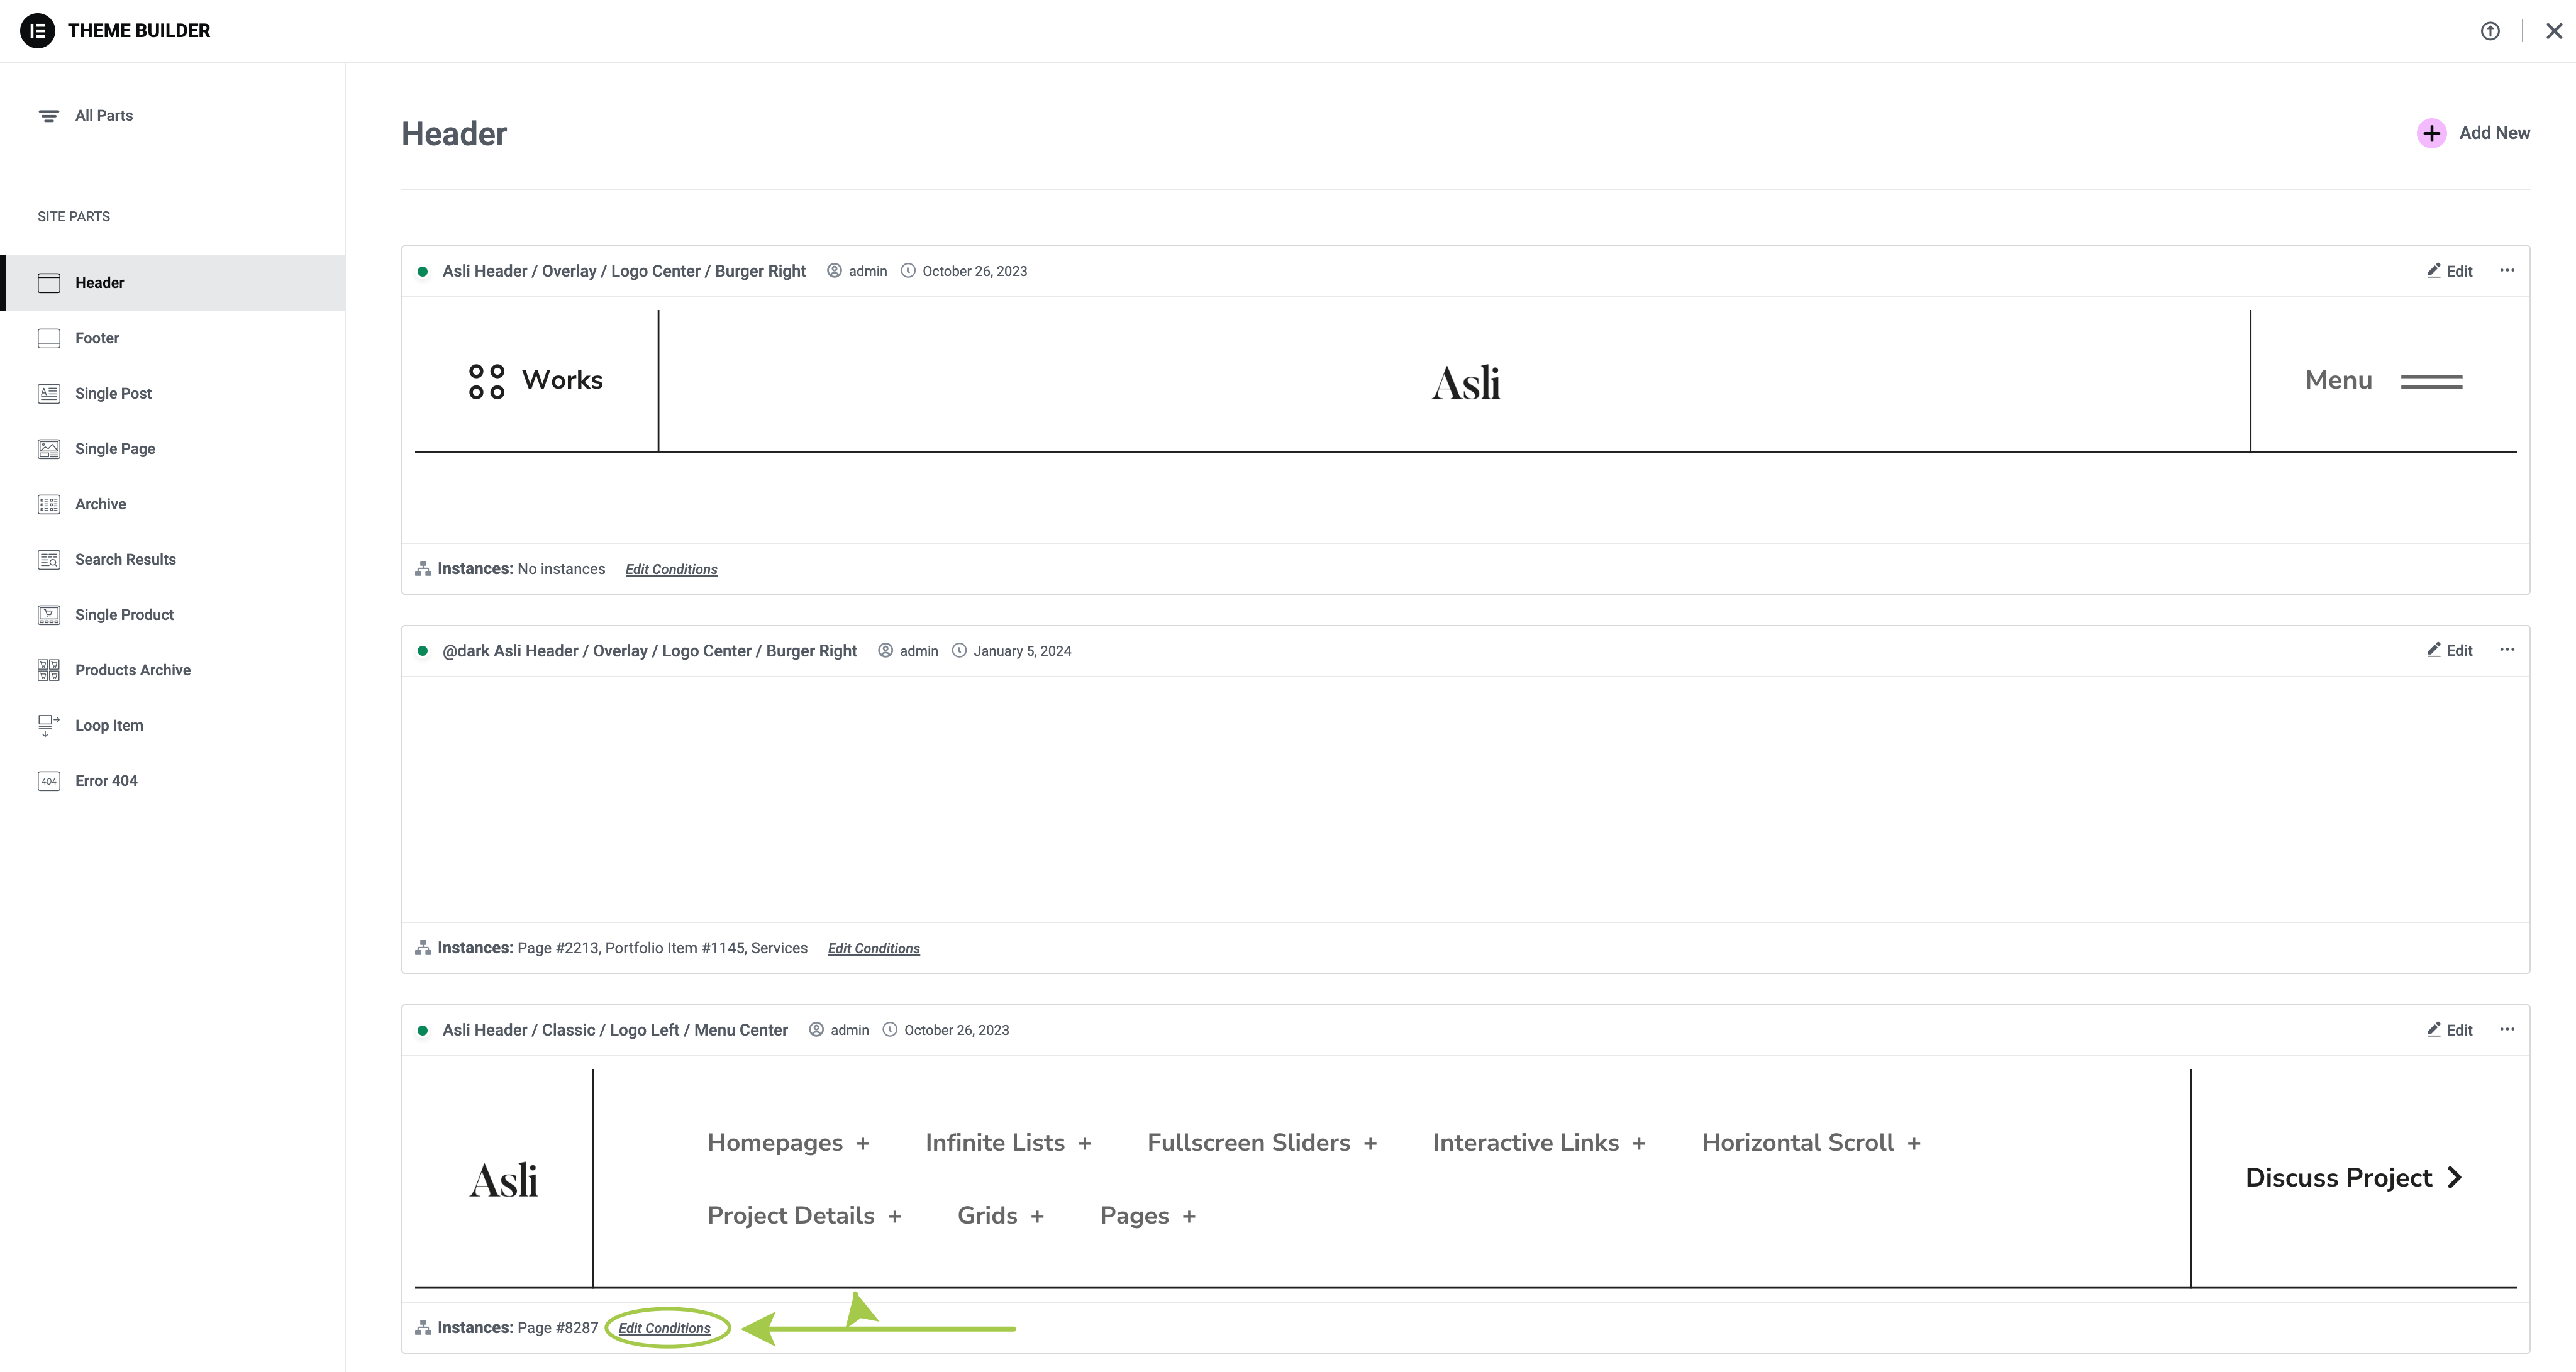
In the left sidebar, select the theme part you'd like to customize, then locate the Edit Conditions link. This is where you can set display conditions for a particular template.
For example, click on the link related to a dark header variation.
▶️ Step 3.
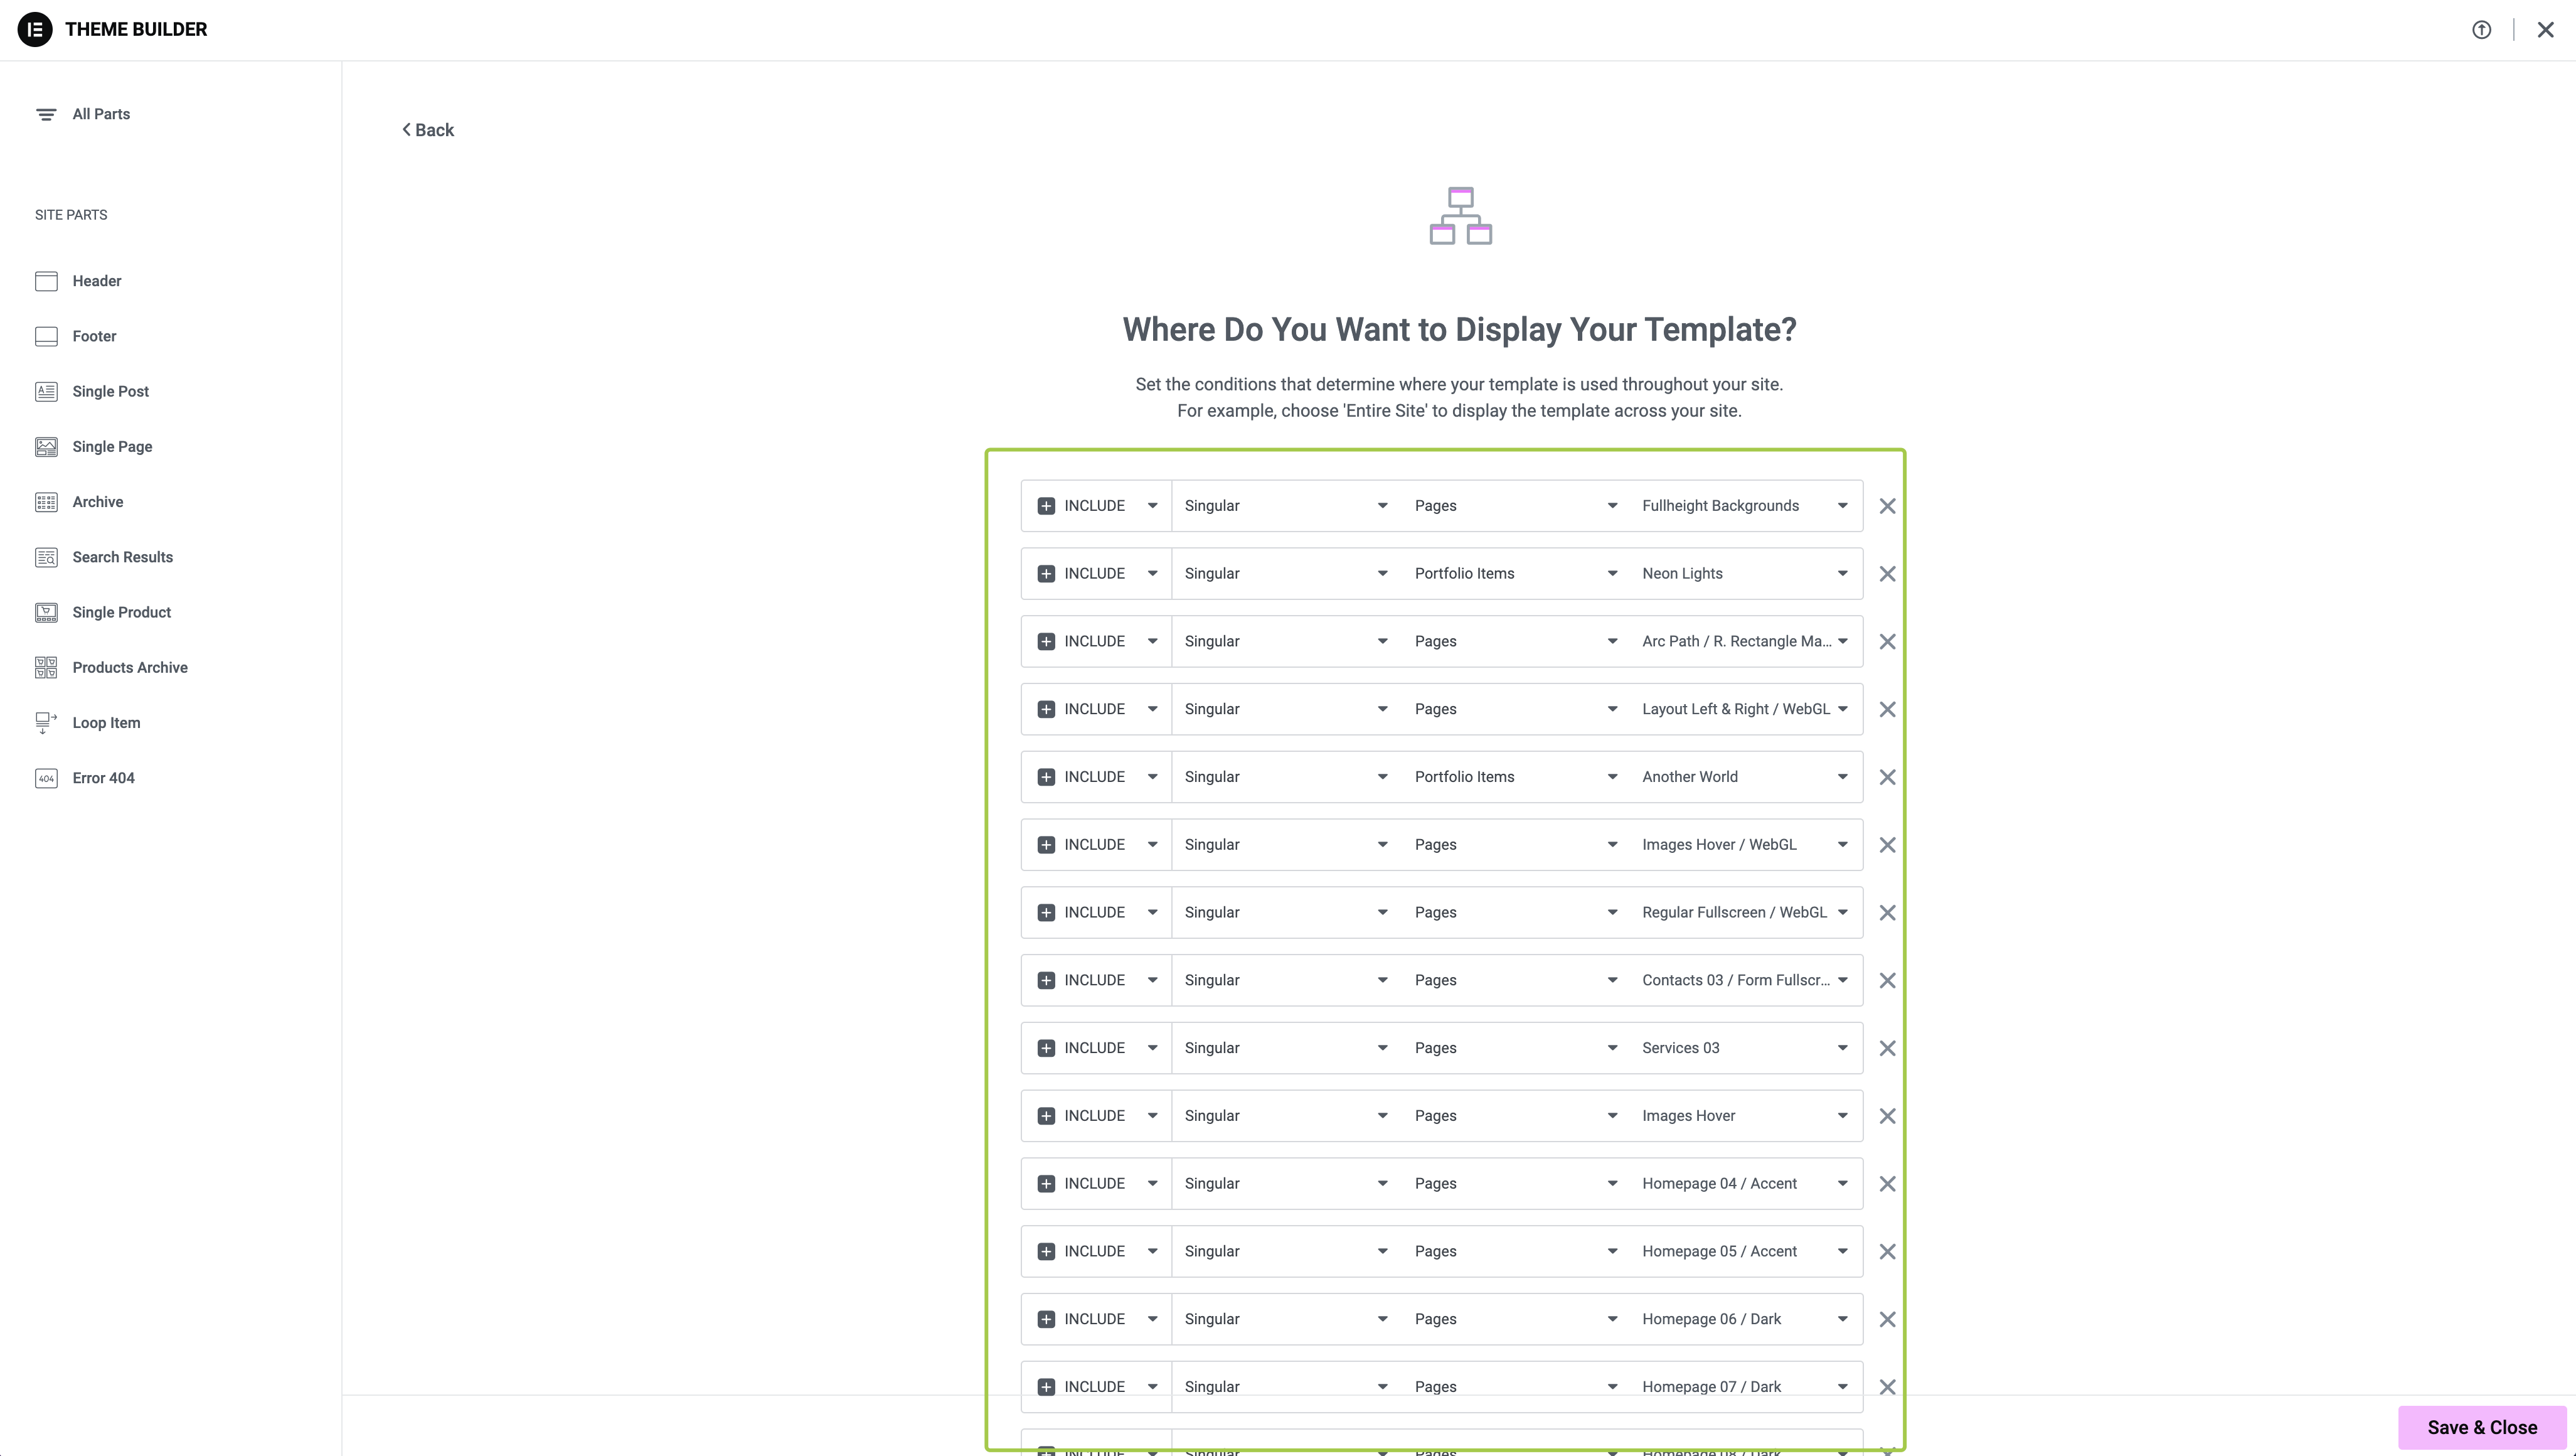
You will see a list of display conditions. These conditions can have either Include or Exclude logic for different theme locations. Customize or remove these rules as needed.
▶️ Step 4.
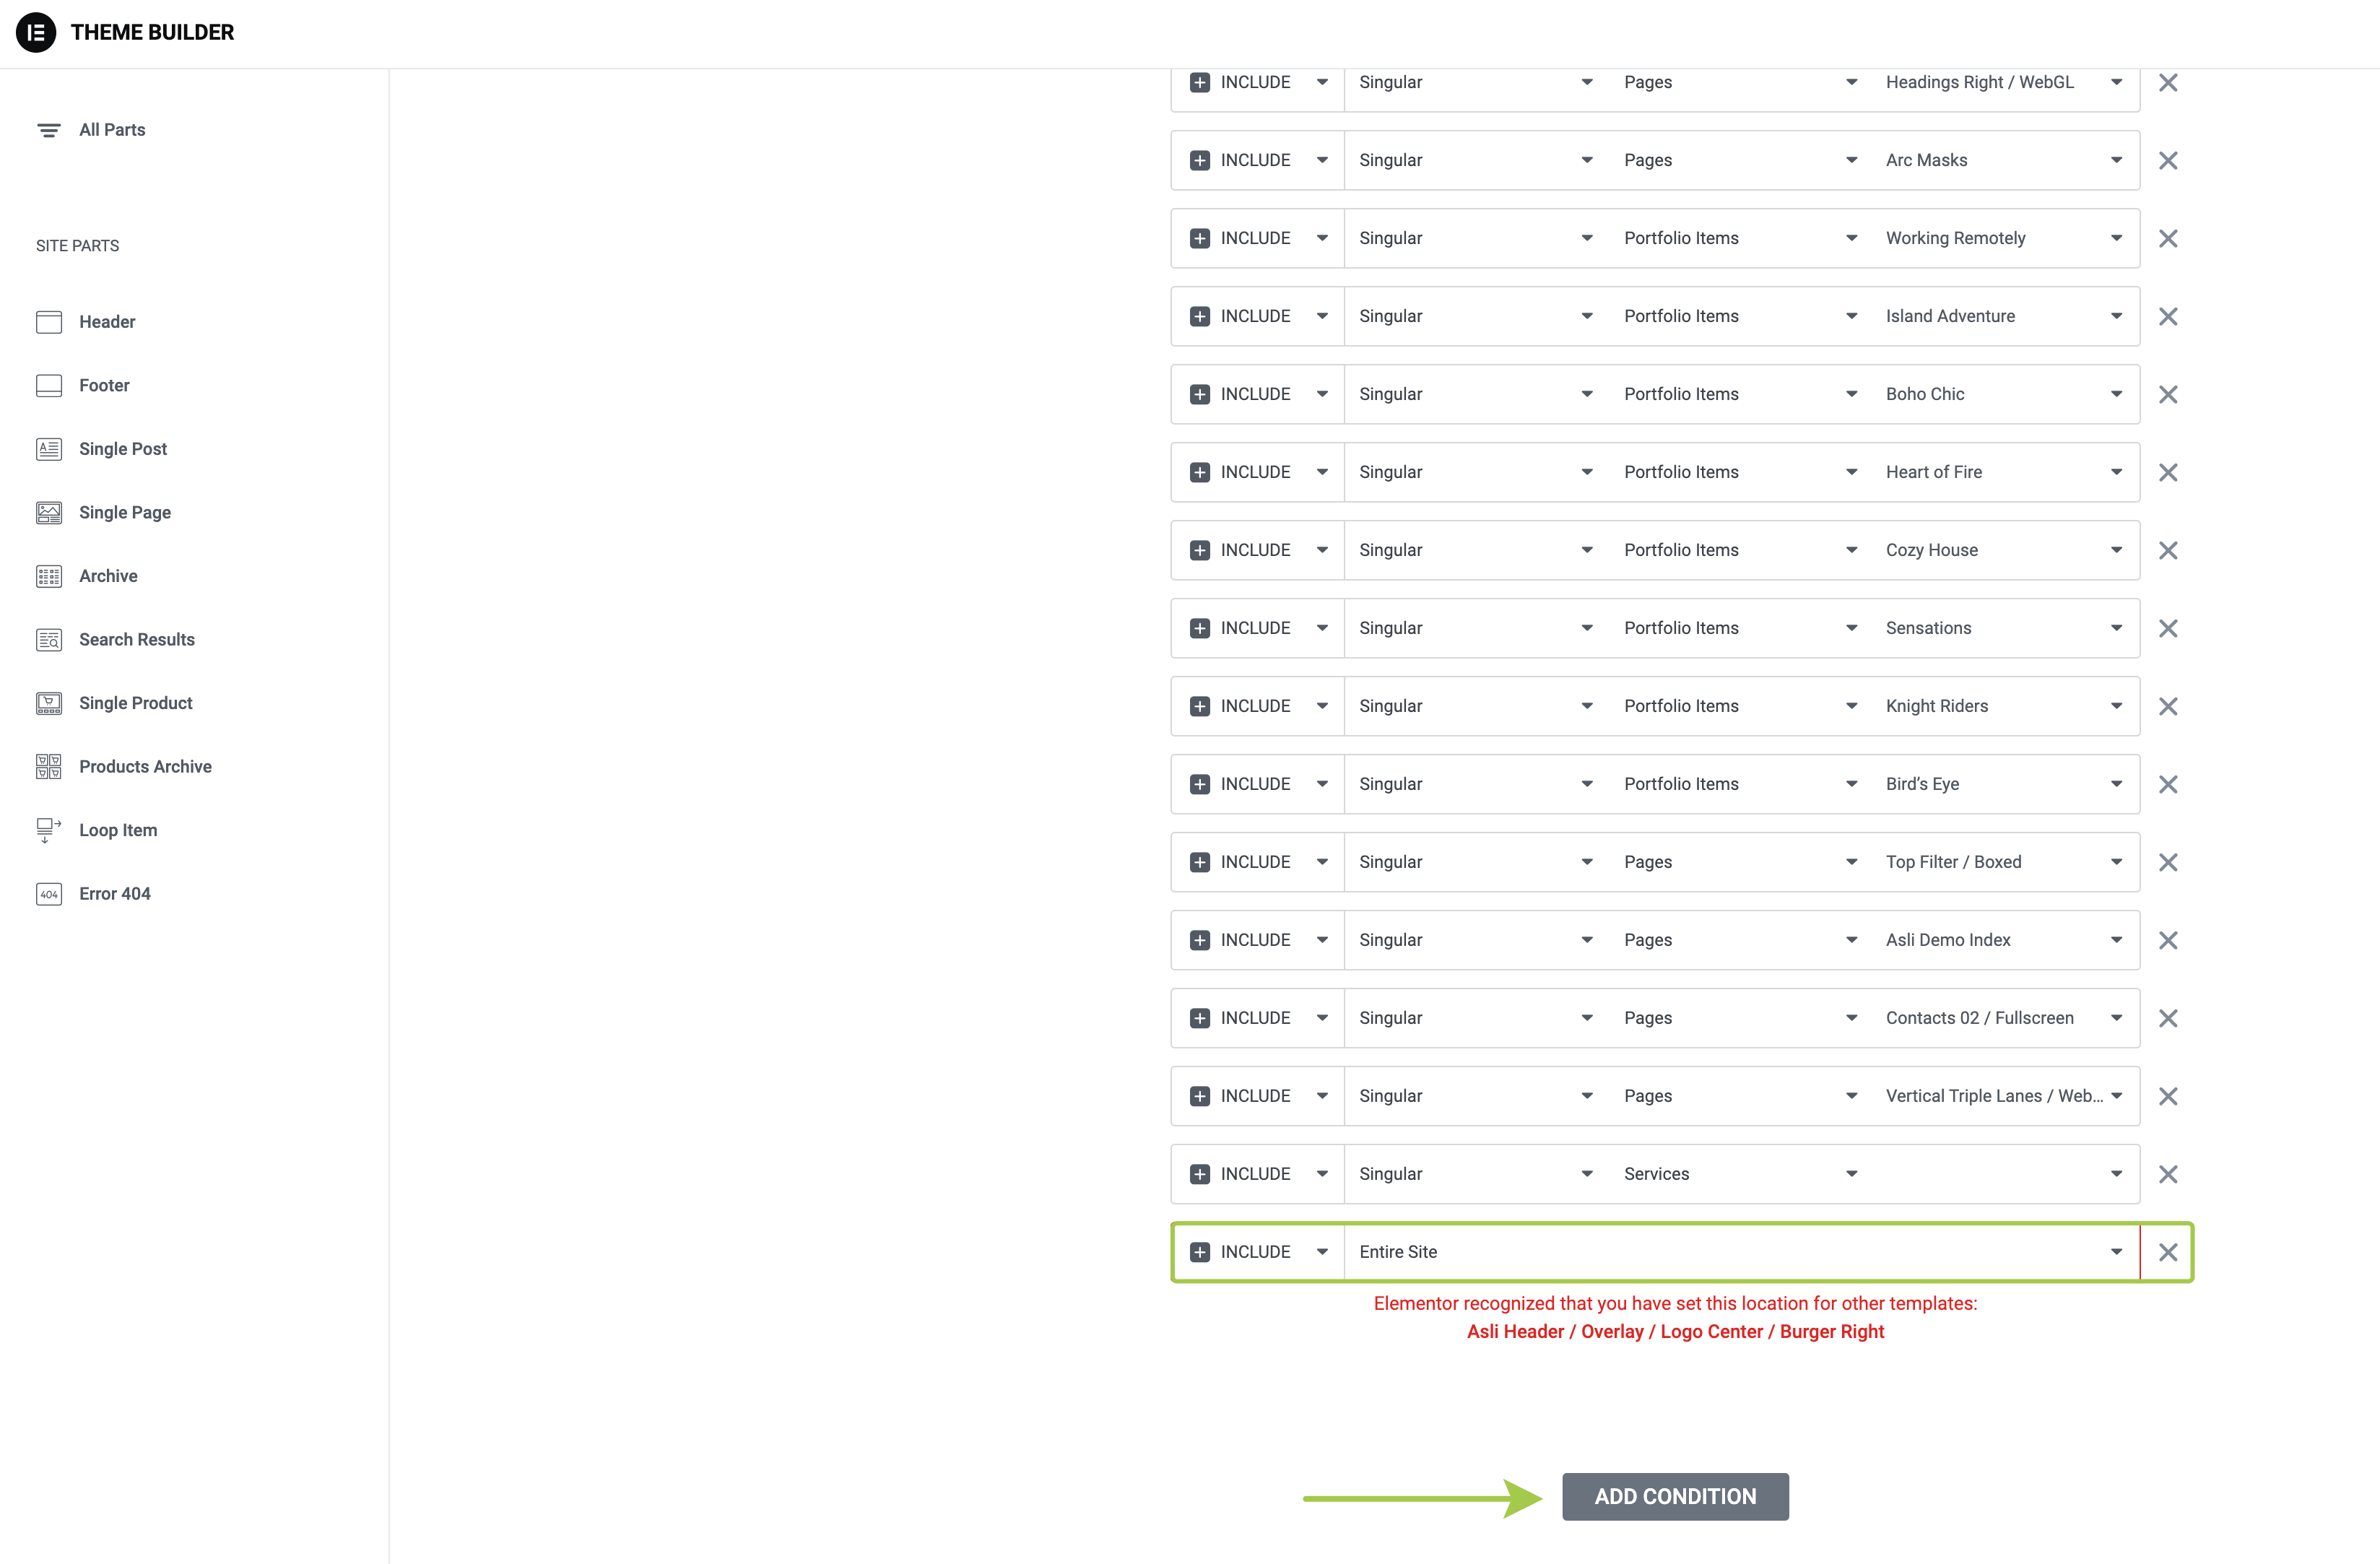
To add a new display condition, scroll down and click the Add Condition button.
For more details, refer to this video tutorial: Setting Conditions – Theme Builder Tutorial
Via Elementor Editor
▶️ Step 1.
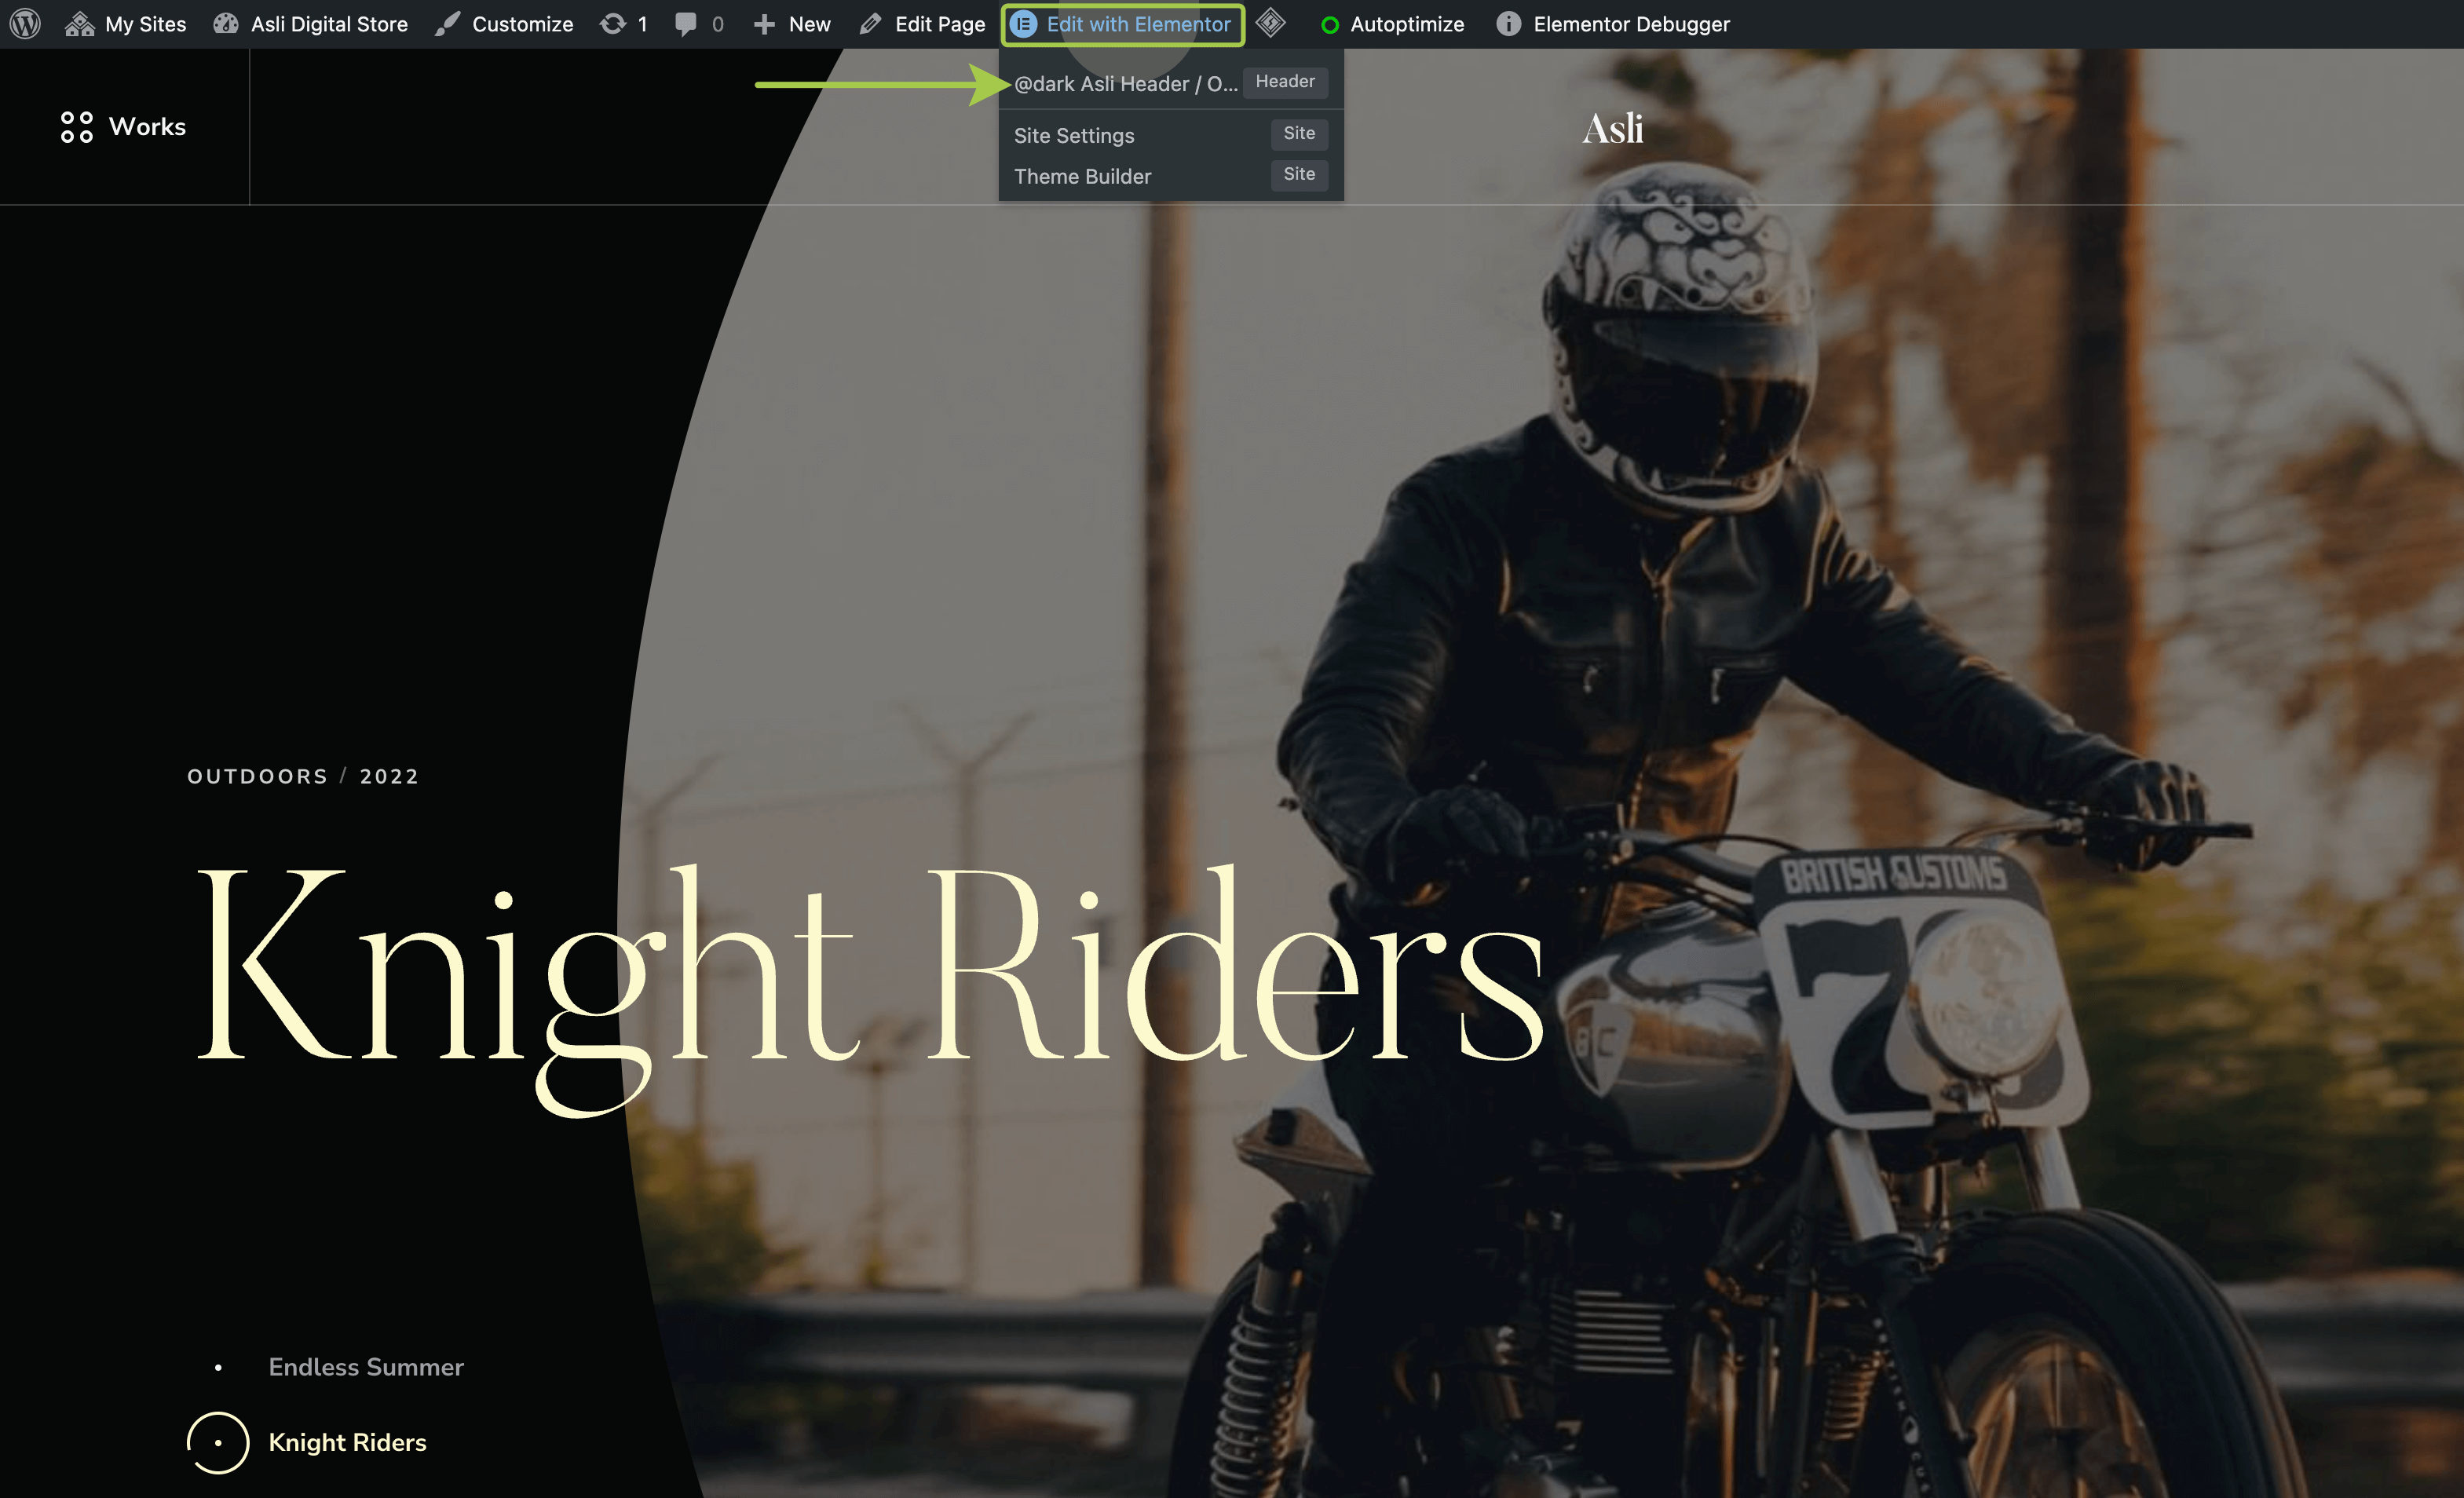
Hover over the Edit with Elementor button in the admin bar. You will see a list of the theme parts currently in use on the page. Click on a theme part (header, footer, single post, etc.) to edit it.
▶️ Step 2.
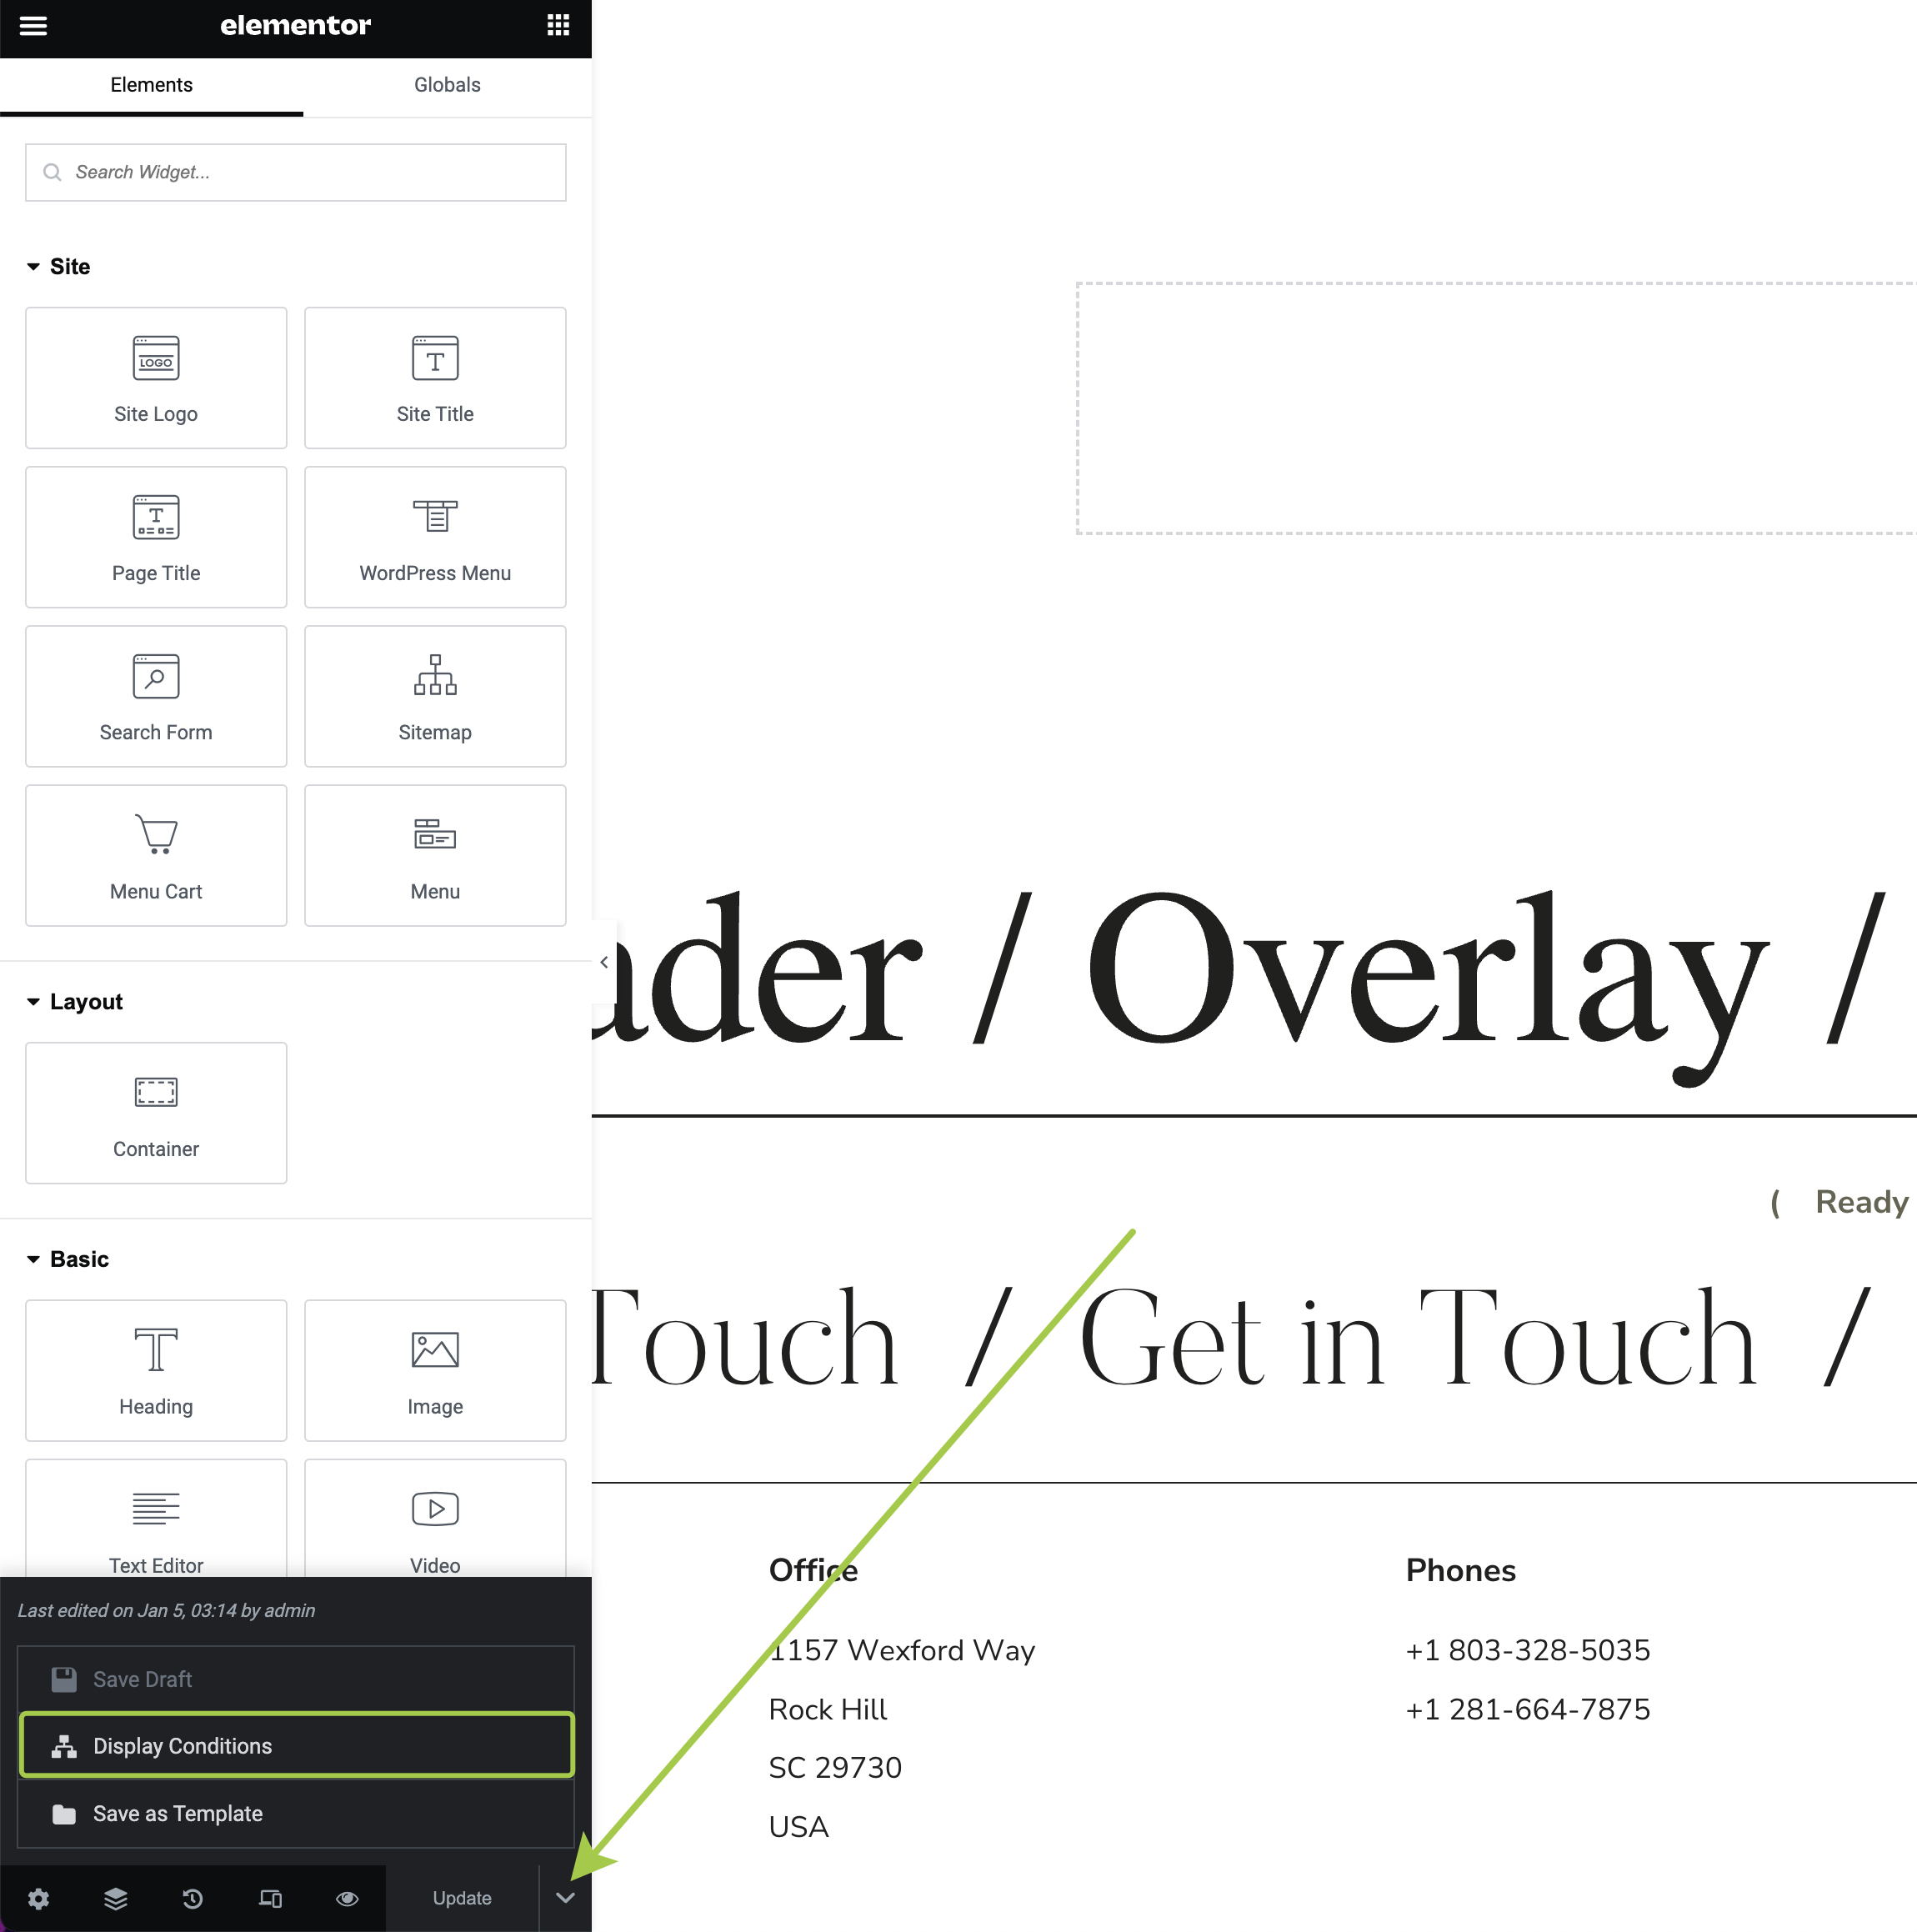
Click on the arrow icon next to the Update button in the bottom left corner.
▶️ Step 3.
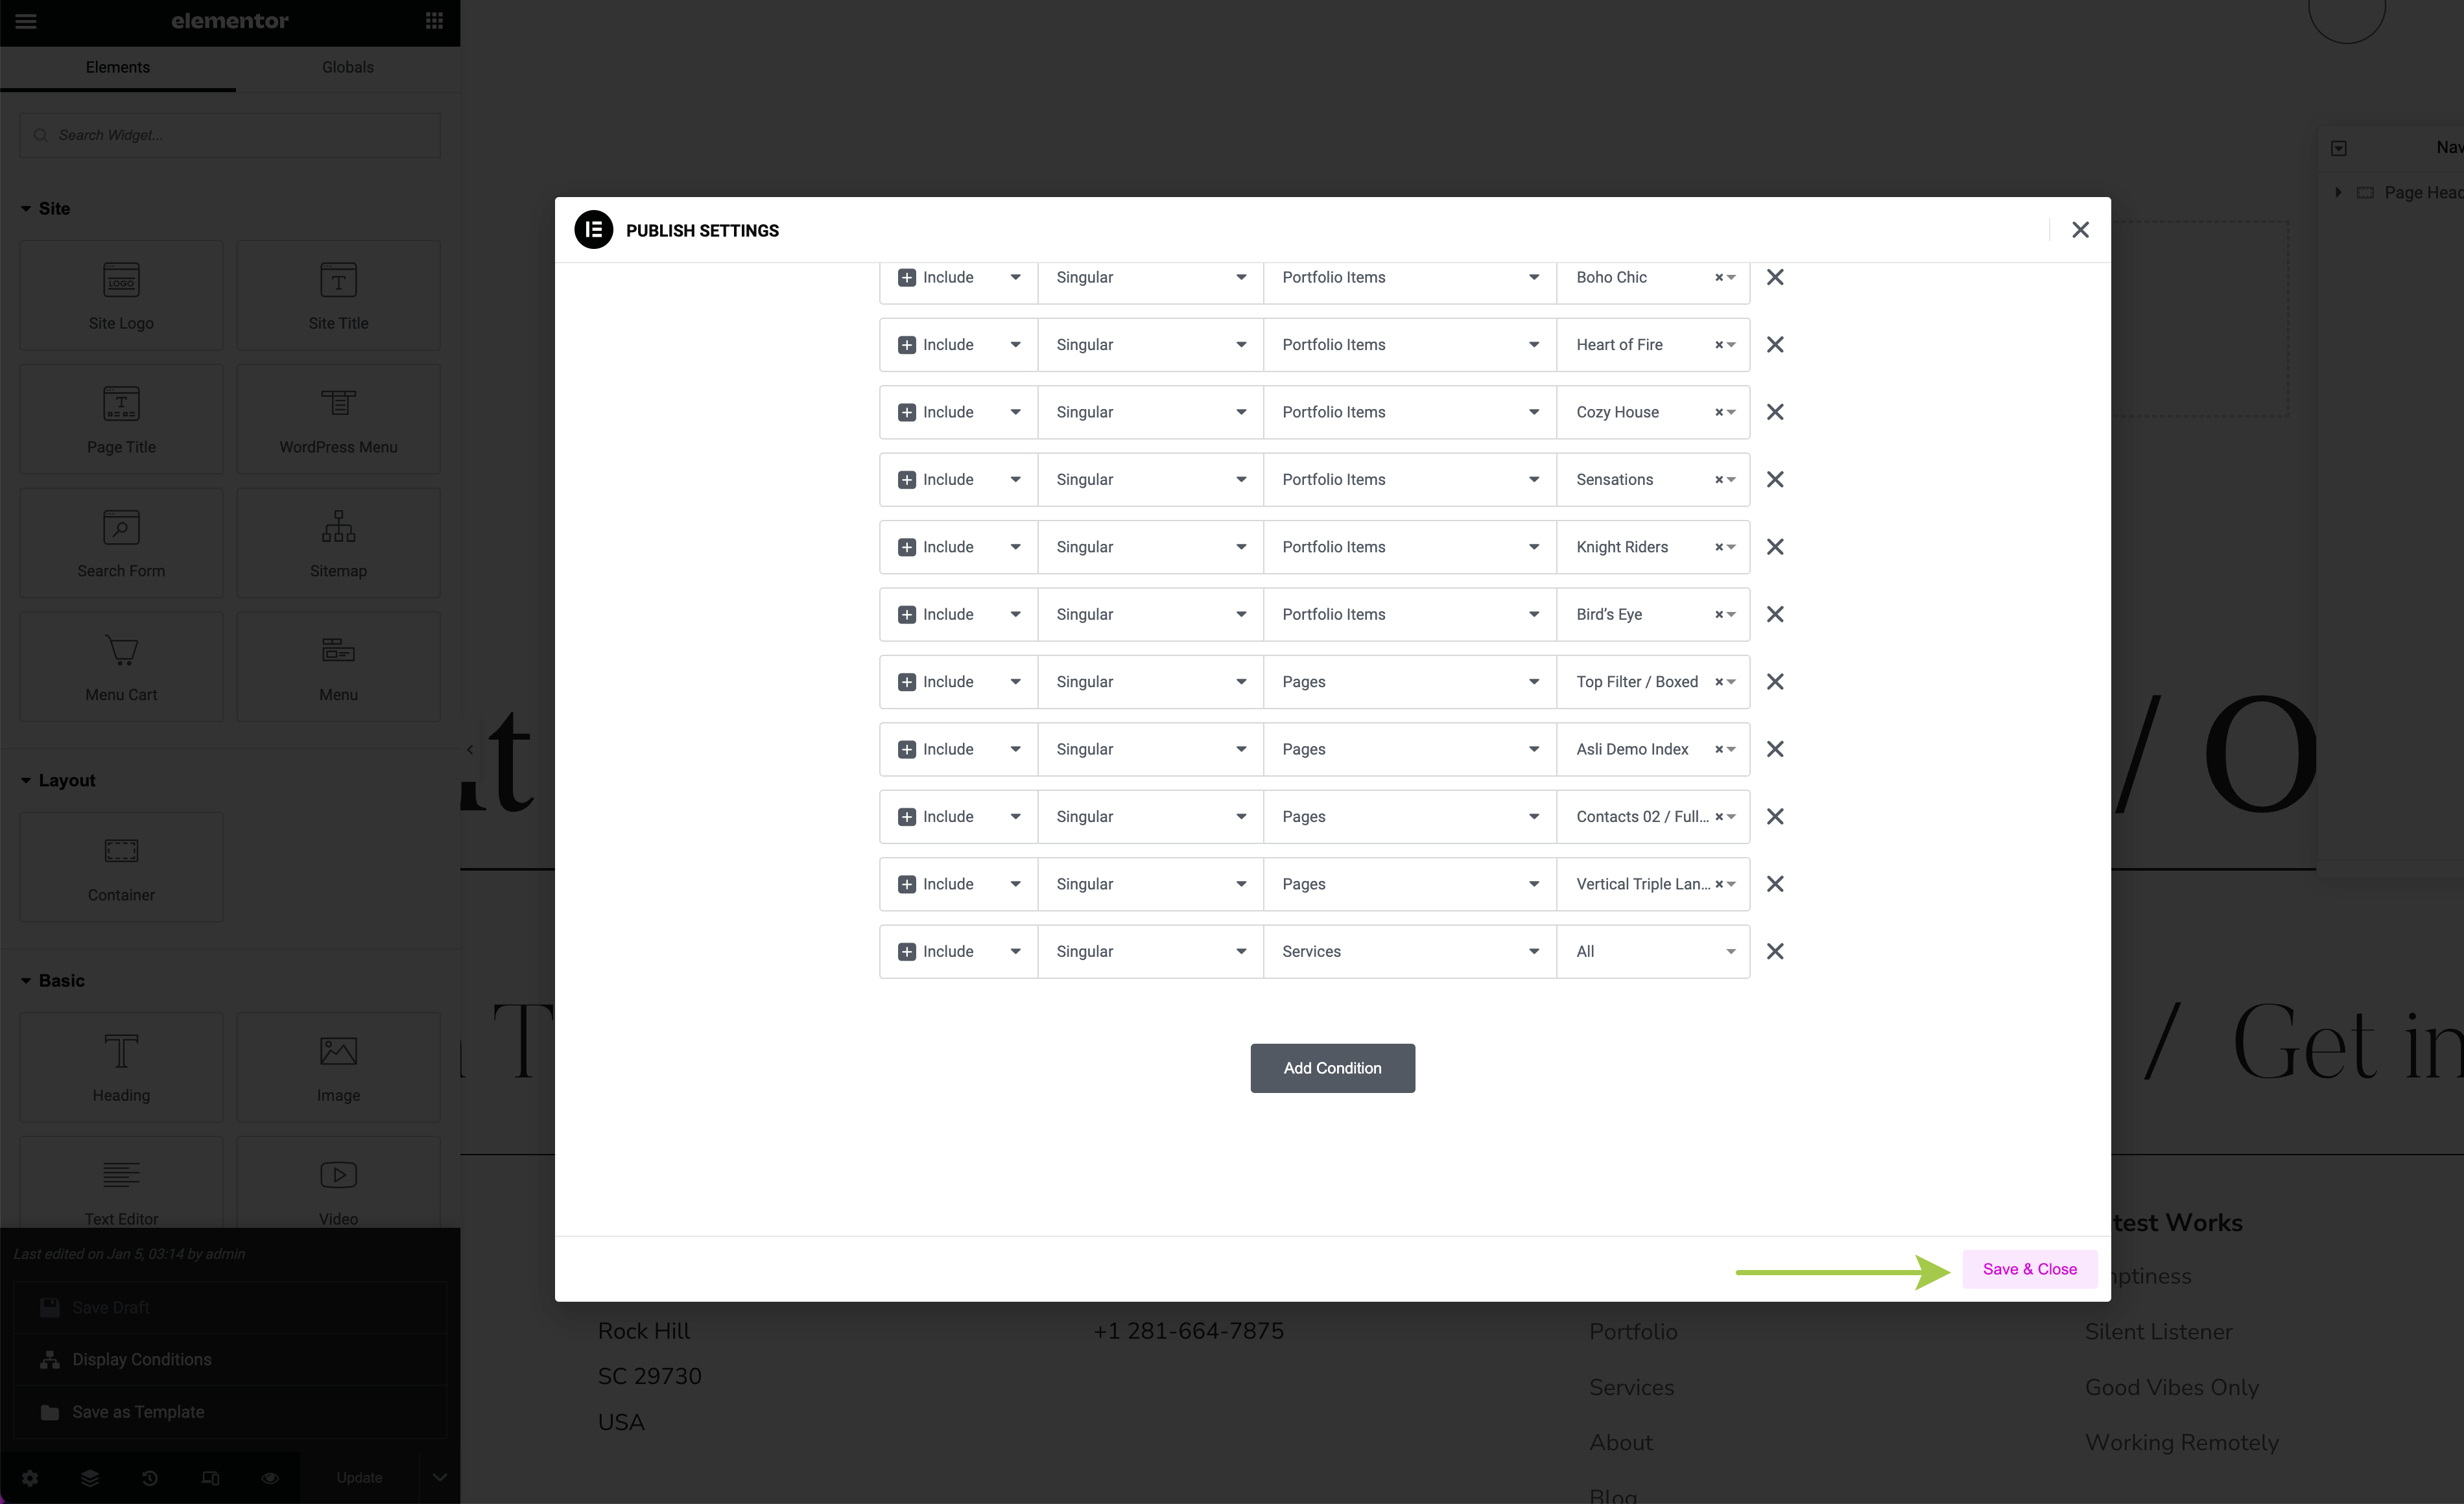
A list of display conditions for the selected theme part will appear. These conditions use Include or Exclude logic for different theme locations. Customize or remove these rules, then click Save & Close to apply the changes.
Common Use Cases
How to Use a Single Header Across Your Entire Site
If you want one consistent header on all pages (the simpler approach):
▶️ Step 1.
Go to Theme Builder and review all Header templates.
▶️ Step 2.
Choose the ONE header template you want to use site-wide.
▶️ Step 3.
Edit its conditions and set to: Include → Entire Site
▶️ Step 4.
For all OTHER header templates, either:
- Delete them (you can re-import later if needed), OR
- Clear all their display conditions (click the X on each condition)
▶️ Step 5.
Save and preview your site. The same header should now appear on all pages.
How to Change Burger Menu on Desktop to Classic Layout
▶️ Step 1.
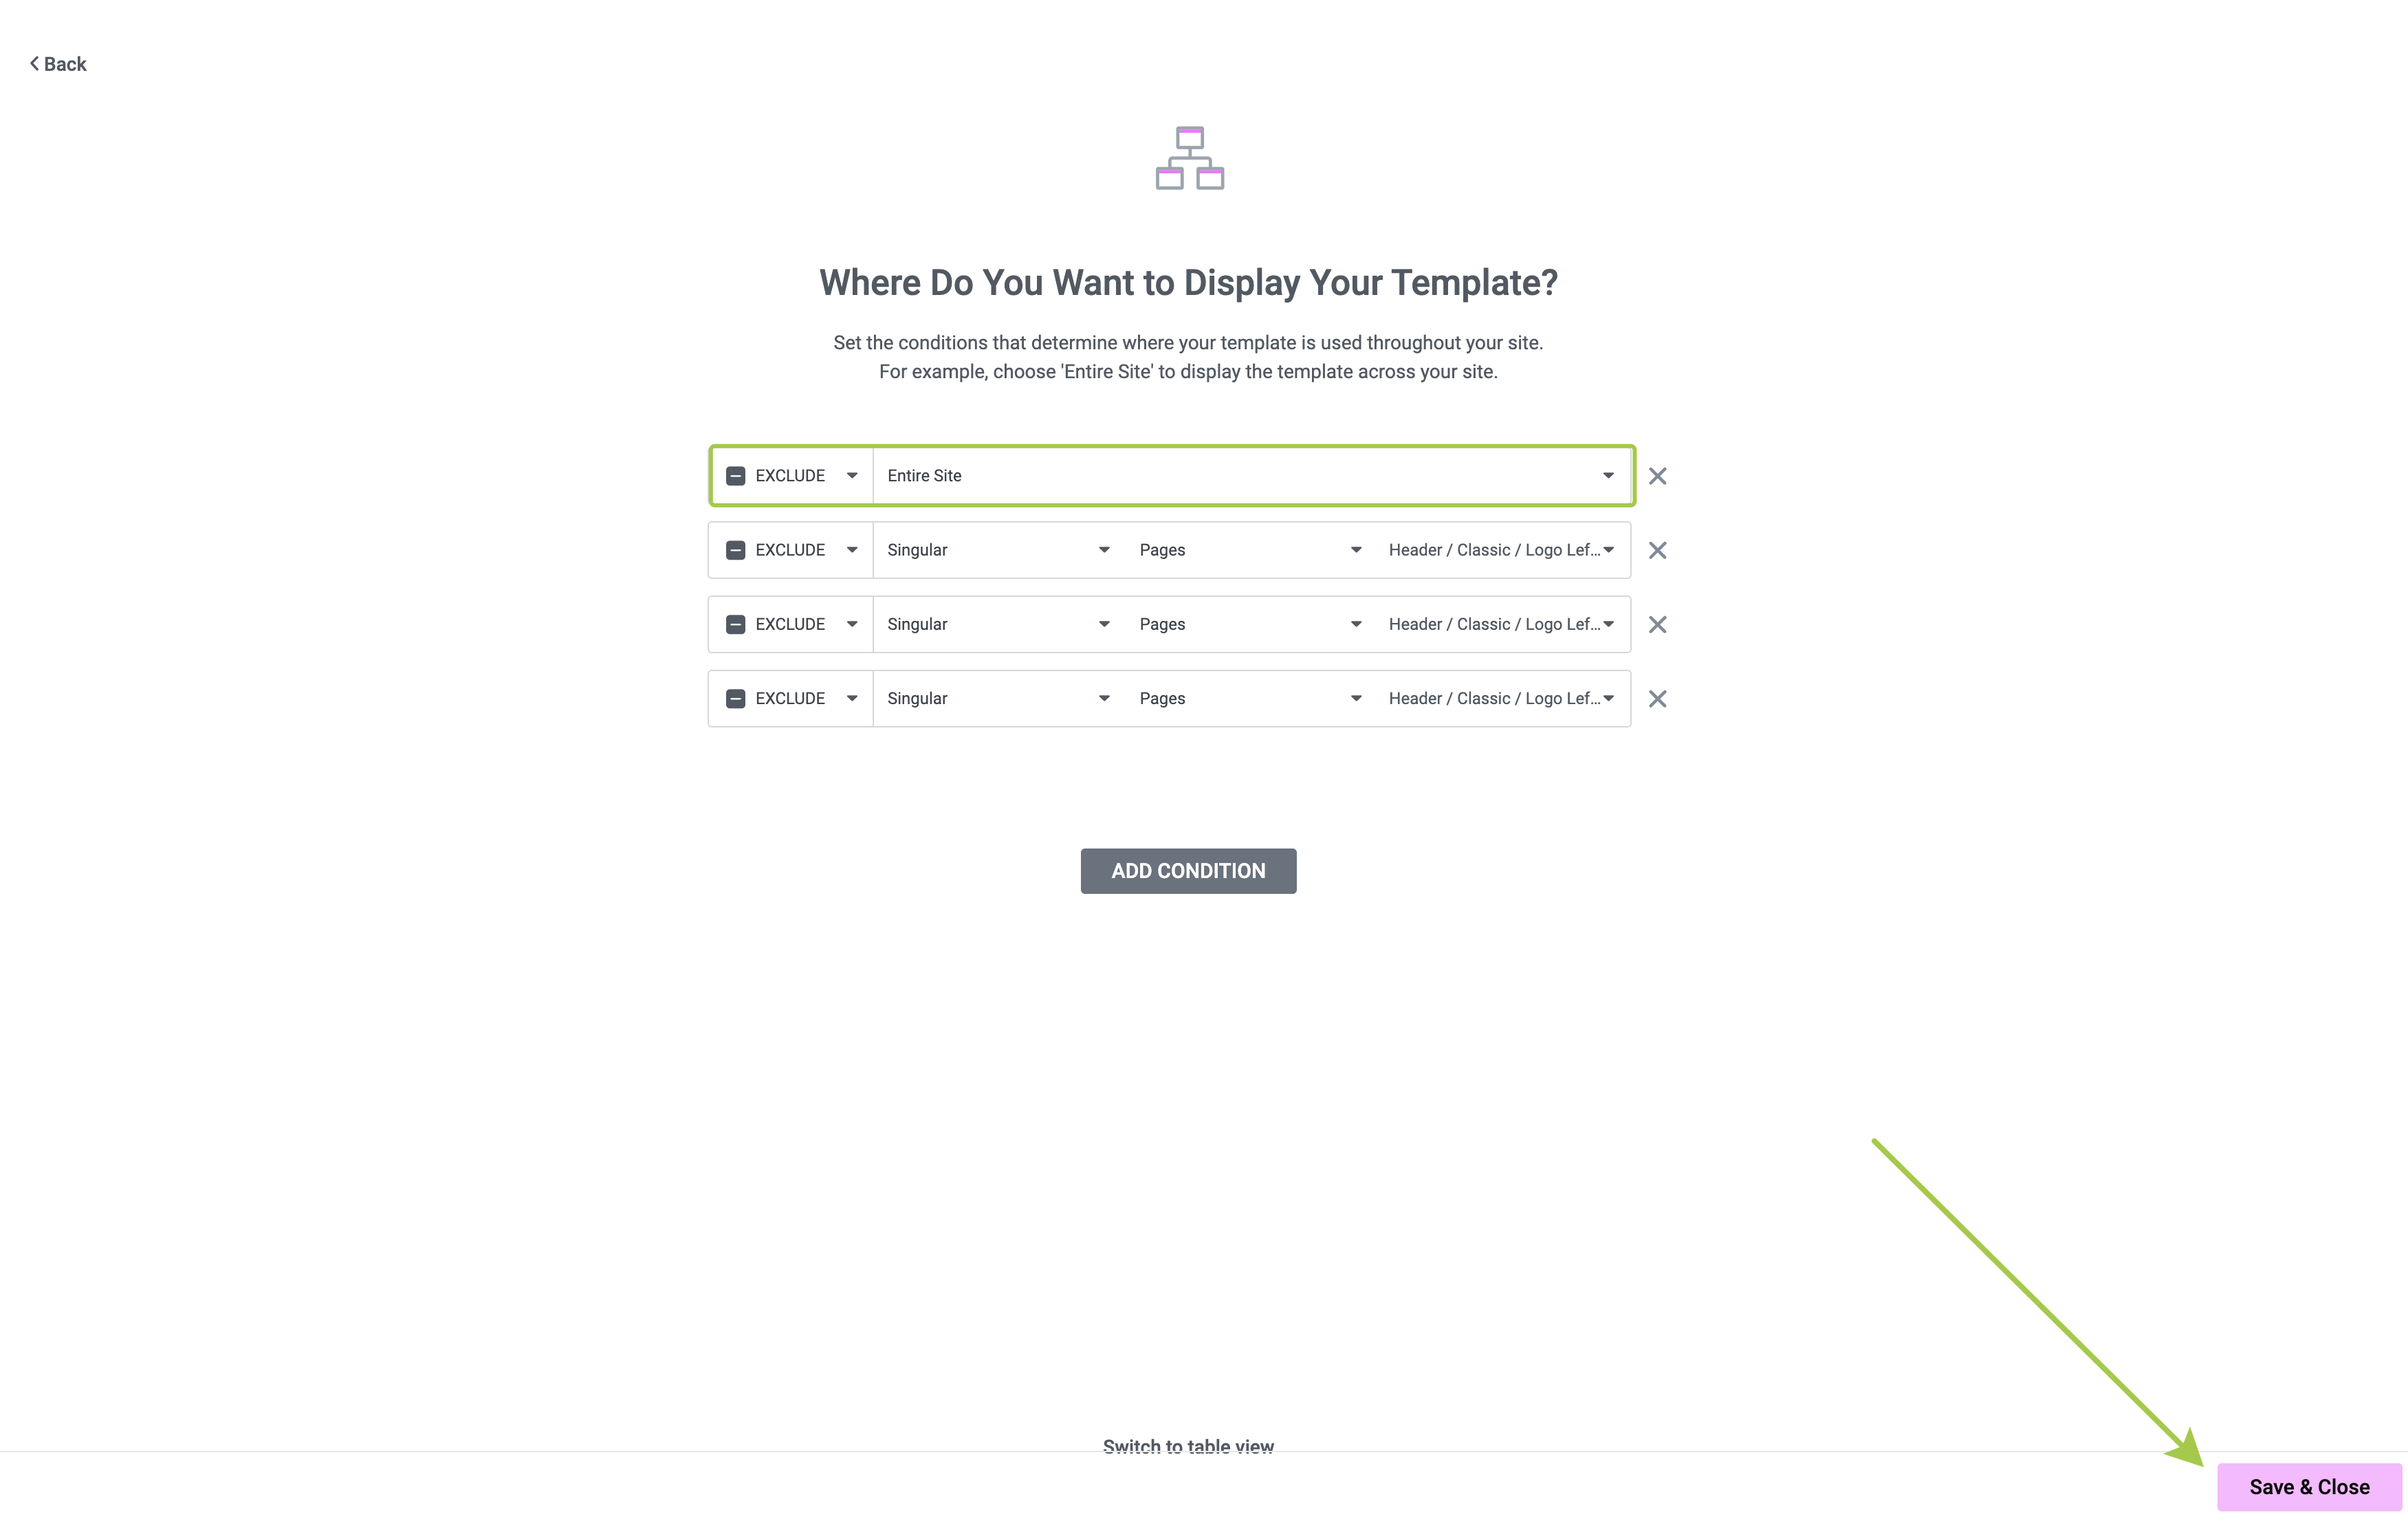
Edit the display conditions of Asli / Header / Overlay / Logo Center / Burger Right, which is the default header for the entire site in the theme demo.
▶️ Step 2.
Change the Include logic to Exclude and click Save & Close.
▶️ Step 3.
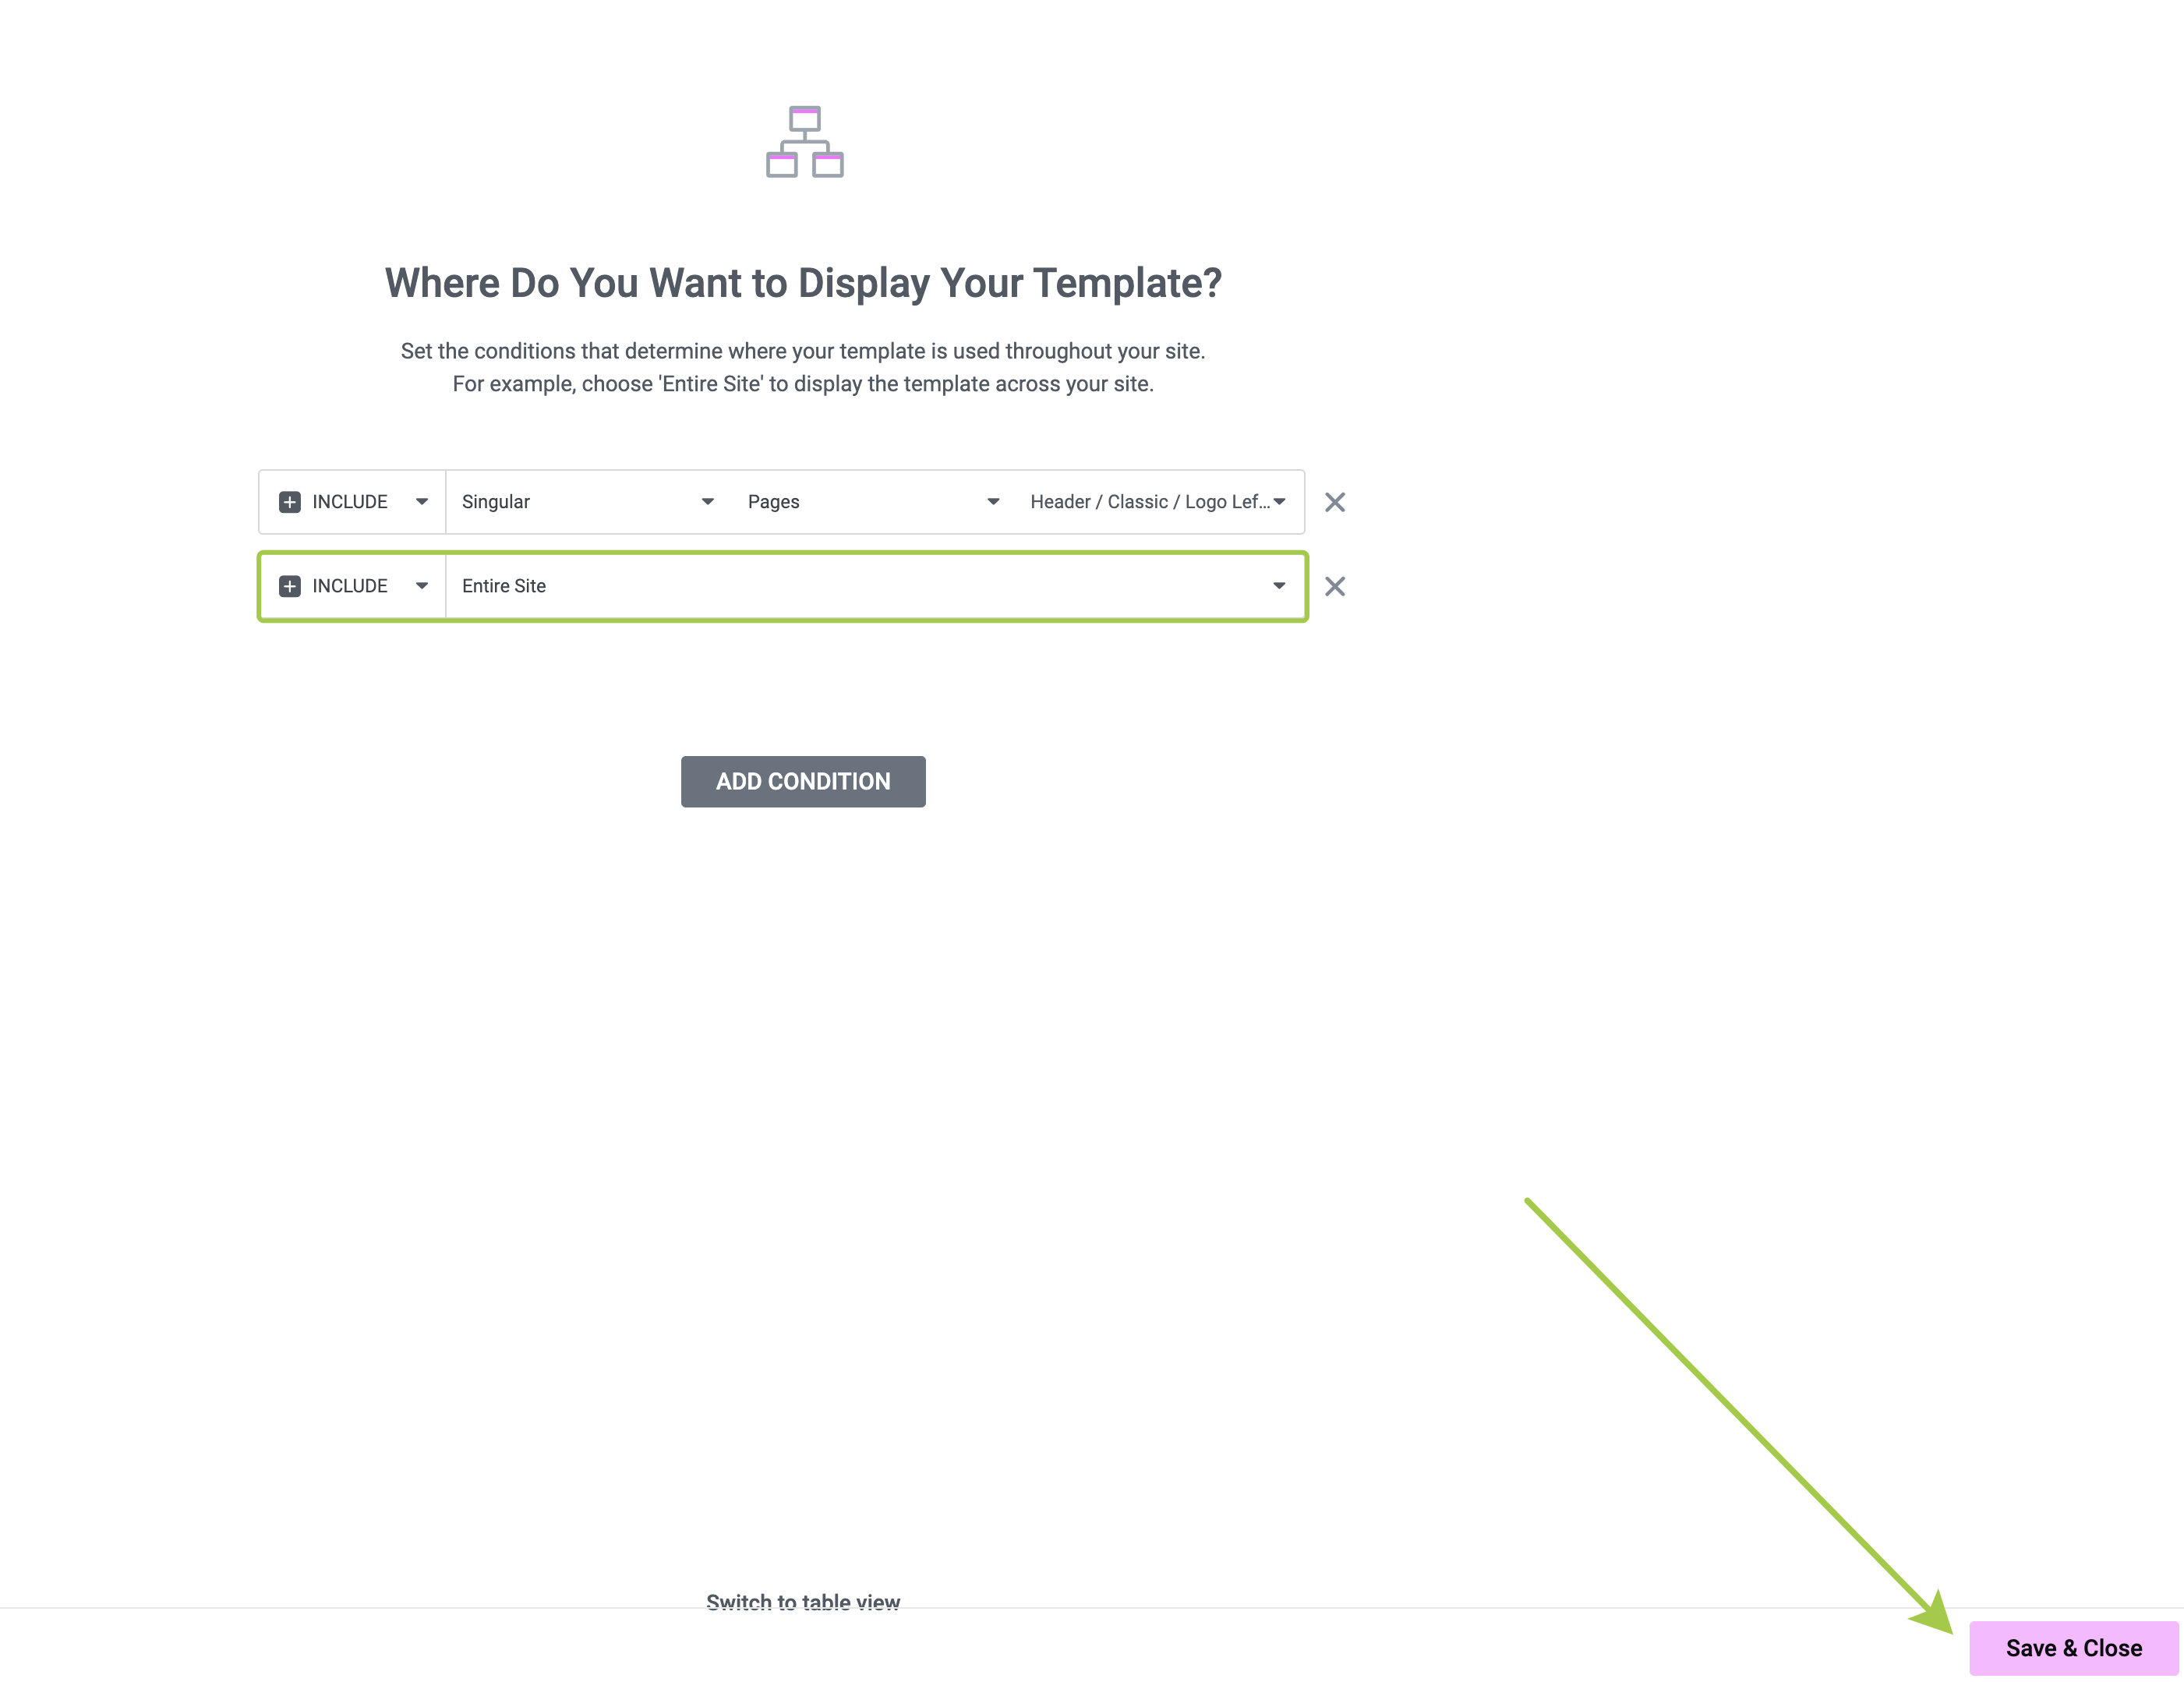
Now, select the classic header layout you'd like to use. The theme demo offers several variations. For example, edit the display conditions of the Asli Header / Classic / Logo Left / Menu Center template.
▶️ Step 4.
Add the Include – Entire Site condition and click Save & Close.
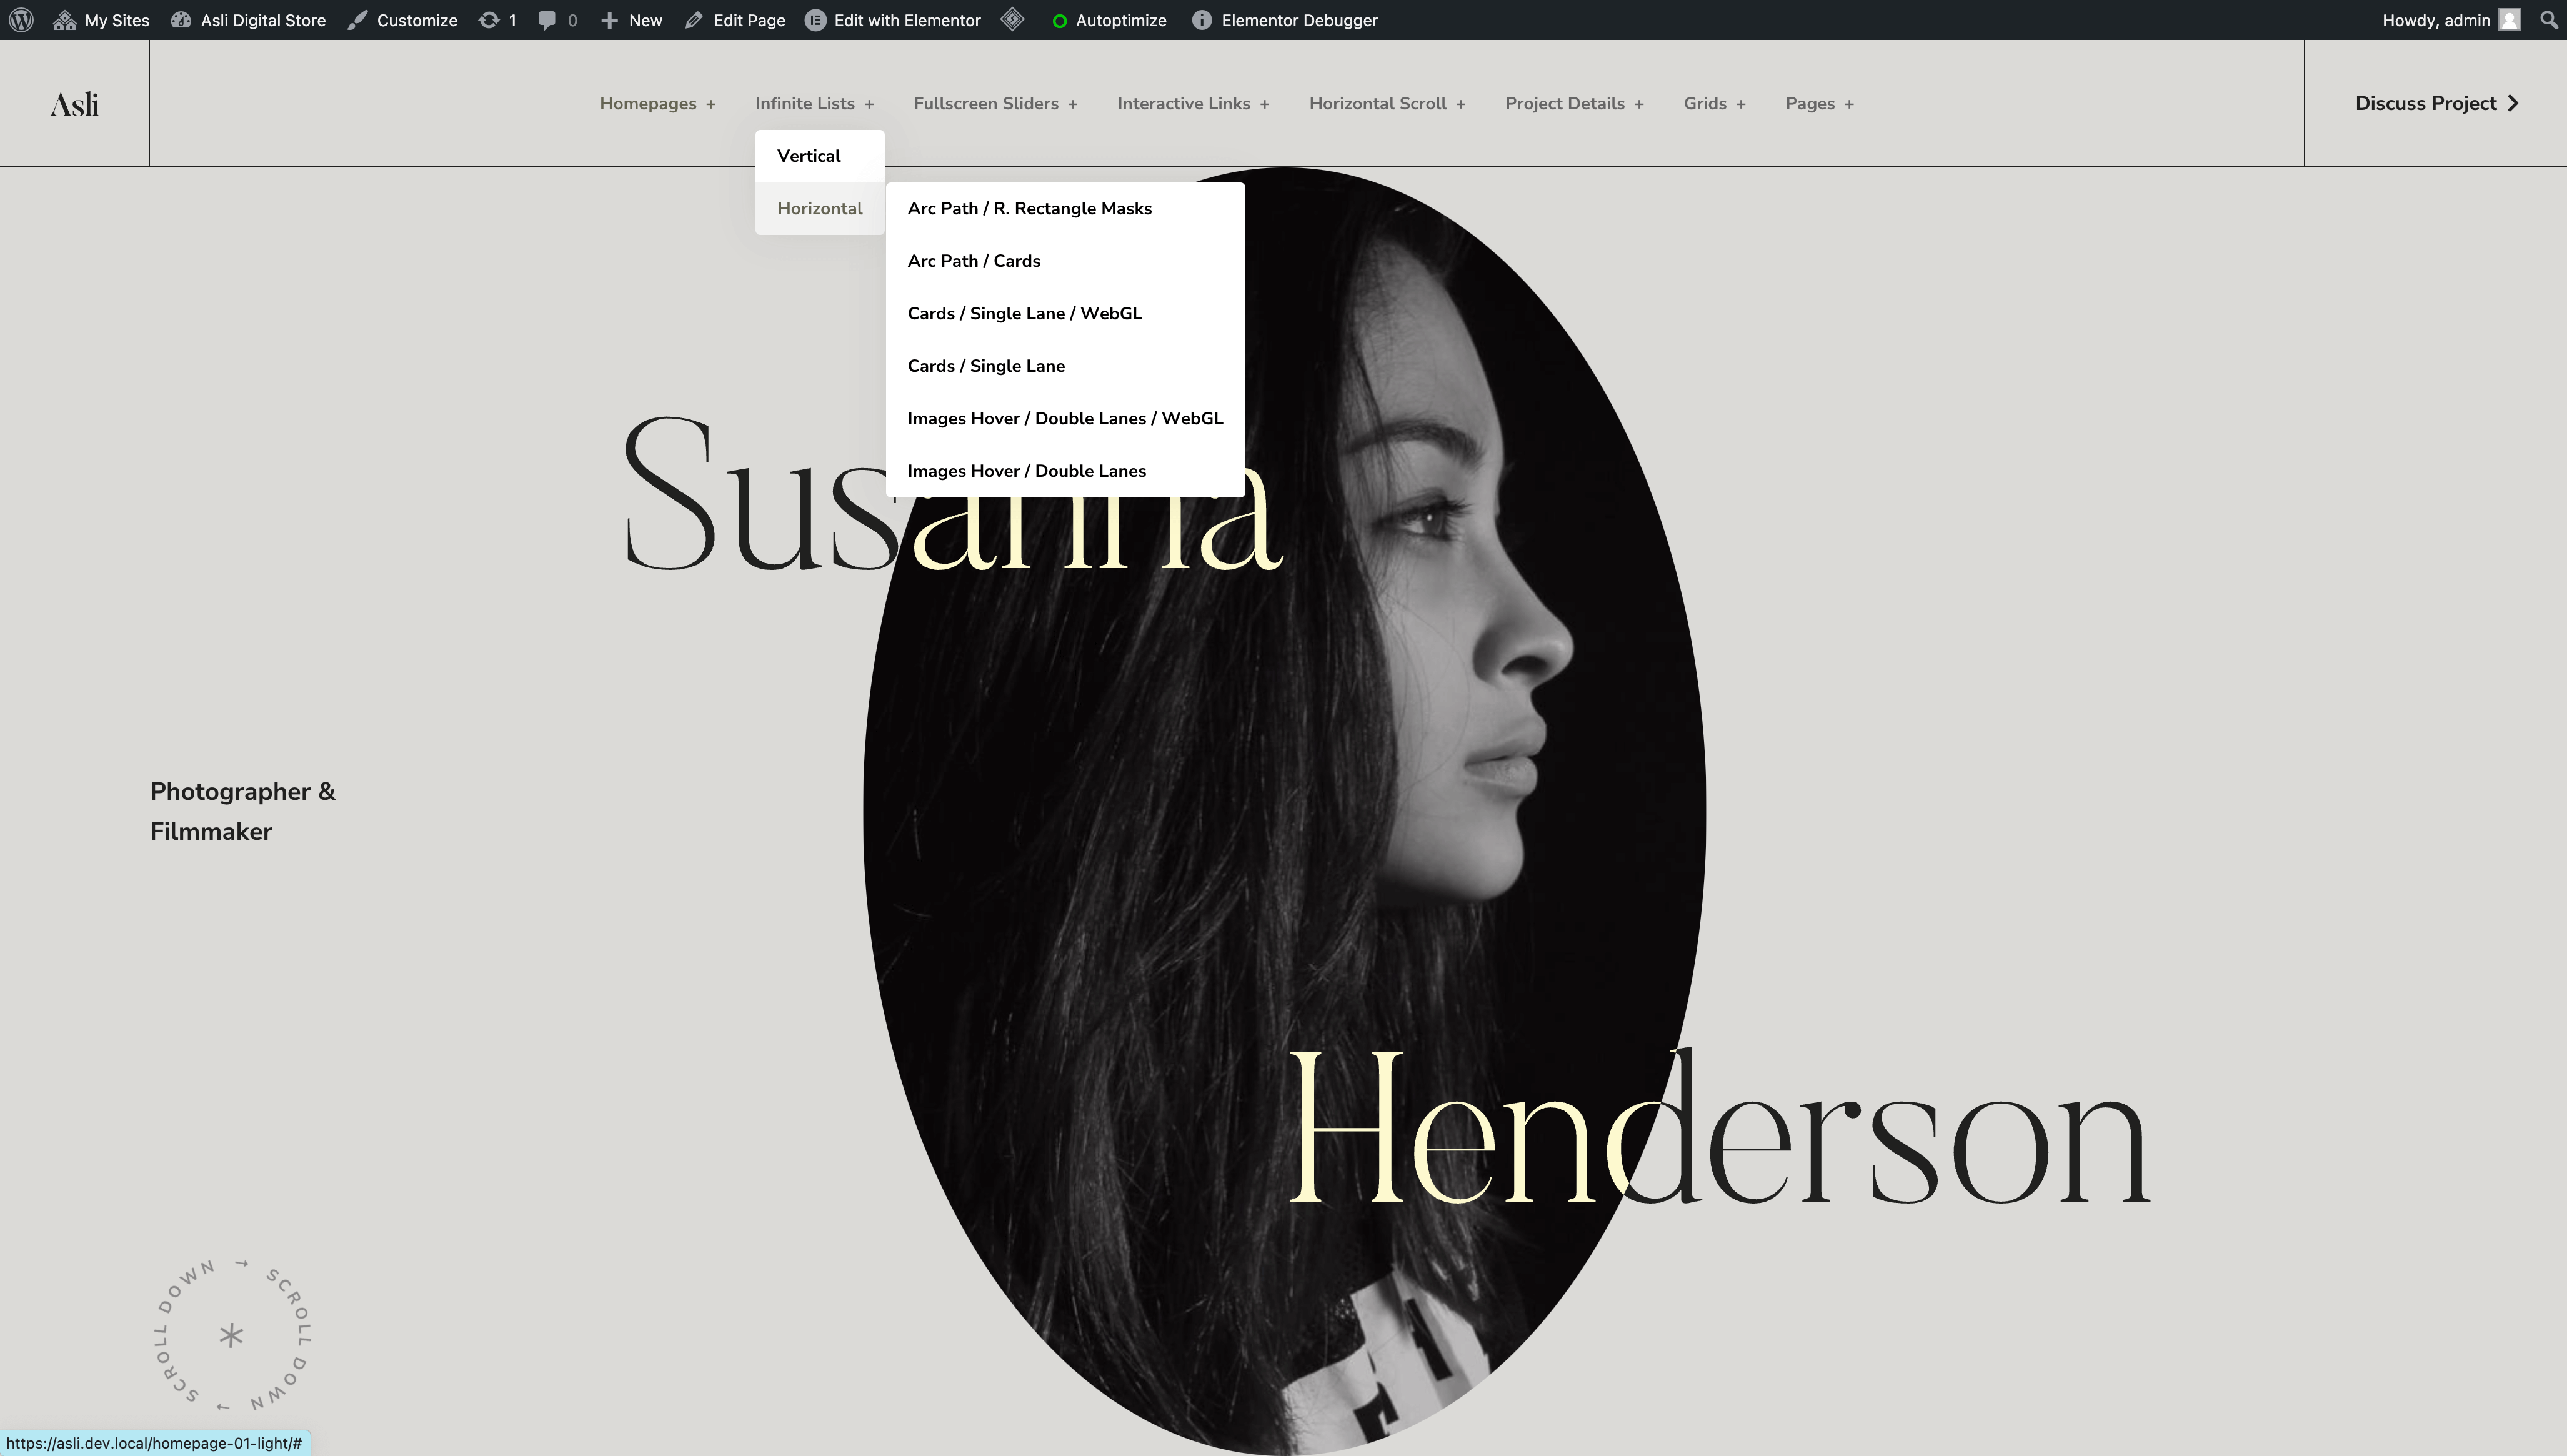
▶️ Step 5.
Open Homepage 01 / Light and preview the result.
Troubleshooting Display Issues
Problem: Wrong Header Showing on Some Pages
Cause: Multiple header templates have overlapping display conditions.
Solution:
- Go to
Theme Builder → Header - Check conditions for ALL header templates (not just one)
- Look for conflicts - two templates both set to show on the same page
- Simplify: Use "Entire Site" for one template, clear conditions on others
Problem: Footer Not Appearing on a Page
Common causes:
- Excluded by mistake: Template is set to "Entire Site" but your page appears in the Exclude list
- No matching Include rule: Template has specific Include rules, but your page isn't listed
- No conditions set: Template has no display conditions at all
Debug checklist:
- [ ] Check if ANY footer template includes your page
- [ ] Check if your page appears in any Exclude lists
- [ ] Try setting one footer to "Include → Entire Site" temporarily to test
Problem: Multiple Headers/Footers Showing on Same Page
Cause: More than one template has conditions that match the current page.
Solution:
- Identify which templates are showing (hover over "Edit with Elementor" in admin bar to see active templates)
- Review conditions for each template
- Remove or adjust conditions so only ONE template matches each page
Problem: No Header/Footer Showing Anywhere
Cause: All templates have been deleted or have no display conditions.
Solution:
- At least one template must have a display condition
- Set your preferred template to "Include → Entire Site"
- If you deleted templates, re-import them from the
Elementor Templatesdirectory in your theme package
Quick Diagnostic: Which Template is Active?
To identify which template is showing on a specific page:
- Visit the page on frontend (while logged in to WordPress)
- Hover over
Edit with Elementorin the admin bar - Check which Header/Footer templates are listed - these are the active templates for this page
