Appearance
Loading Screen (Preloader)
The loading screen (sometimes called a page preloader or intro animation) creates an animated entrance experience when visitors first arrive at your site. It displays a dynamic grid of scrolling images and videos that smoothly transitions into your page content — a cinematic page transition effect that sets the tone before your homepage appears.
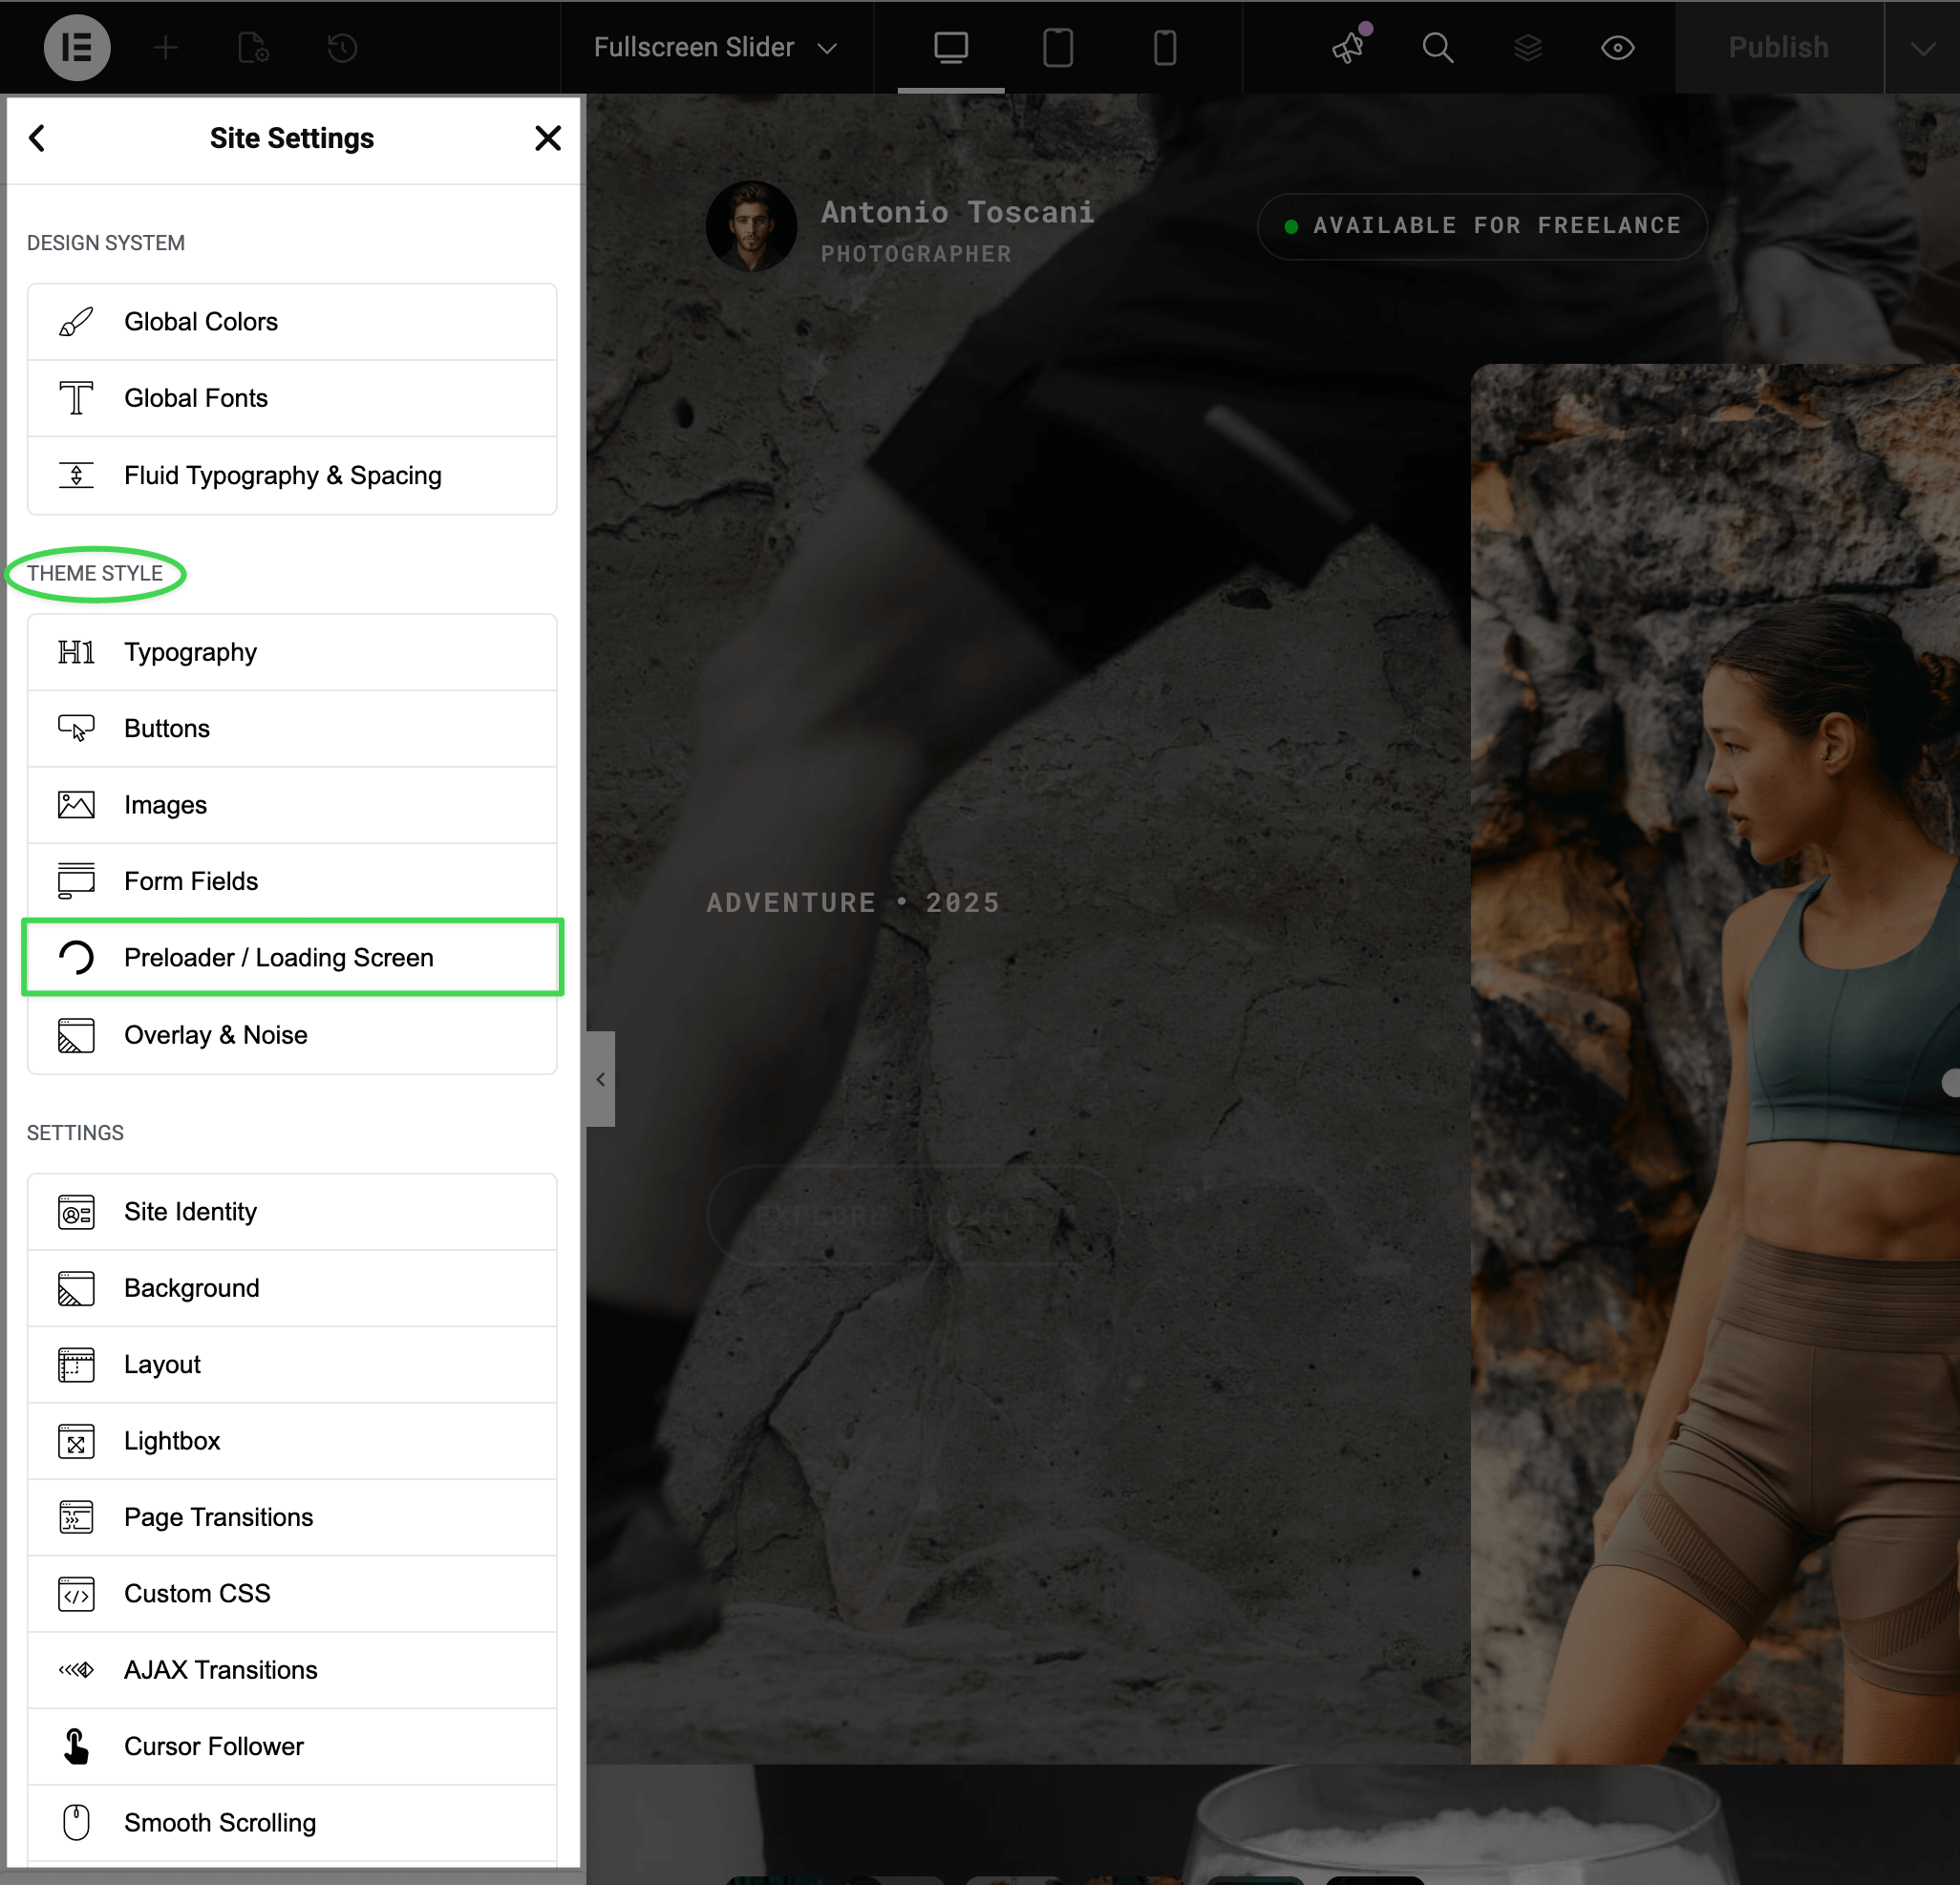
How to Access this Panel
Open Site Settings panel in Elementor using this guide Accessing Theme Options Panel and select Preloader / Loading Screen.
Adding Your Images and Videos
You have two ways to populate the intro animation with media:
Option 1: Use Media from Your Posts
This option pulls images and videos directly from your existing posts or projects. No extra uploads needed — it reuses the media you've already added when creating your content.
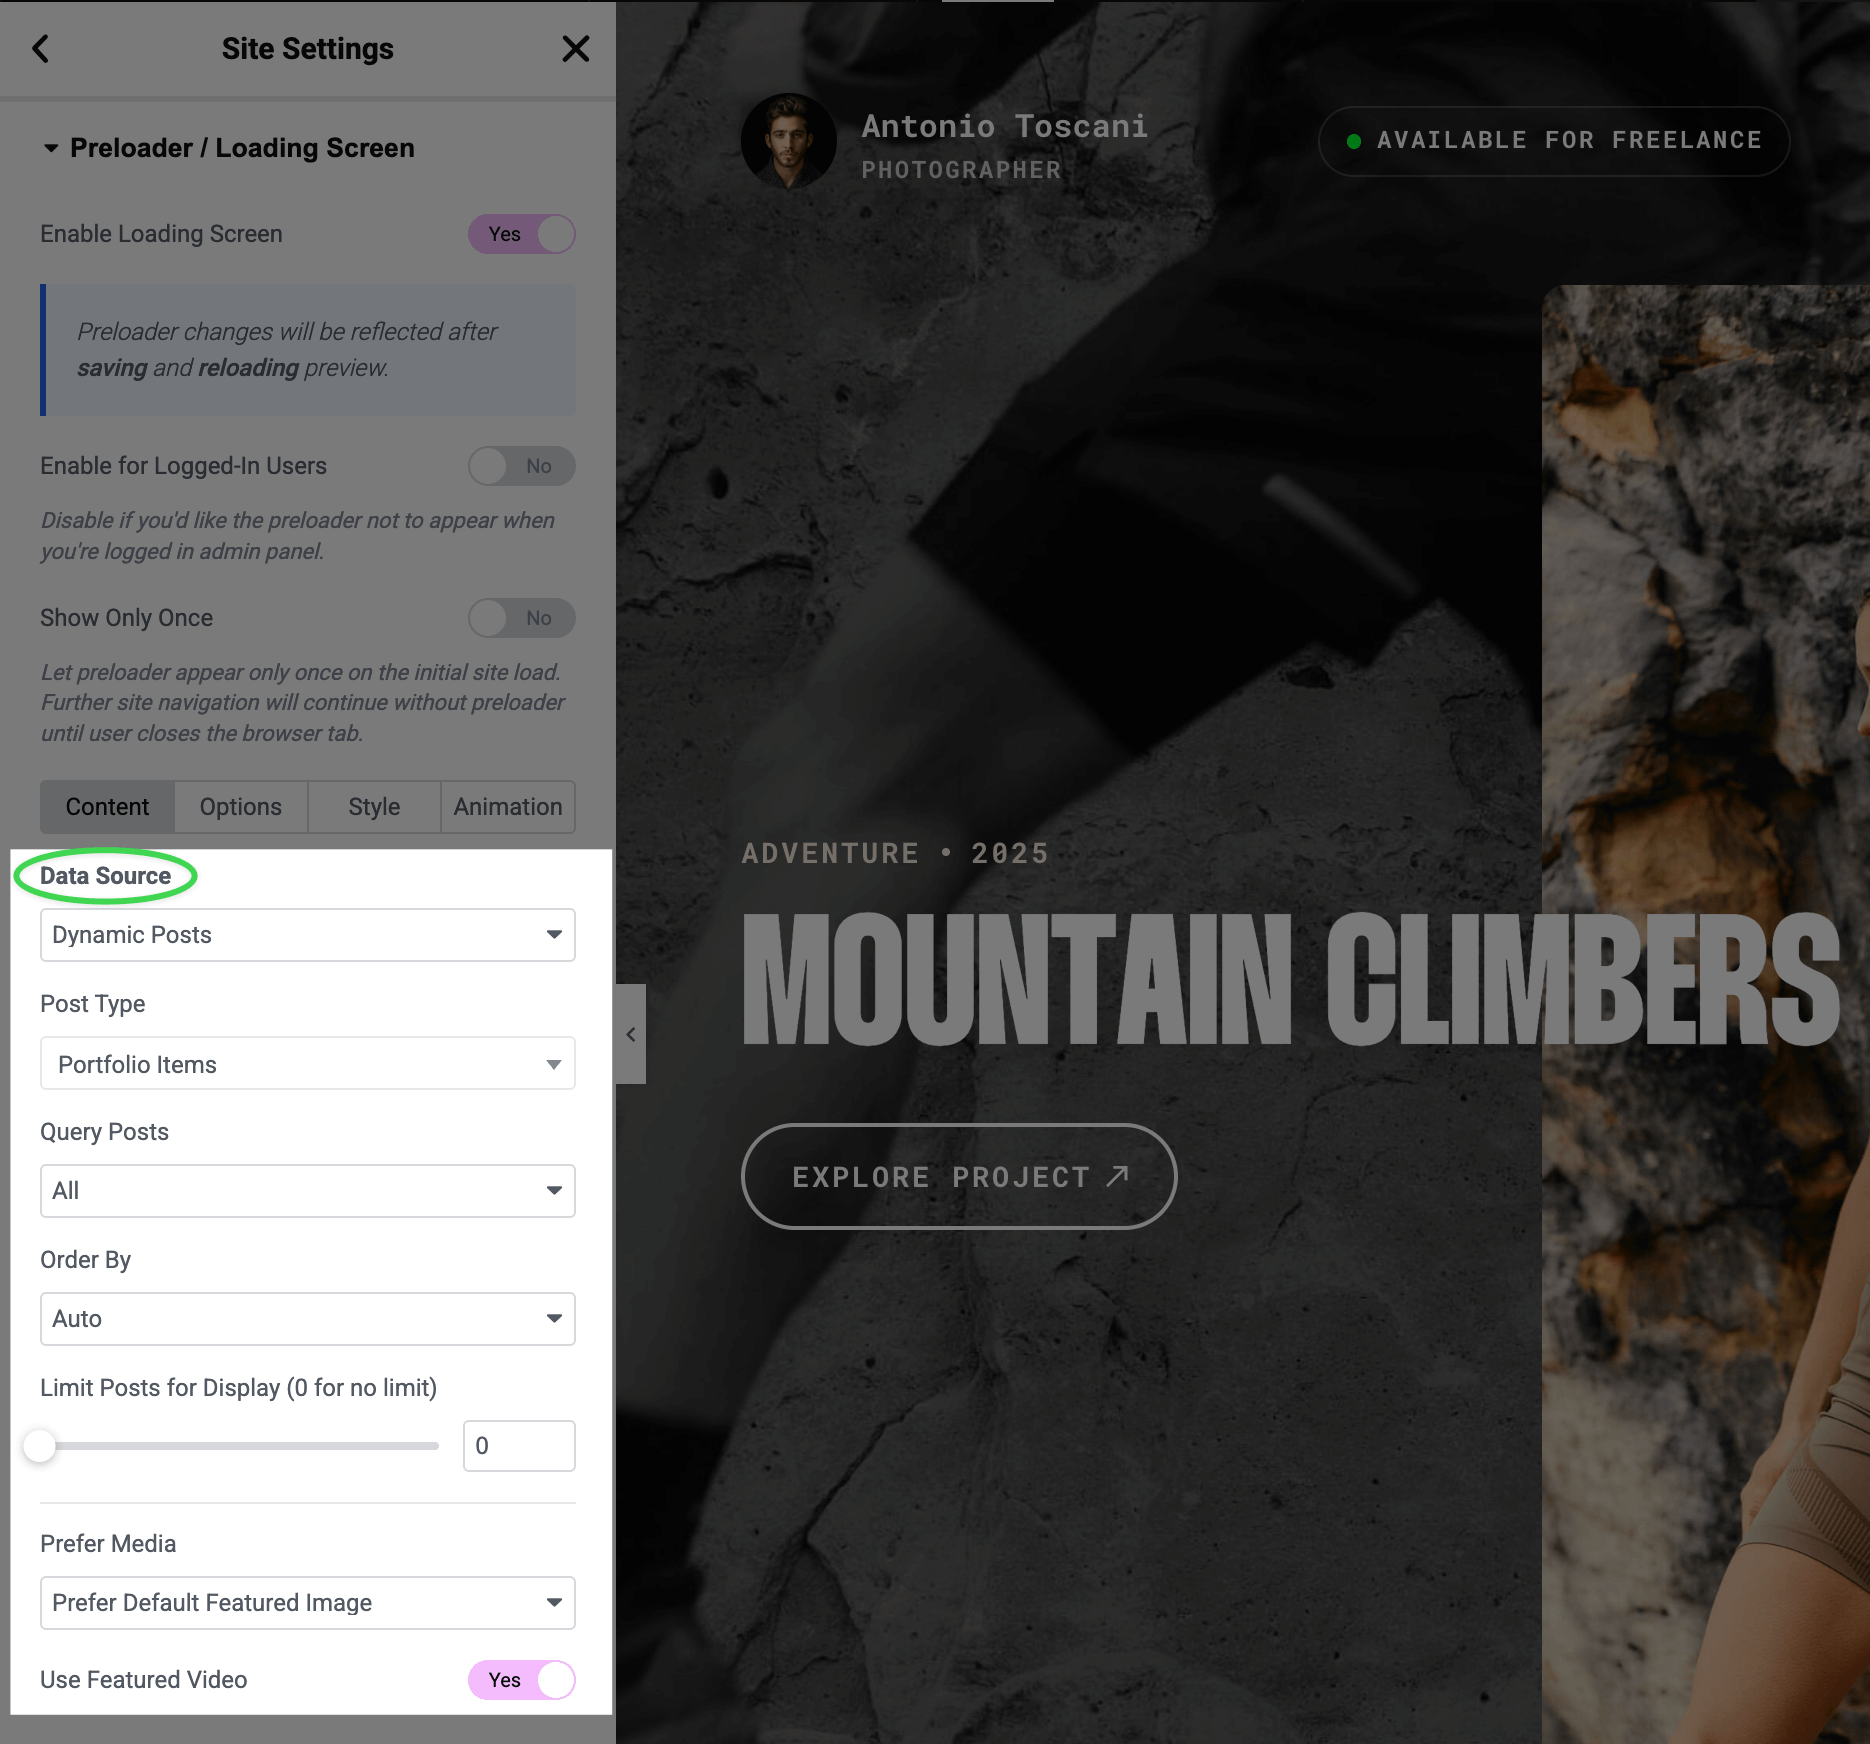
▶️ Step 1.
In the Content tab, set Data Source to Dynamic Posts.
▶️ Step 2.
Choose which post type to pull from (e.g., Portfolio Items, Services, Posts).
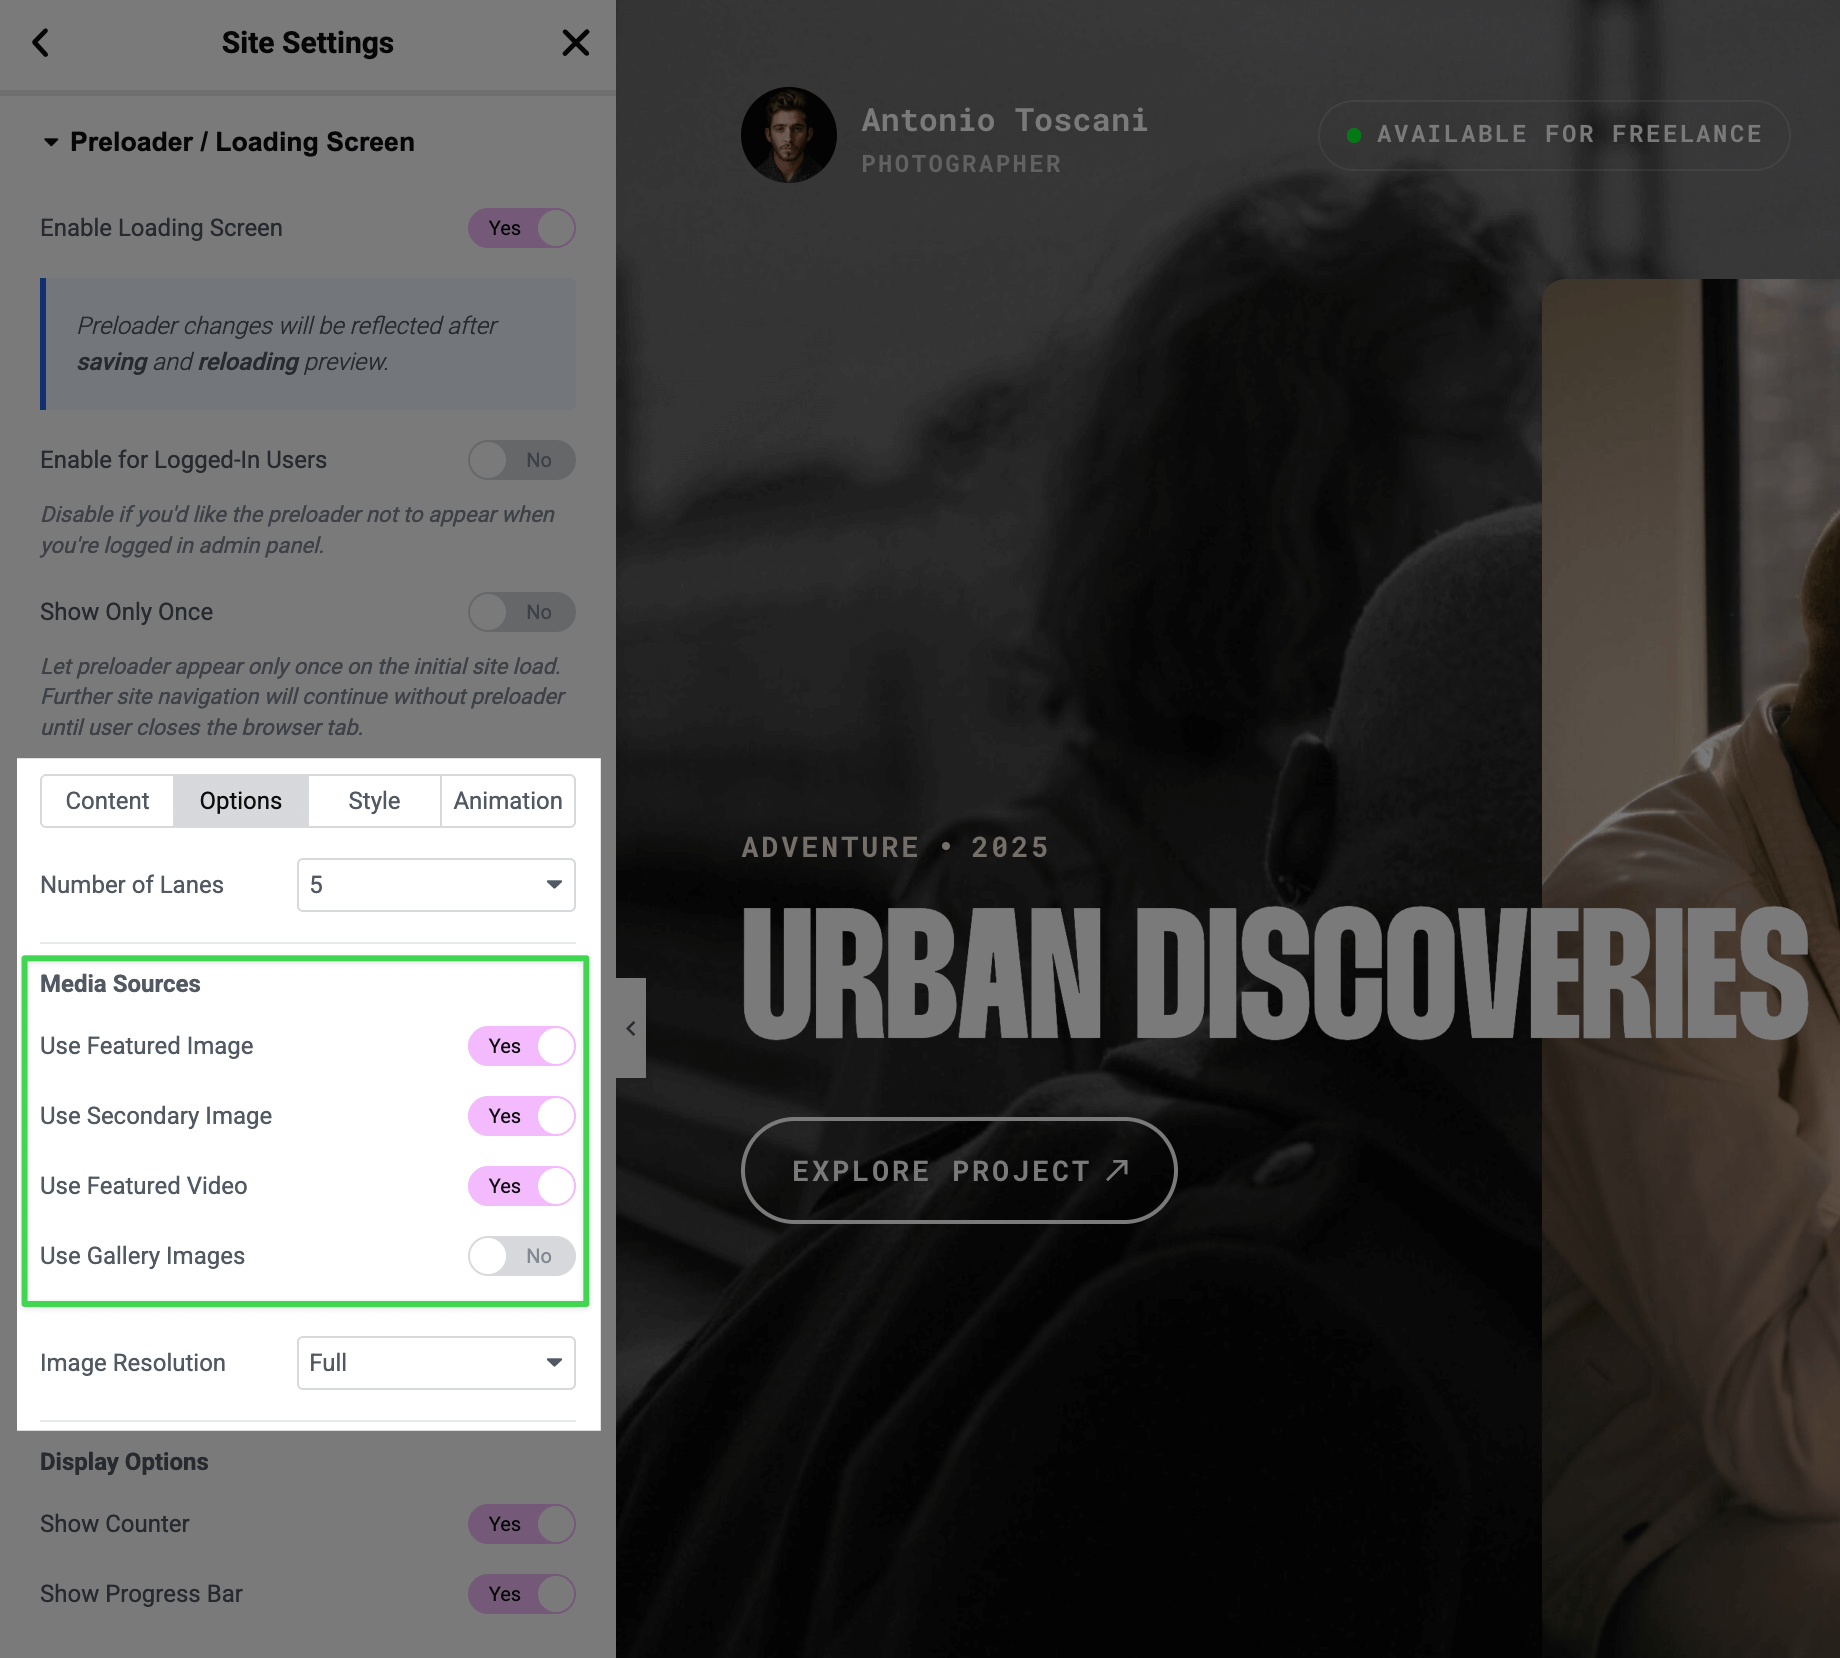
▶️ Step 3.
In the Options tab, choose which media to include:
- Use Featured Image — the main thumbnail you set for each post
- Use Secondary Image — the secondary featured image (if the post type supports it)
- Use Featured Video — the featured video from posts (requires an image source enabled)
- Use Gallery Images — images from the post's gallery section
Customizing the Media
To change what appears in the loading screen, edit your individual posts/projects and update their featured images, videos, or galleries — see Editing Pages and Posts. The loading screen will automatically reflect those changes.
Option 2: Upload Custom Images
For creatives with extensive portfolios who want full control over the site entrance animation — hand-pick your strongest work to showcase, even if visitors only see it for a few seconds.
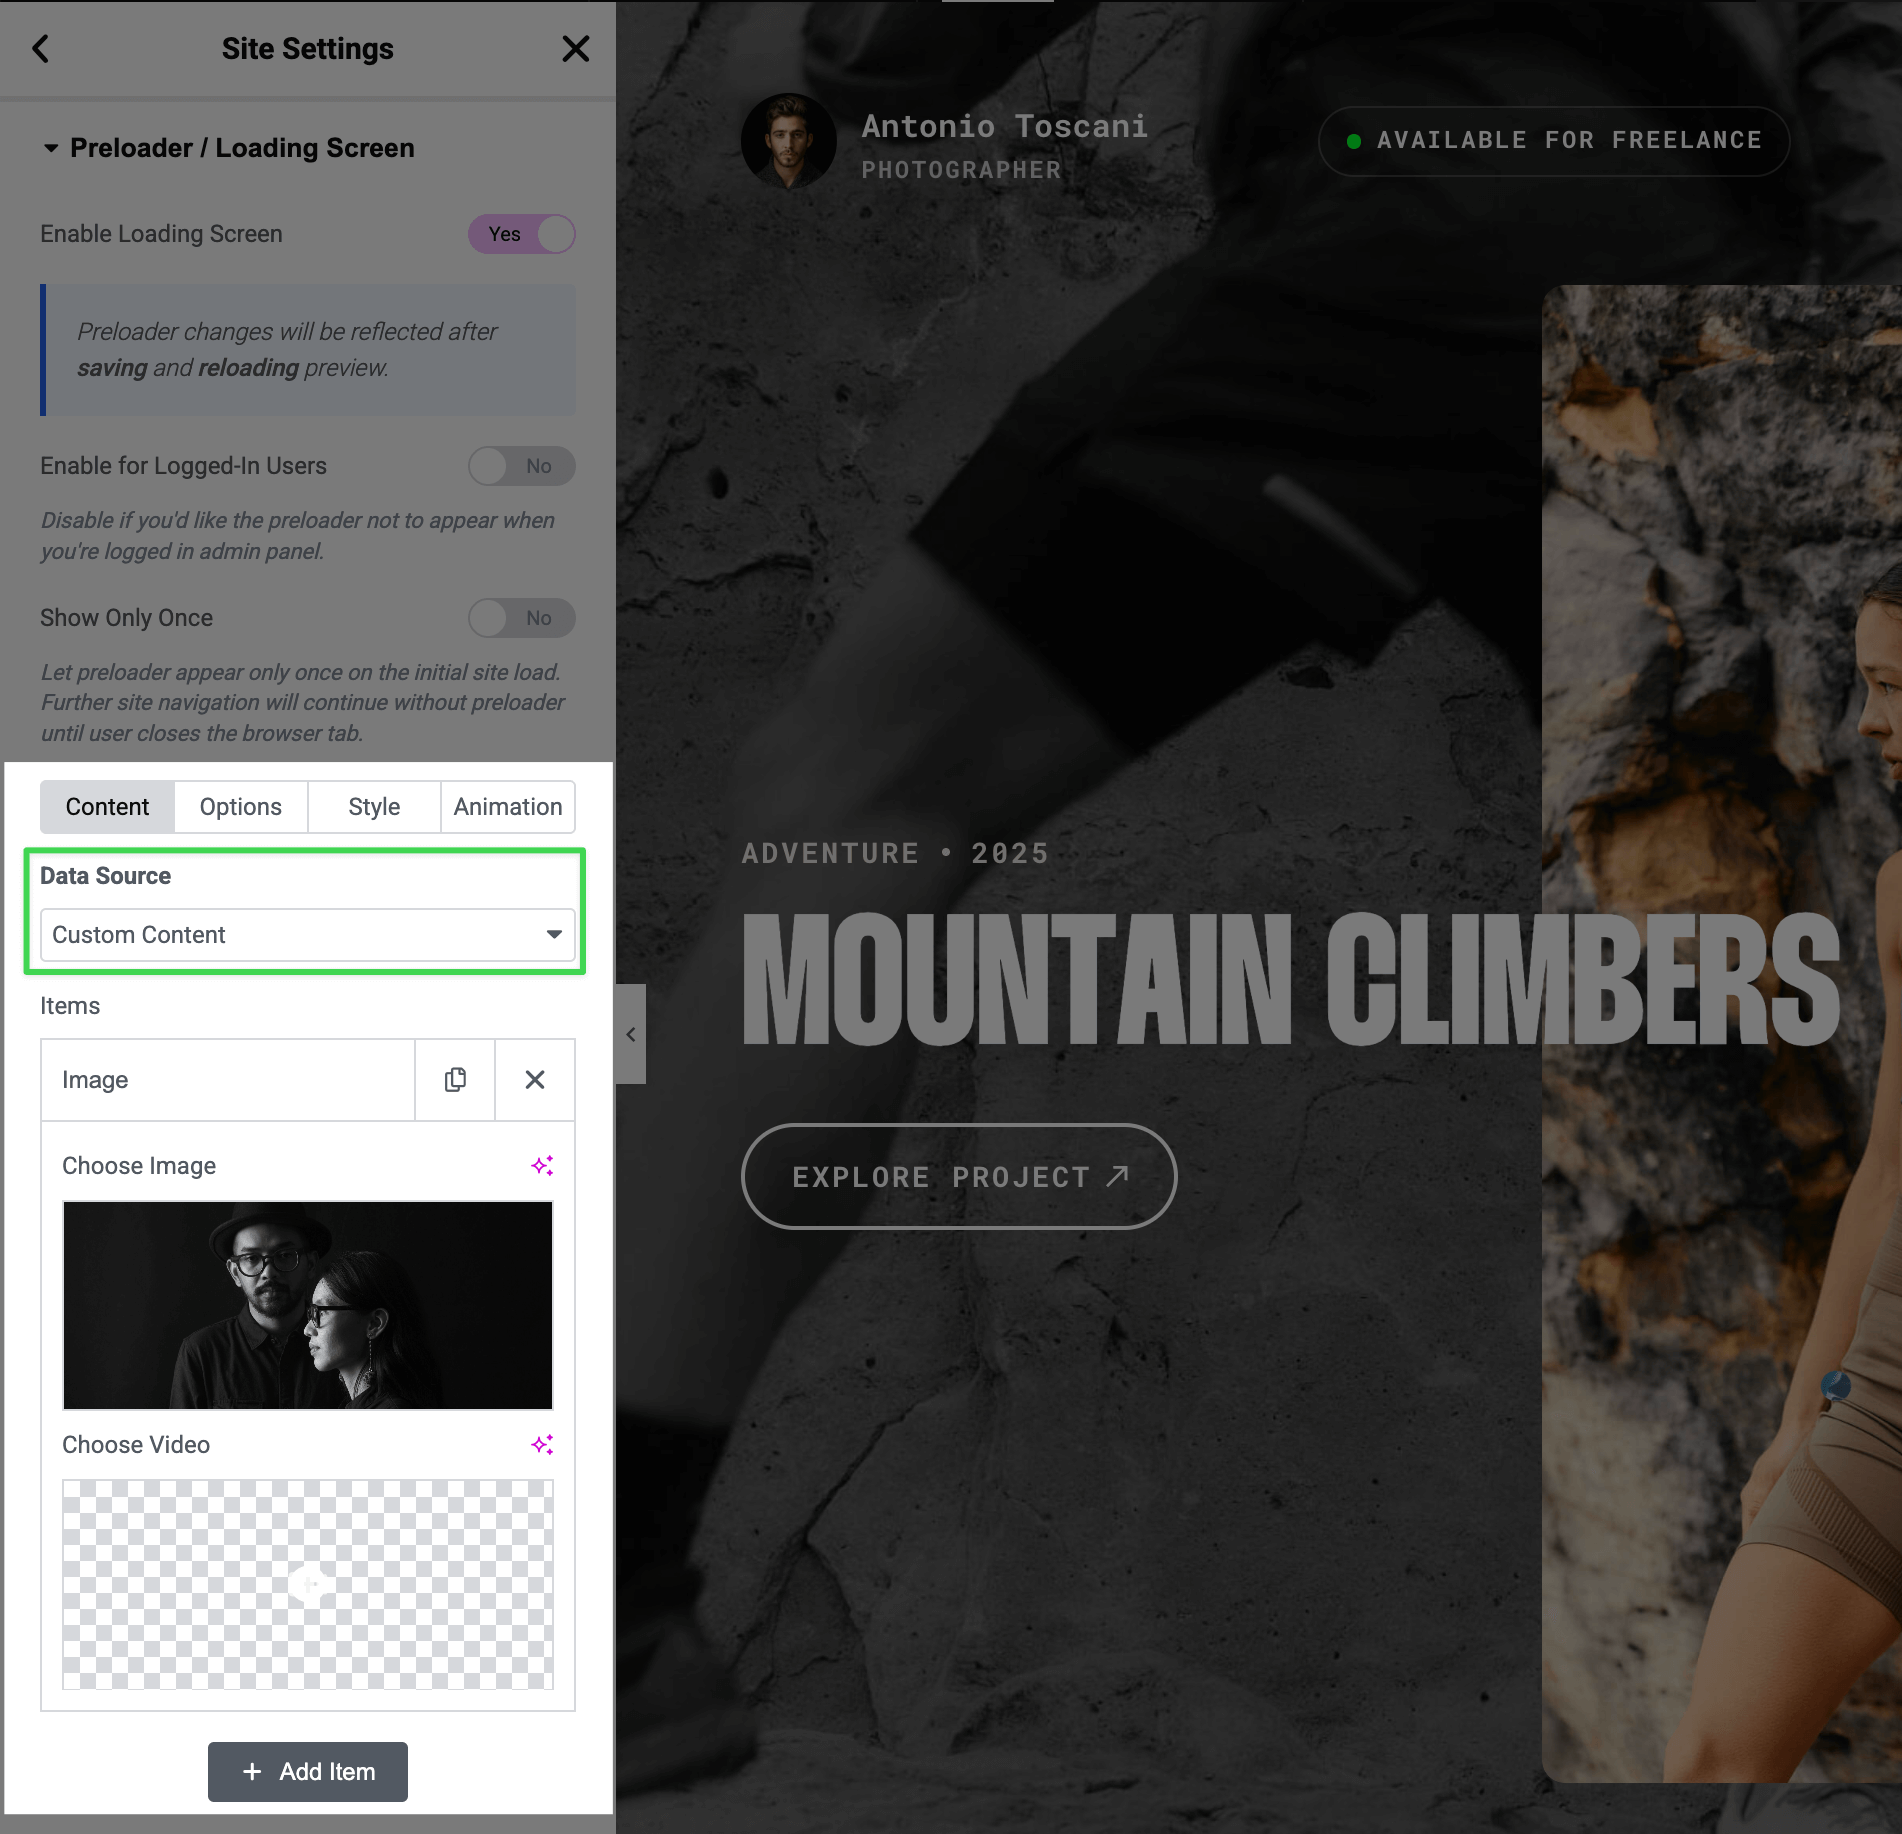
▶️ Step 1.
In the Content tab, set Data Source to Custom Content.
▶️ Step 2.
Click Add Item to add images one by one.
▶️ Step 3.
For each item, you can upload both an image and a video.
Video Support
Videos play automatically (muted) in the loading screen. Each video must have an accompanying image as a fallback.
Showing or Hiding the Counter and Progress Bar
The loading screen can display a percentage counter (0–100%) and a progress bar during the intro animation.
In the Options tab under Display Options:
- Toggle Show Counter to show/hide the animated percentage
- Toggle Show Progress Bar to show/hide the loading bar
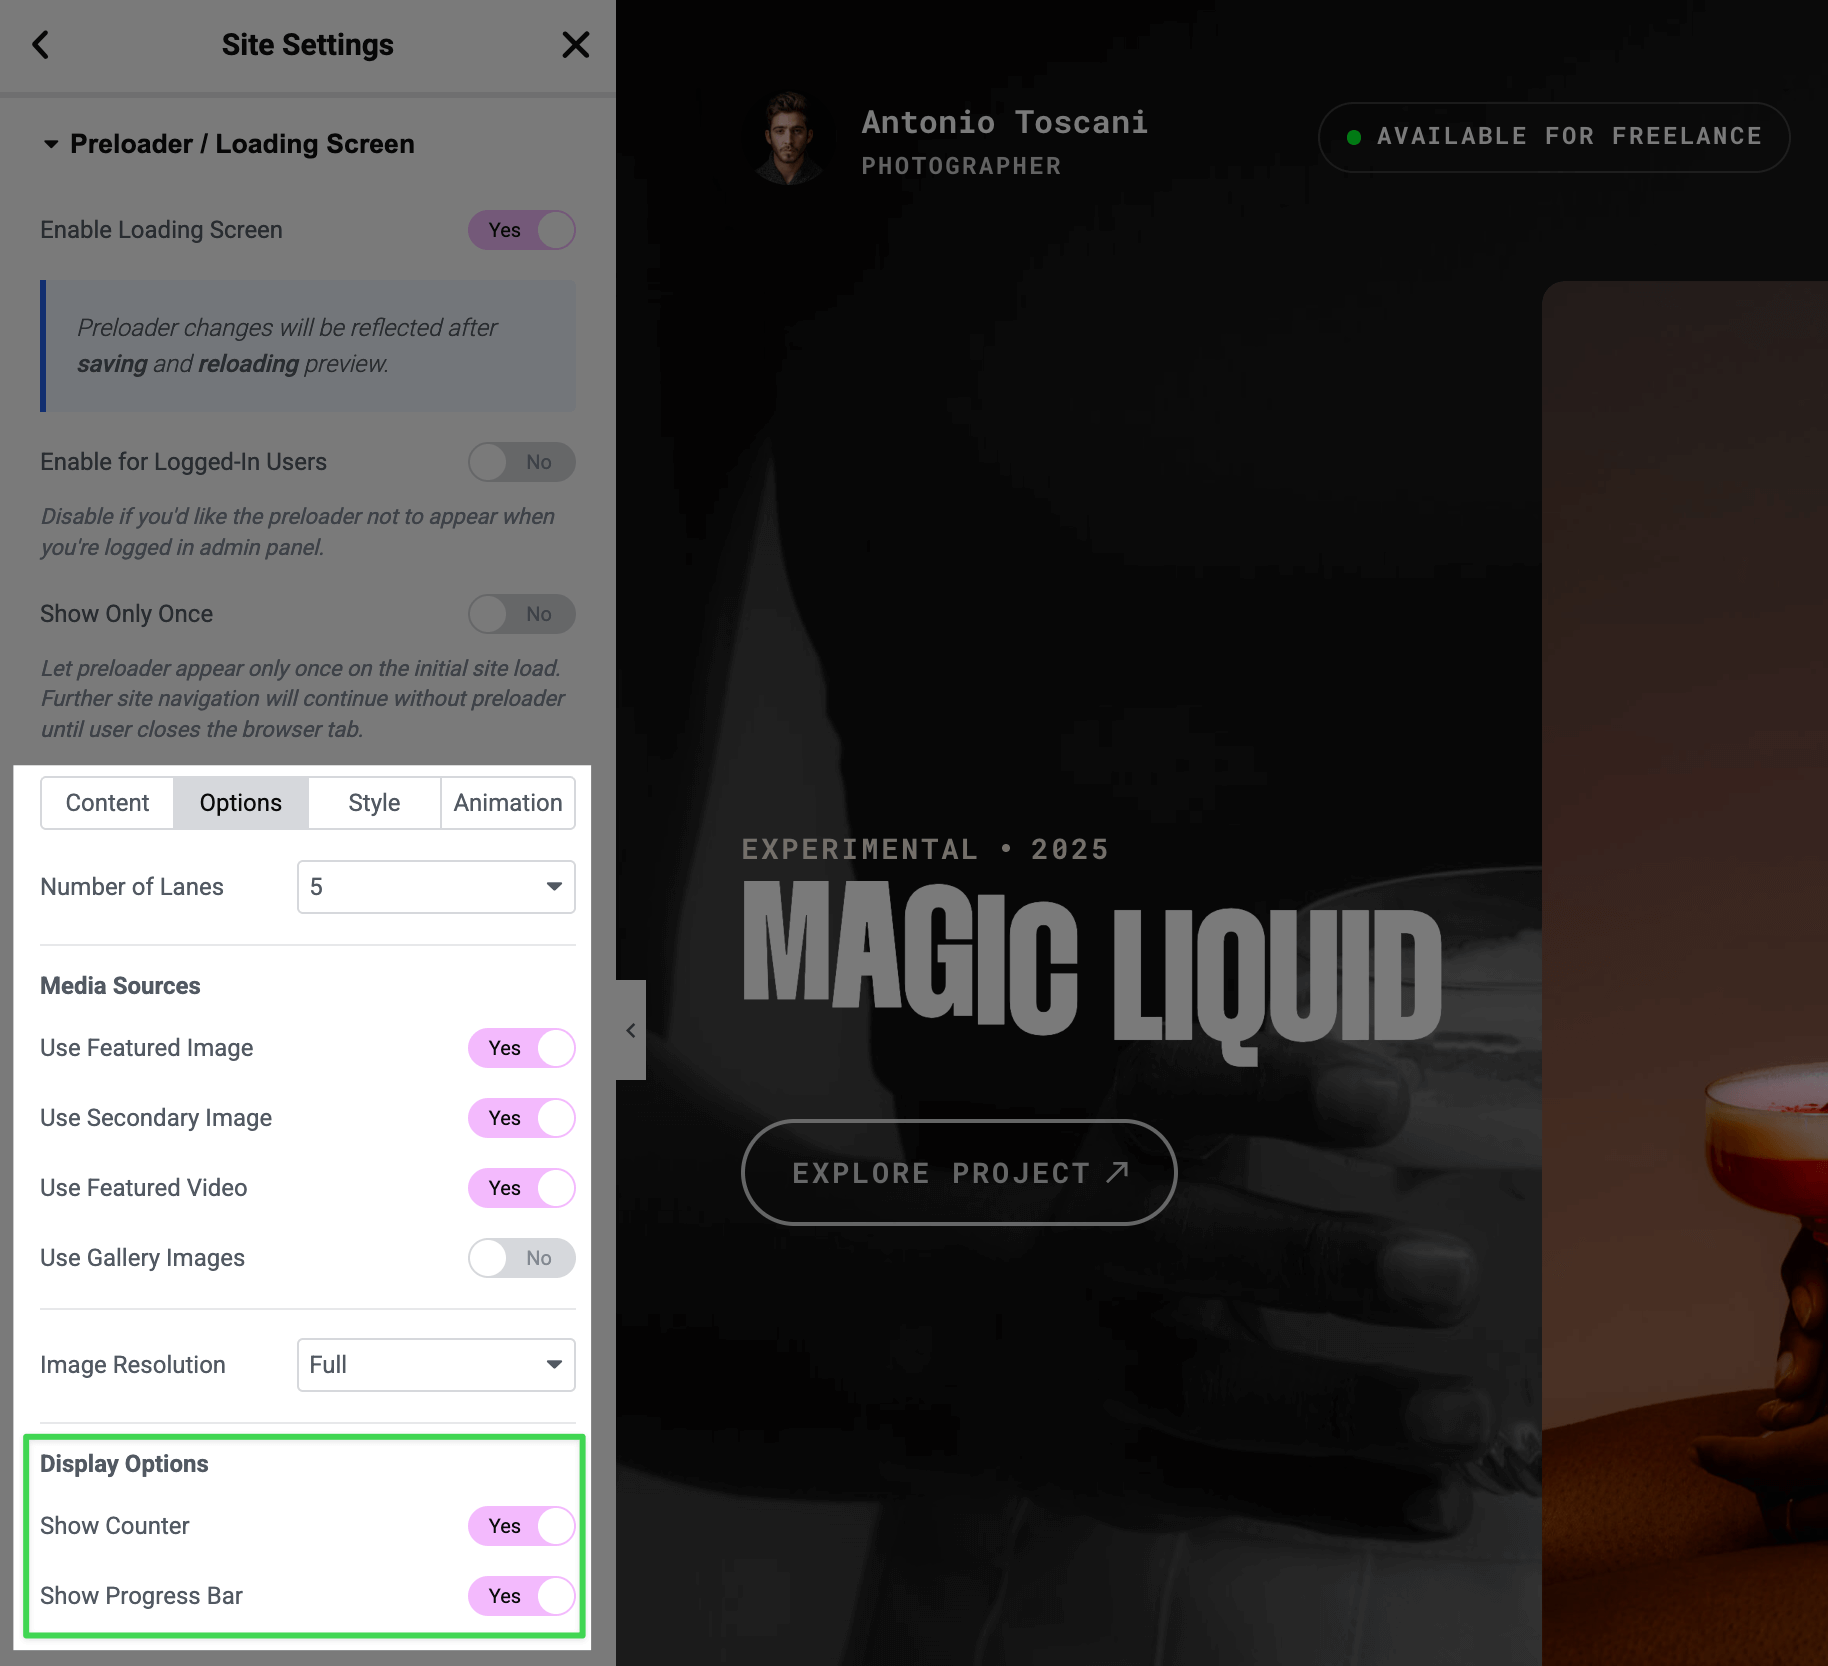
When enabled, you can customize colors in the Style tab using Counter Color and Loading Bar Color controls.
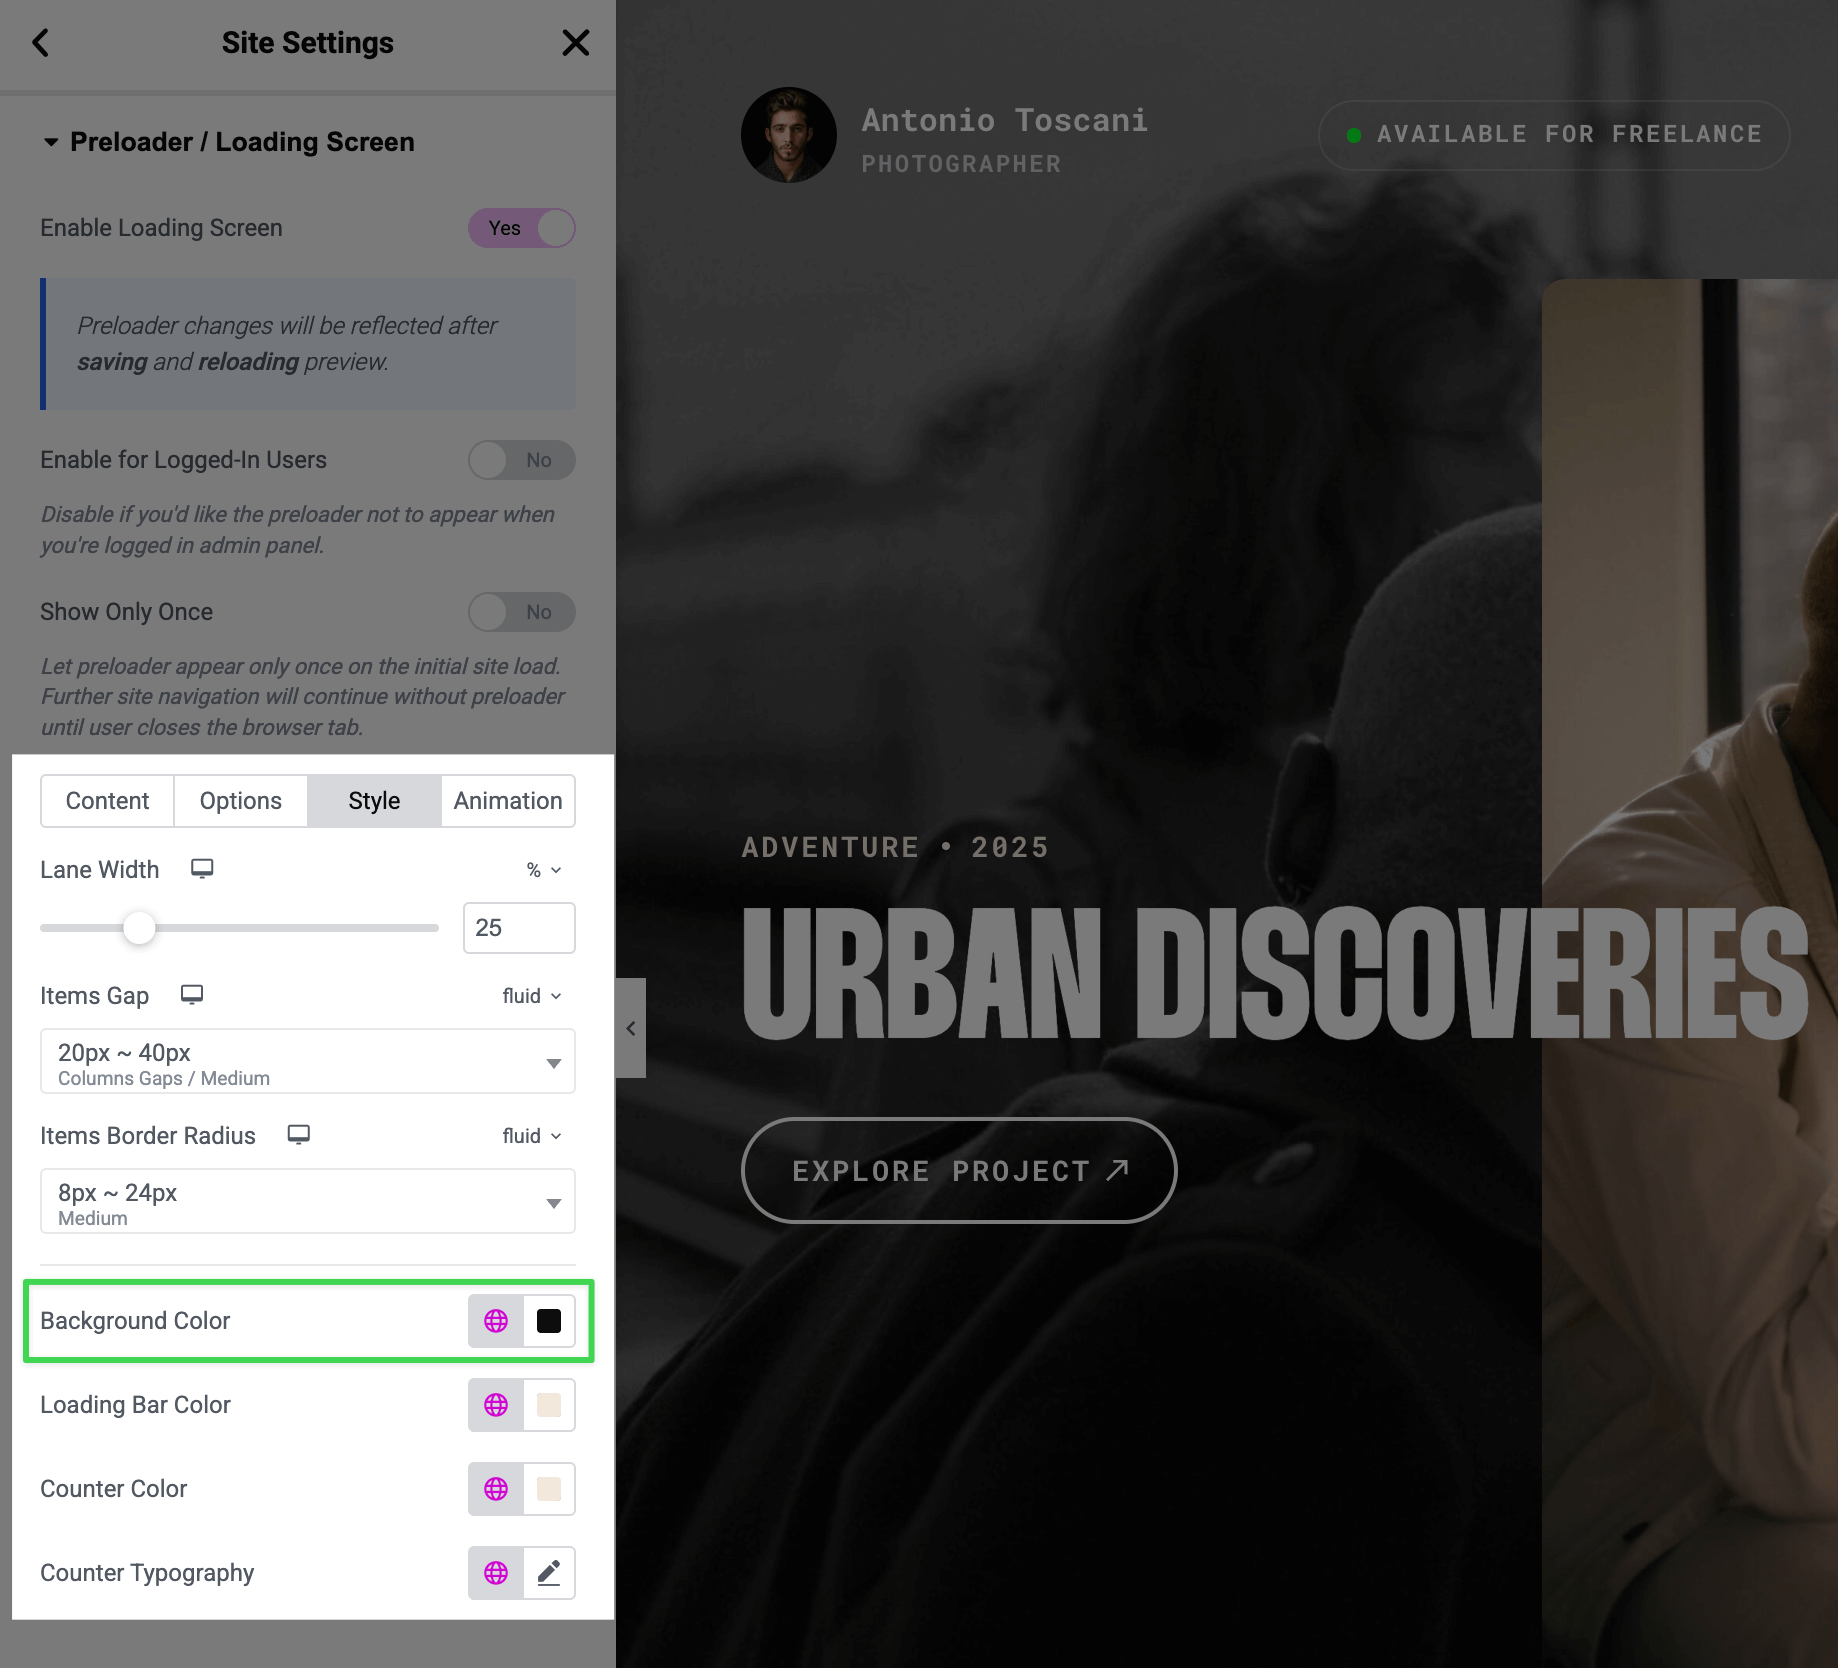
Changing the Background Color
- Go to the Style tab
- Use the Background Color control to set your preferred color
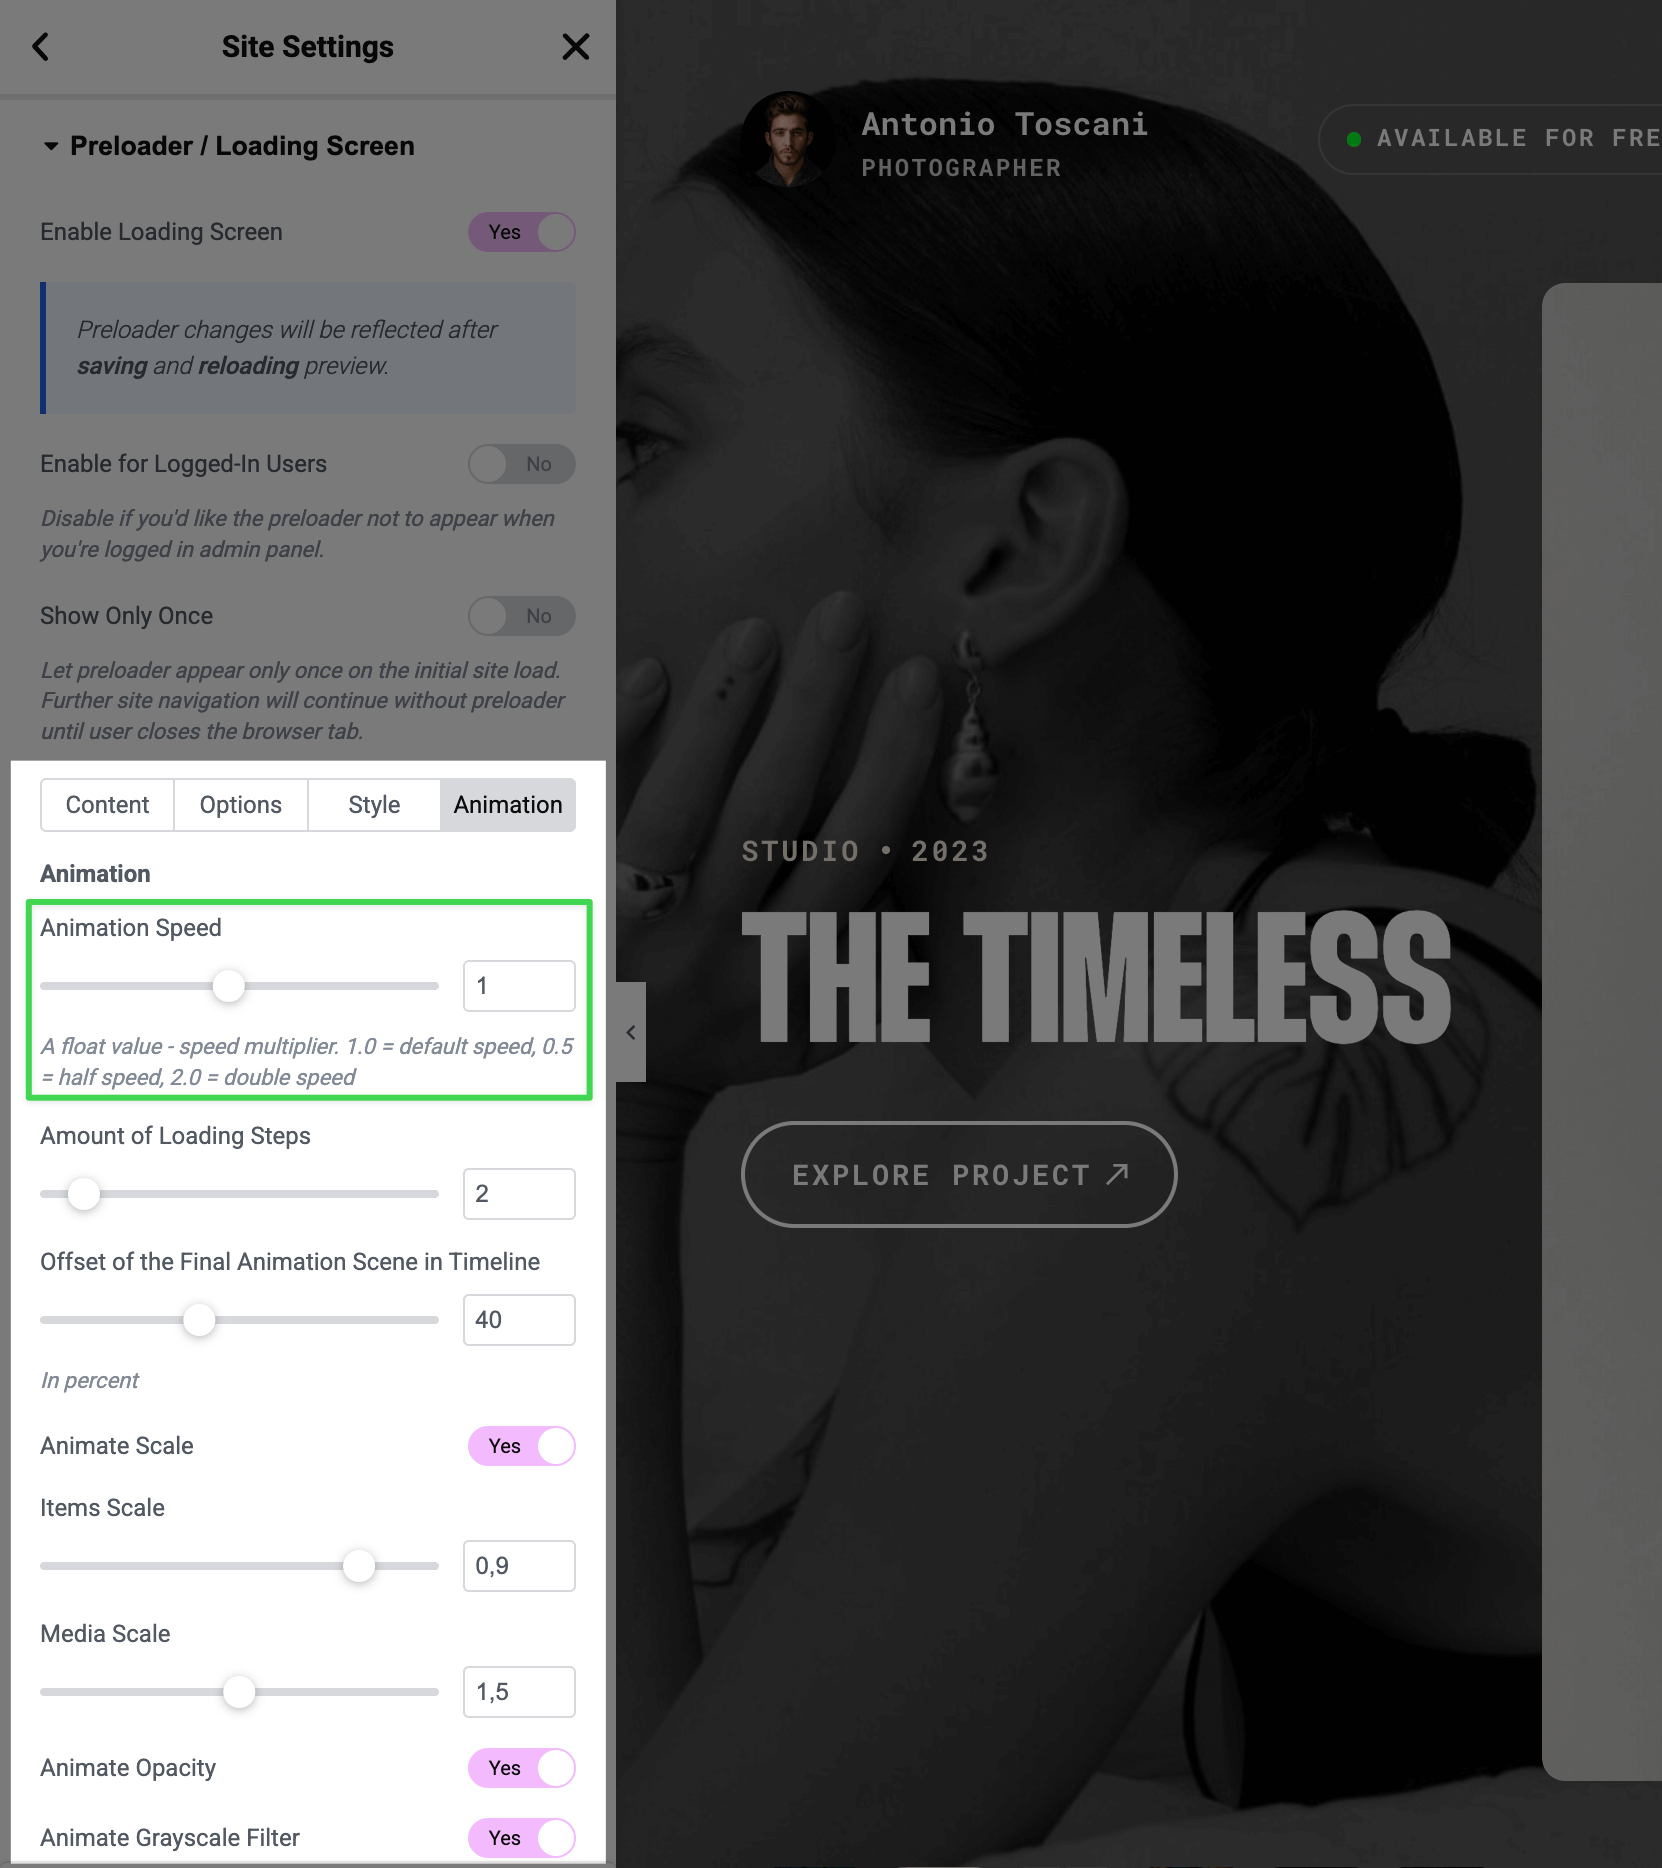
Adjusting Animation Speed
- Go to the Animation tab
- Use the Animation Speed slider:
- 1.0 = default speed
- 0.5 = slower (half speed)
- 2.0 = faster (double speed)
WARNING
While you can adjust the speed, the default timing is carefully choreographed for the smoothest visual experience.
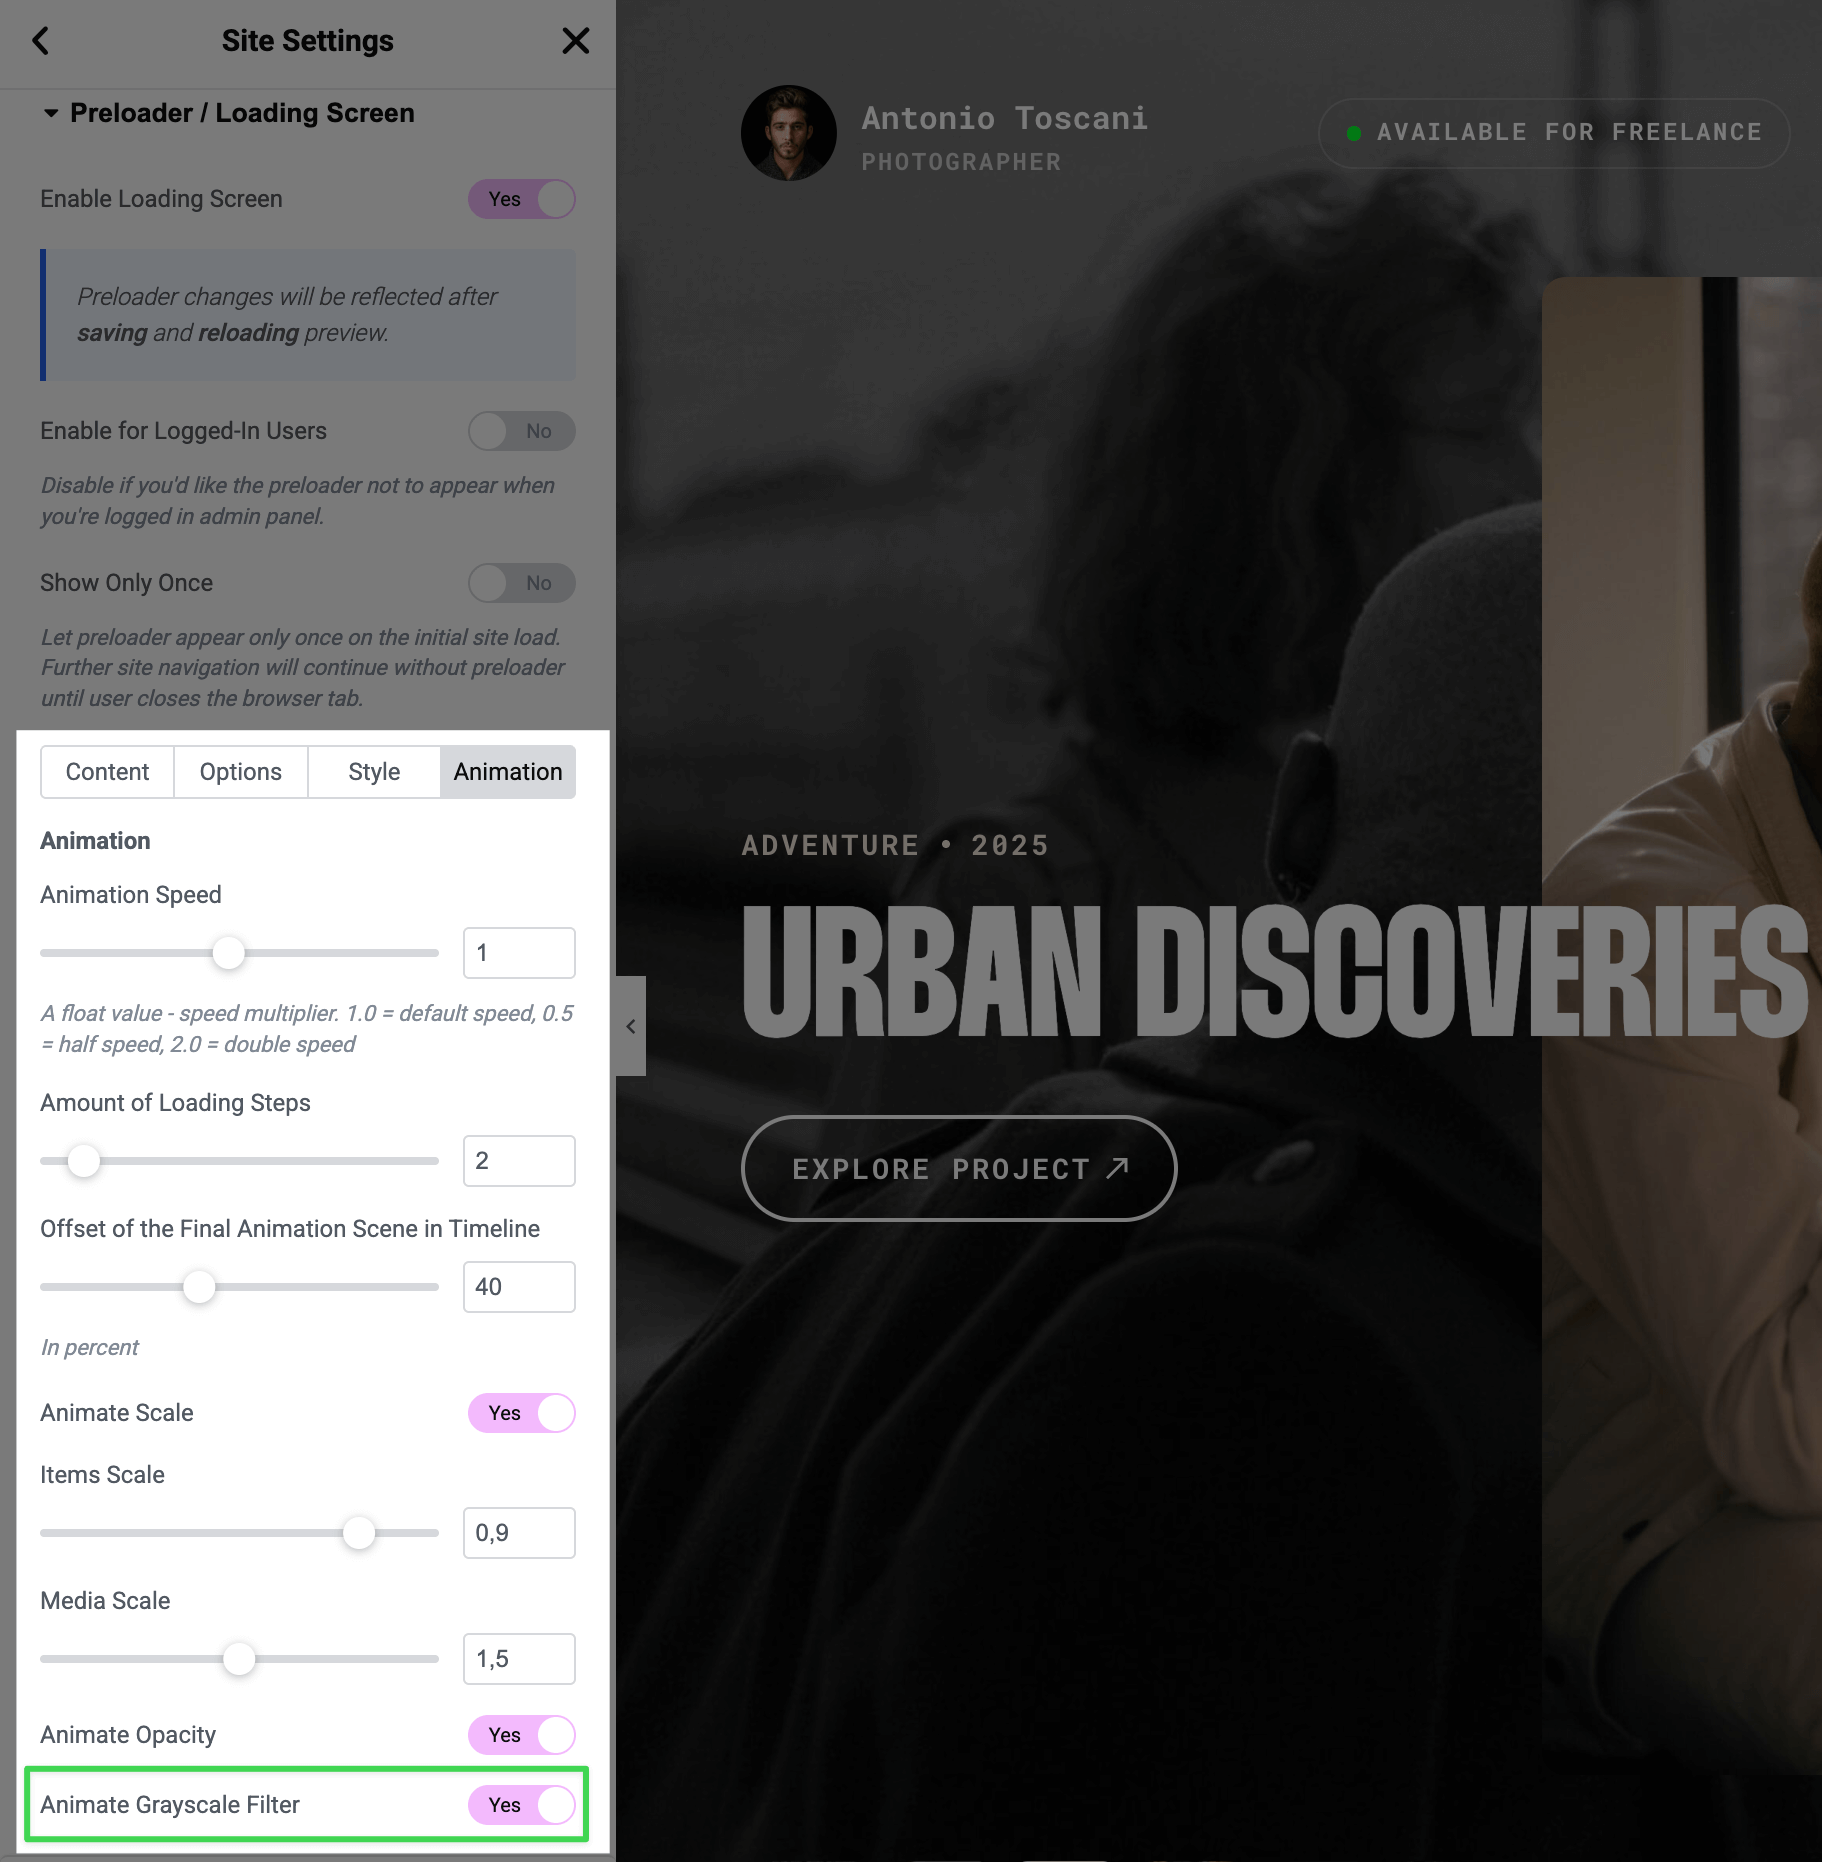
Disabling the Black & White Effect
The loading screen applies a black & white effect to images that transitions to full color during the animation.
To disable this effect:
- Go to the Animation tab
- Turn off Animate Grayscale Filter
Enabling or Disabling the Loading Screen
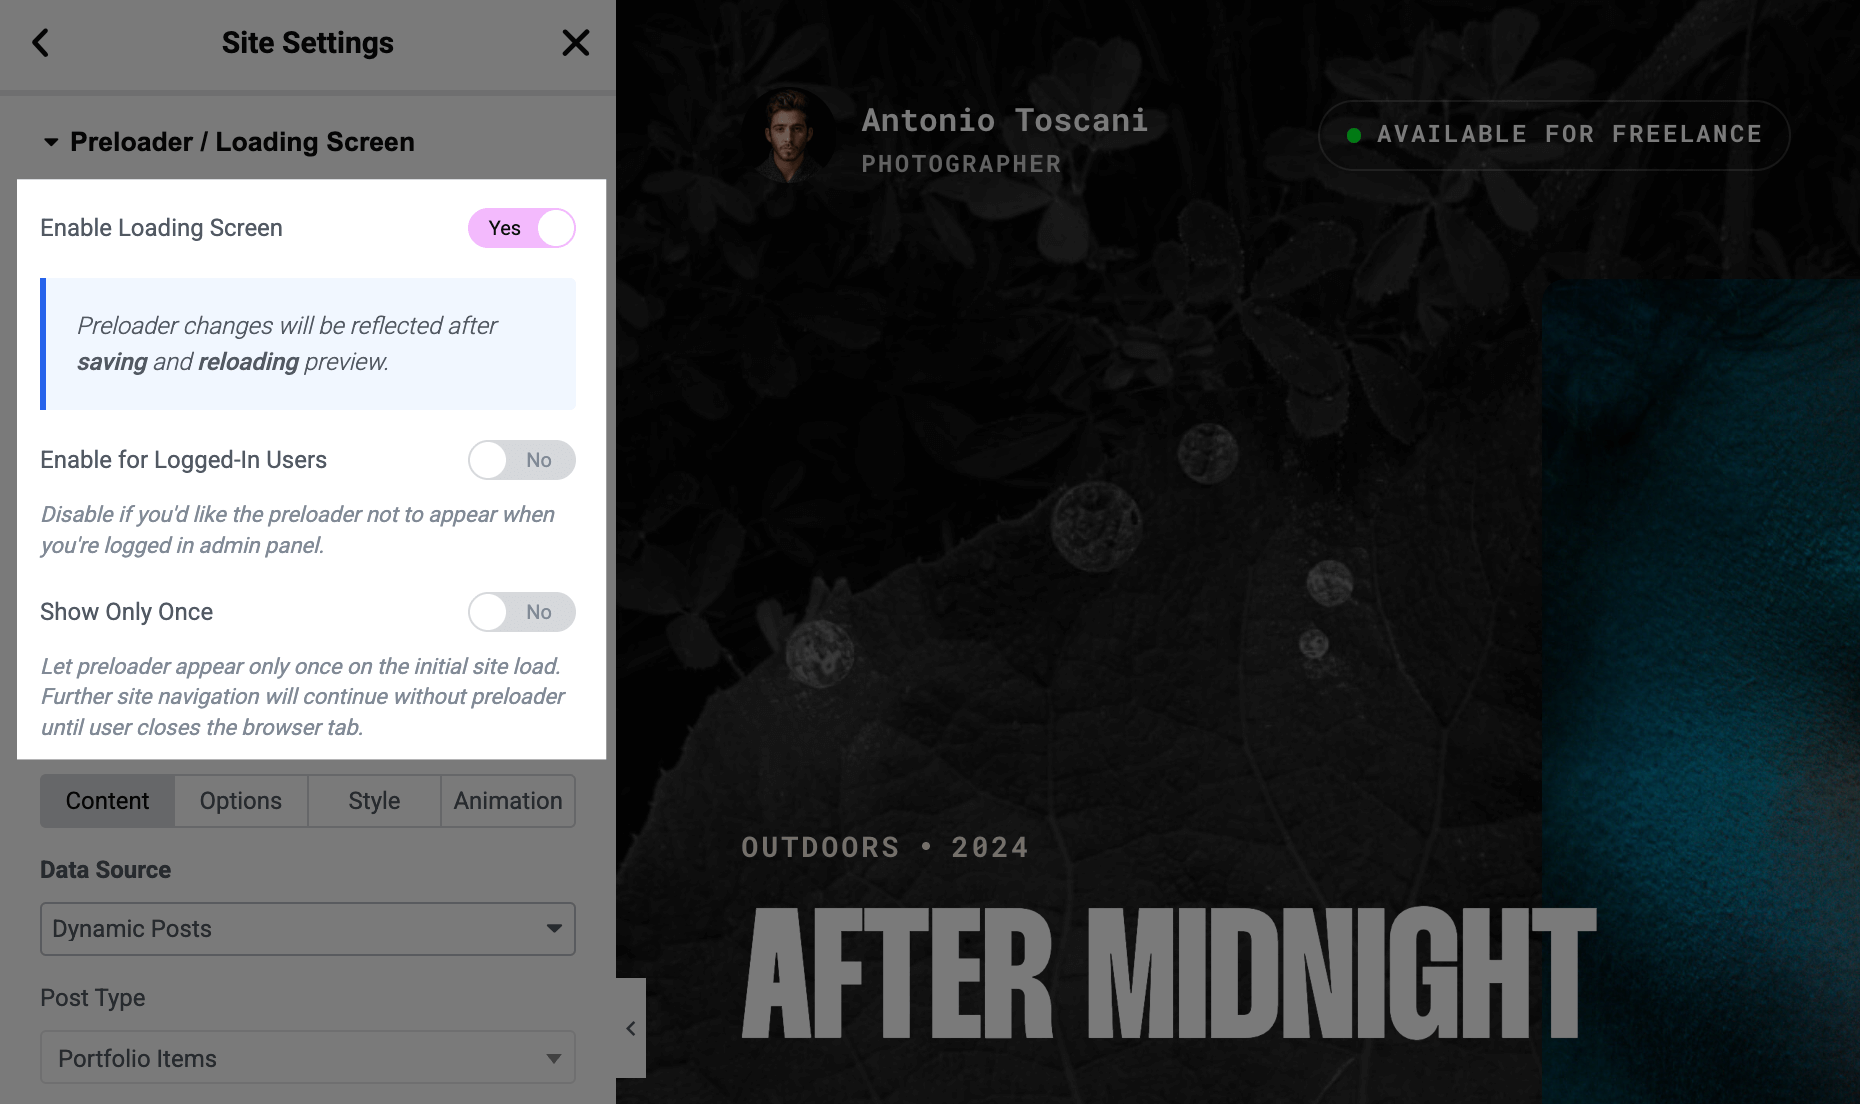
Option 1: Completely Disable
Turn off the Enable Loading Screen toggle at the top of the panel.
Option 2: Disable for Logged-In Users Only
Useful when you're editing your site and don't want to wait through the animation each time.
- Keep Enable Loading Screen turned on
- Turn off Enable for Logged-In Users
The preloader won't appear while you're logged into WordPress admin, but visitors will still see it.
Option 3: Show Only Once Per Visit
A middle ground for those who want the cinematic entrance without slowing down site navigation.
- Enable Show Only Once
The preloader plays when visitors arrive from an external source (search engine, social link, direct URL), but skips when they navigate between pages on your site. This creates a polished first impression without interrupting the browsing flow.