# Navigation Menu
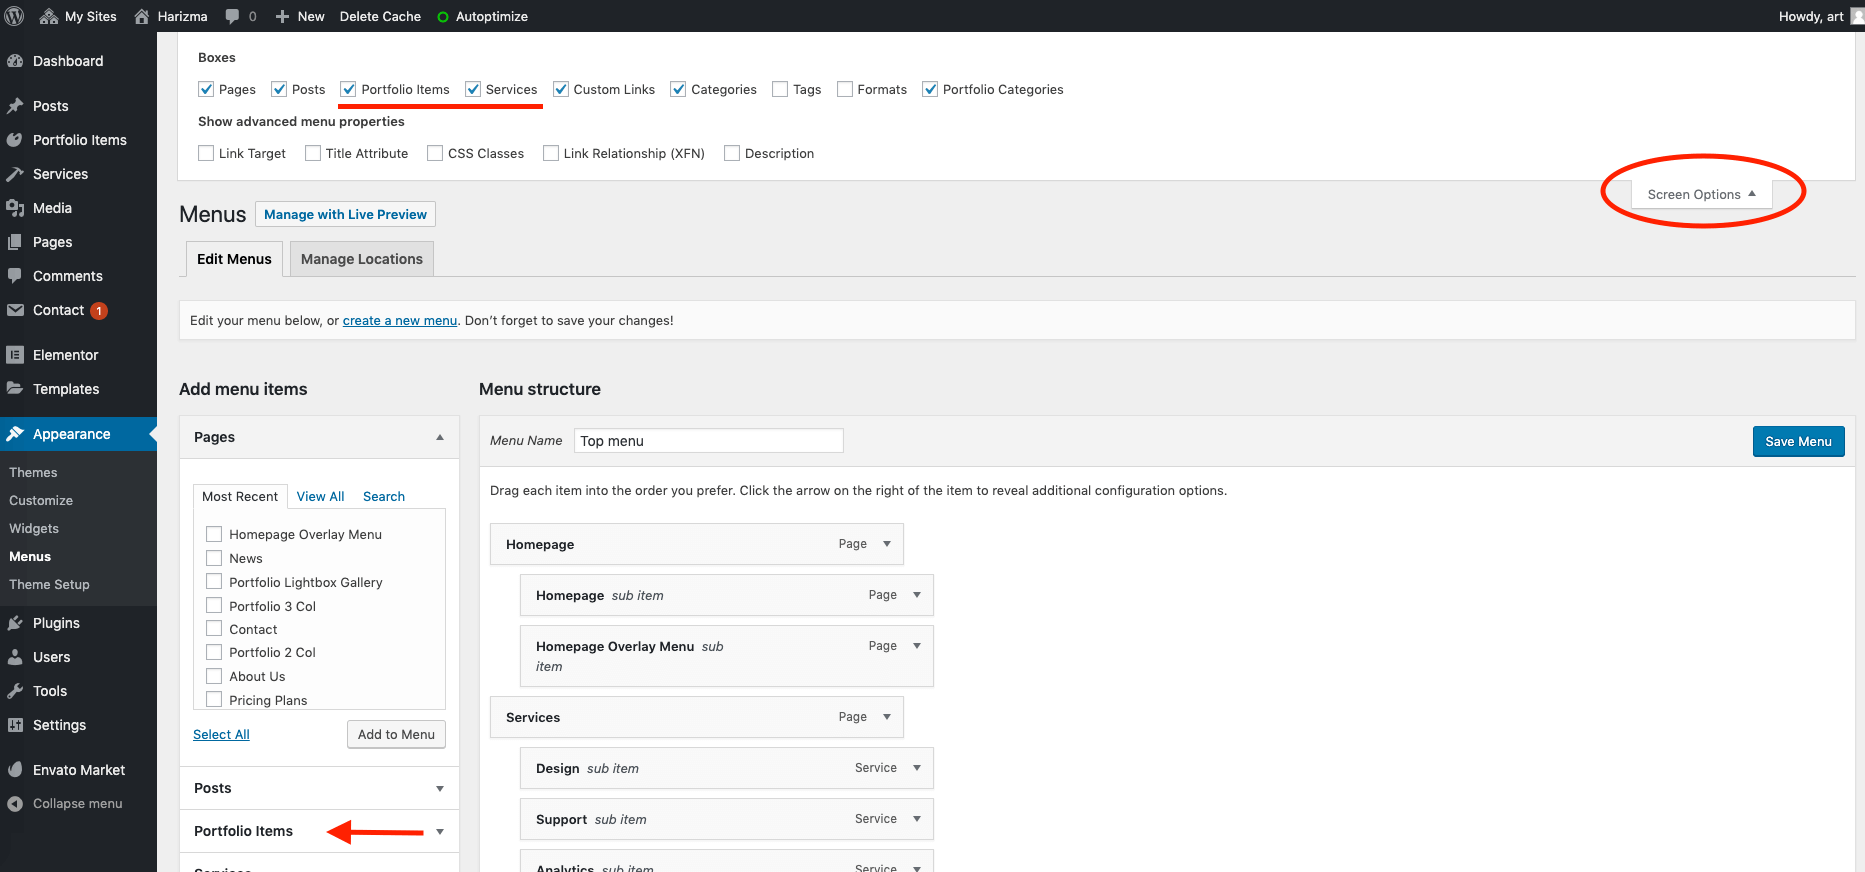
To set up the navigation menu, go to Appearance → Menu in the admin panel. Then open Screen Options and enable the post types that you want to include in your menu later. The Harizma Core plugin registers two extra custom post types: Portfolio and Services.
WARNING
If you don't see these extra items in the Screen Options, make sure that all the required plugins are installed and activated. Please refer to the Plugins Installation section for more information.
You can drag and drop links to your pages and posts into the menu. It is also possible to create a link with a custom URL. Once you’re done, make sure that the menu you've edited is added to the Main Menu location.
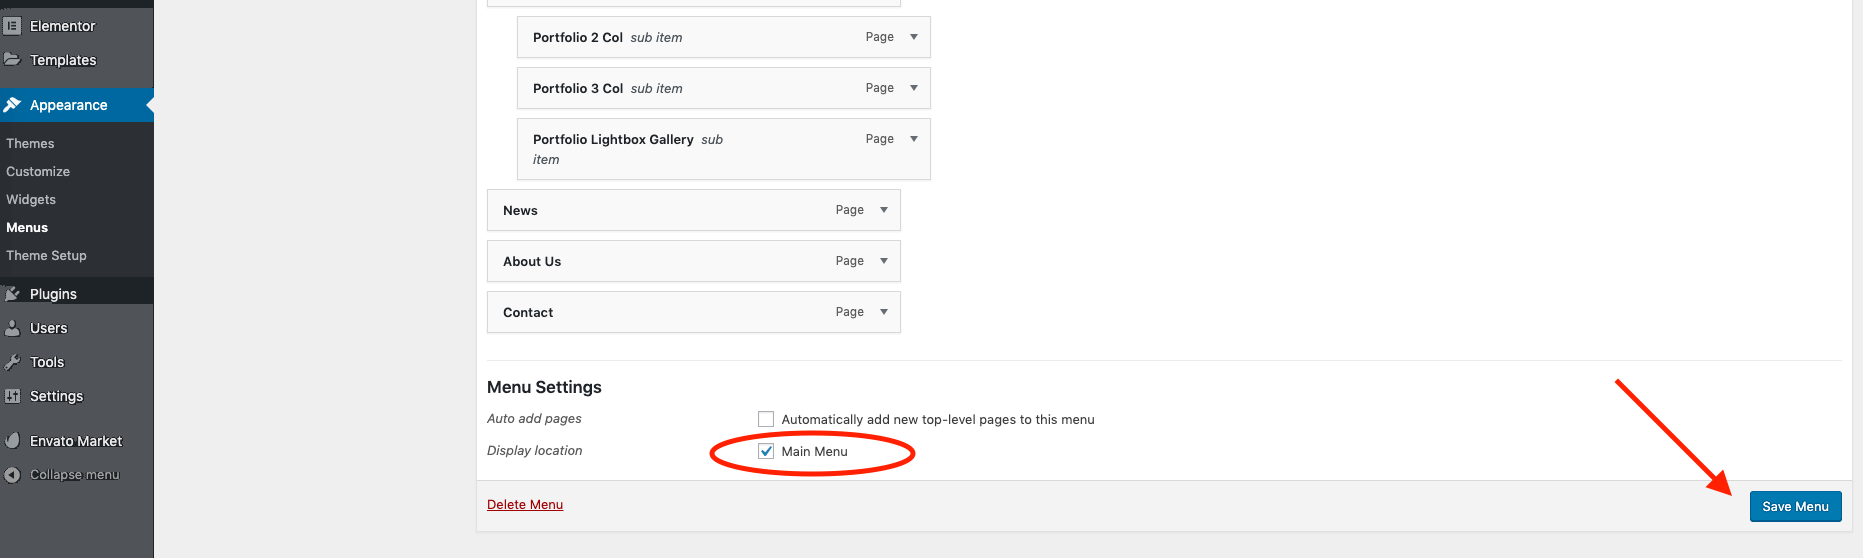
Save menu afterwards.
# Menu Style
The theme supports two menu styles: "Regular" and "Fullscreen Overlay". If you want to change the menu appearance, you can do this from the WordPress Live Customizer panel.
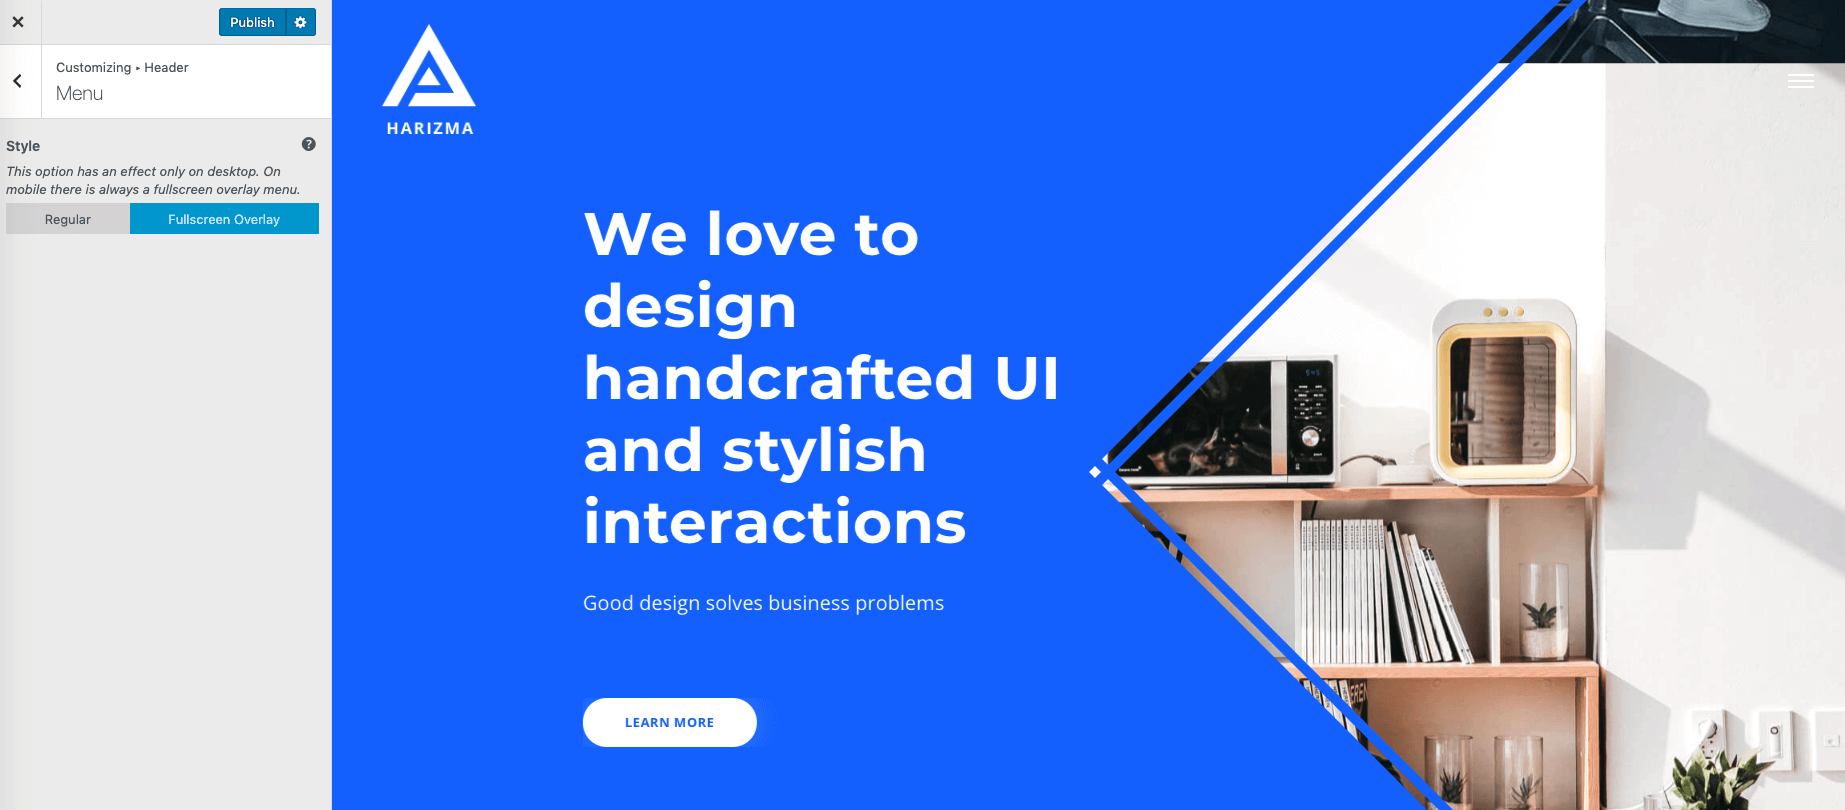
Customize -> Header -> MenuTIP
If you don't know what the WordPress Customizer is or how to switch it on, don't worry. There will be a brief explanation in further articles.