# Customizng Colors
# 1. How the design system works
| Preset type | Edited from Customizer | Used inside Elementor |
|---|---|---|
| Background presets (section backgrounds) | Appearance -> Customize -> General Style -> Colors | Section / Container -> Advanced -> Extended Theme Options -> Color Theme |
| Typography presets (text styles) | Appearance -> Customize -> Typography | Any Rhye widget -> Style tab -> Typography Preset |
Each Typography preset stores:
- Font family
- Weight, line-height, letter spacing
- Prefered mobile & desktop sizes in pixels.
- Light text color (for dark backgrounds)
- Dark text color (for light backgrounds)
# 2. Define your color & typography presets
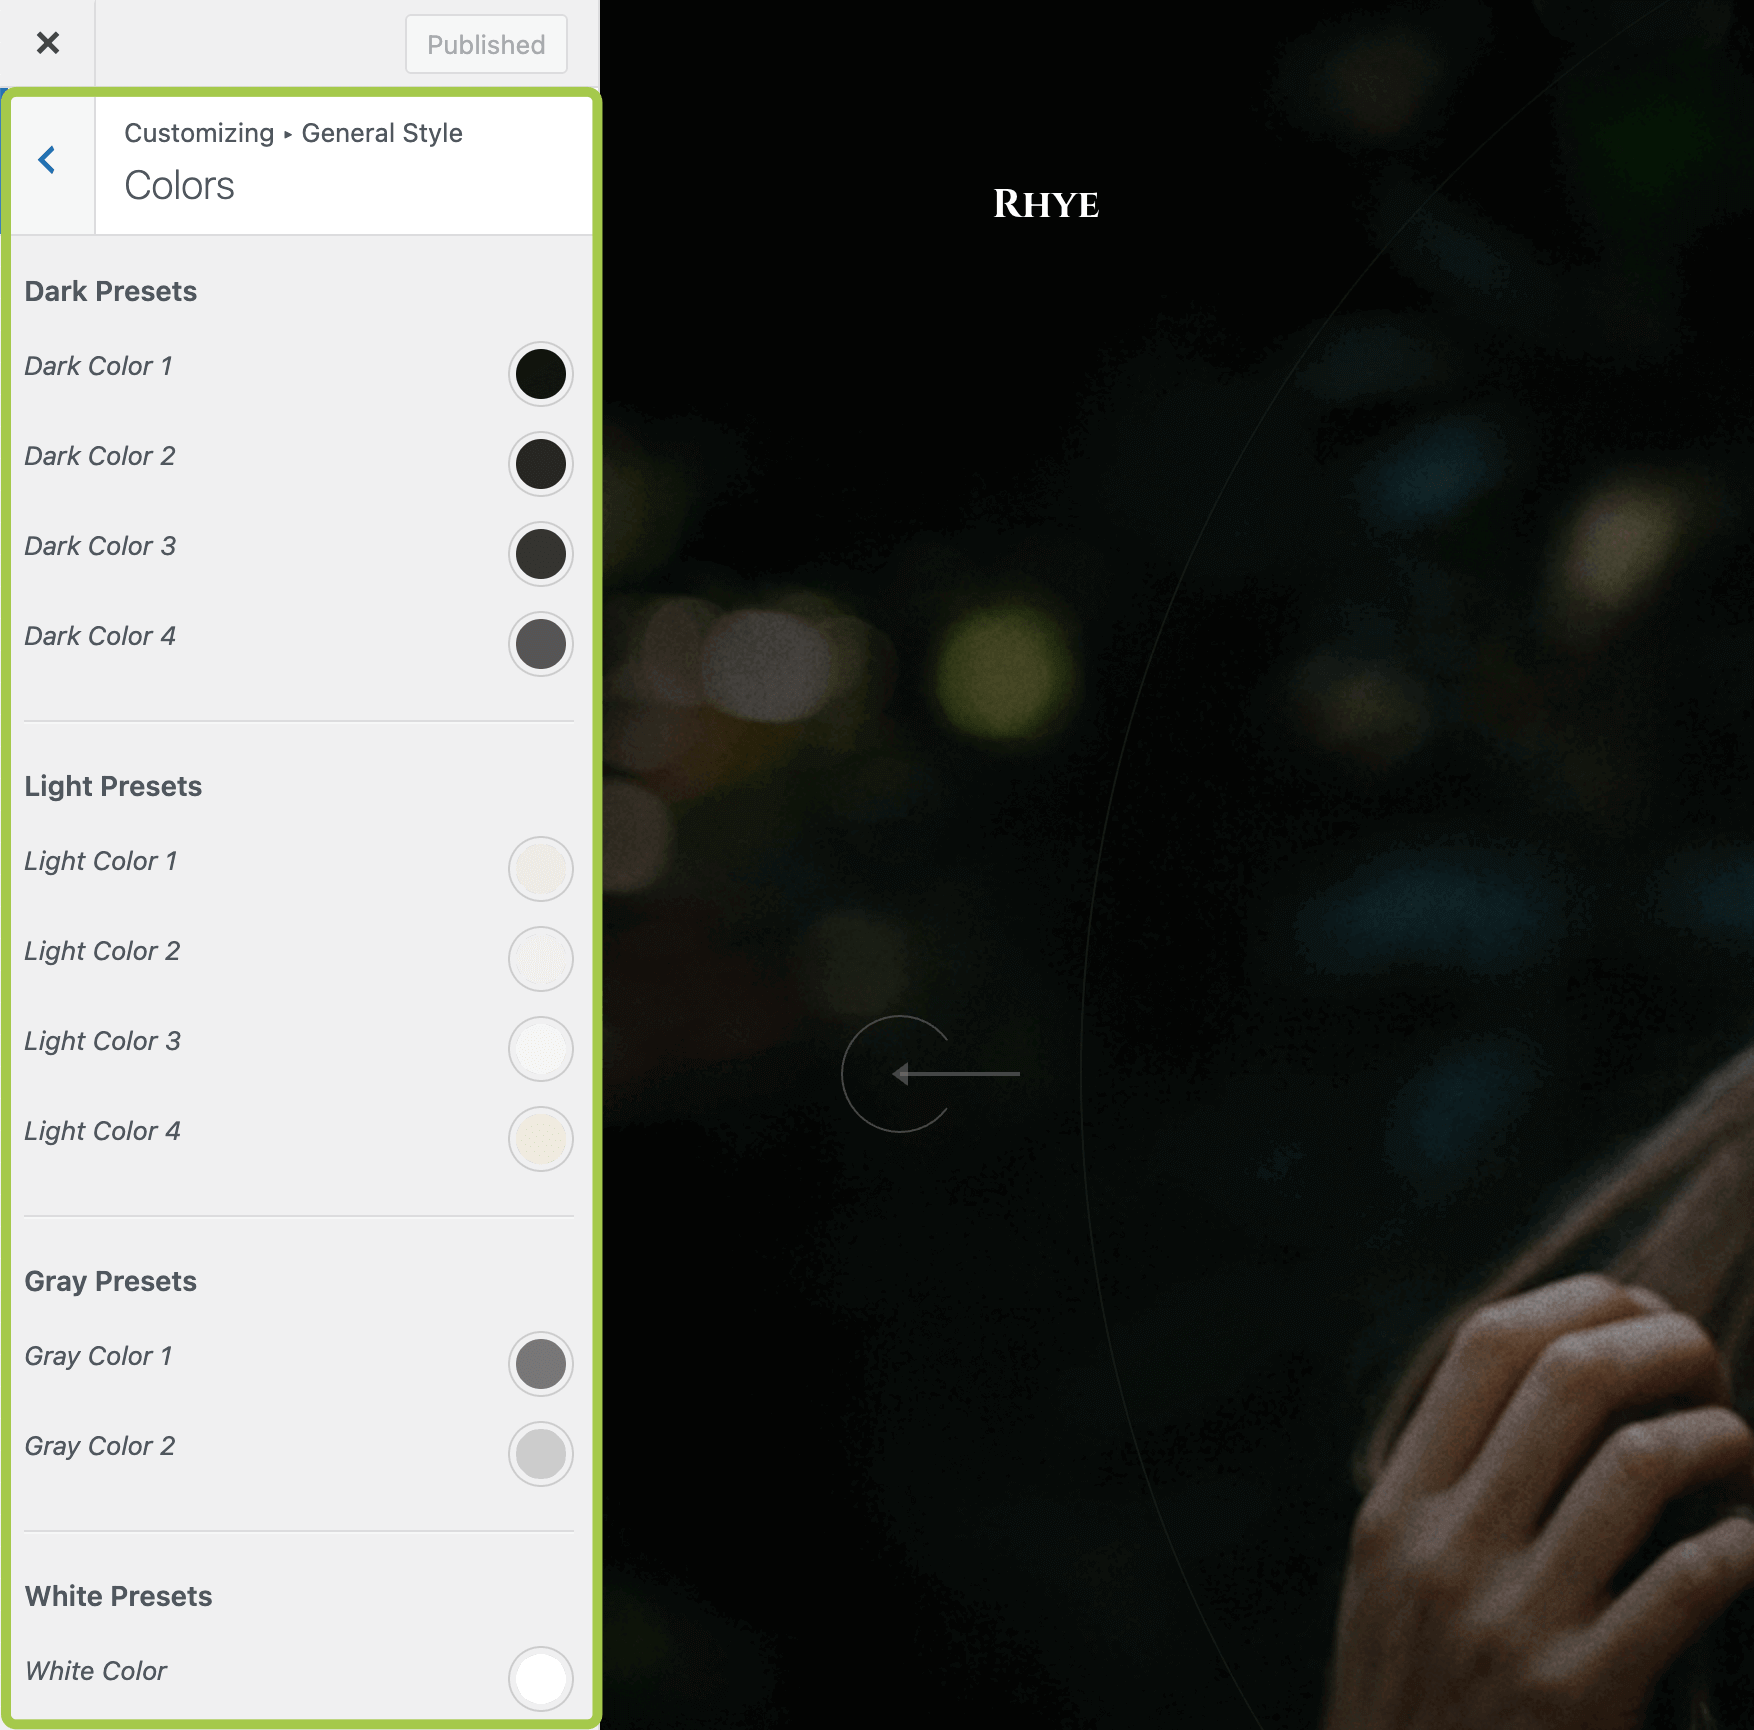
- Open the Customizer
Wordpress -> Appearance -> Customize - Set background colors
Customizer -> General Style -> Colors— adjust each Background preset. These colors become selectable in Elementor as presets for the sections backgrounds.
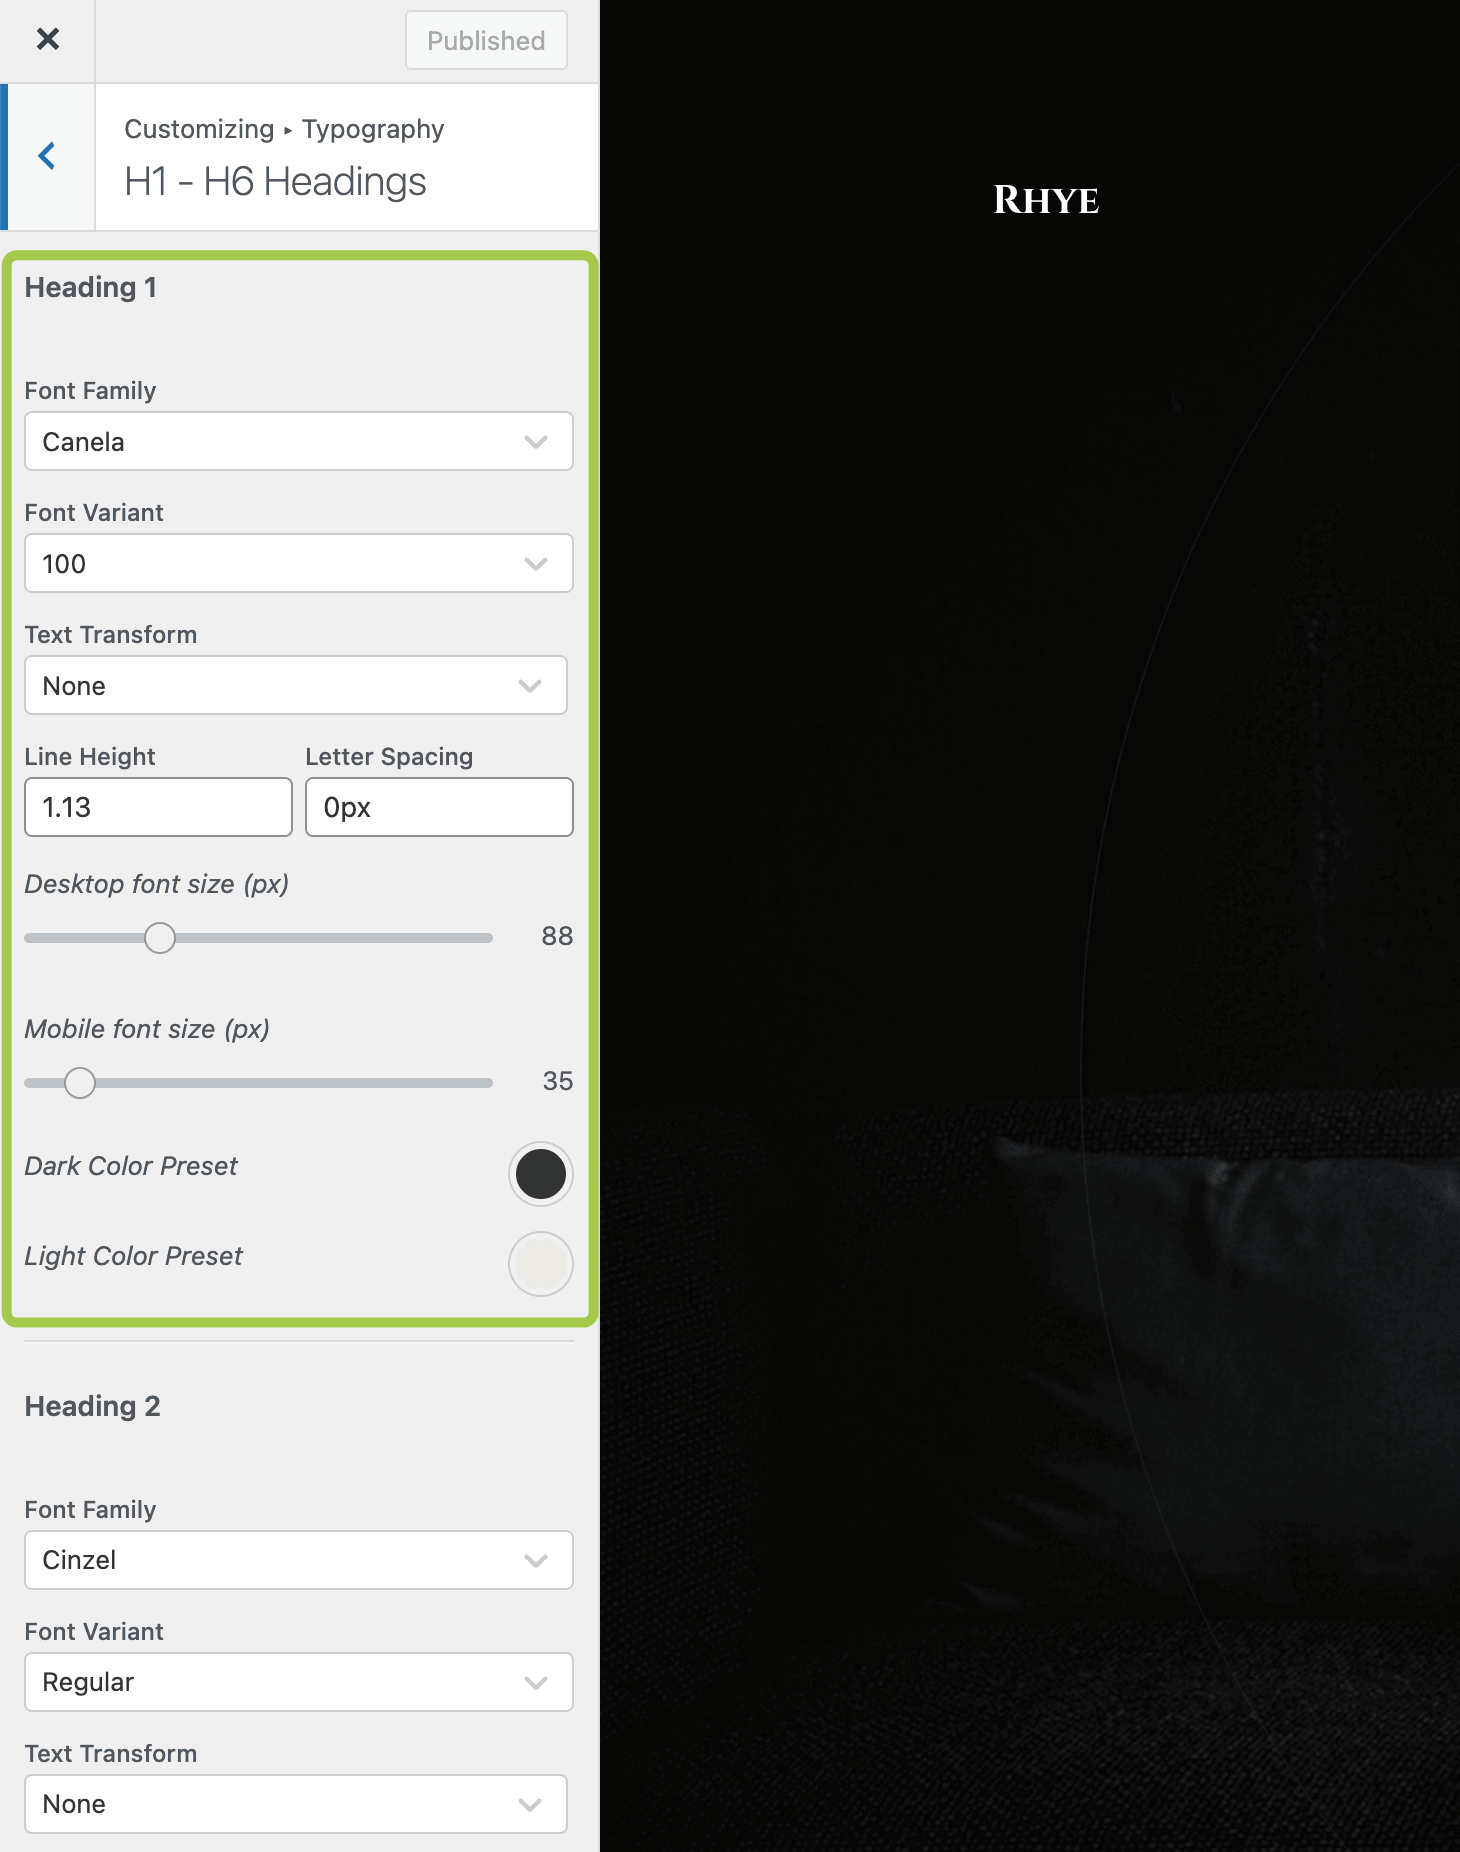
- Set typography presets
Customizer -> Typography— choose a preset (e.g., Heading 1) and define:
- Font options
- Dark color preset (shown on light backgrounds)
- Light color preset (shown on dark backgrounds)
- Publish the Customizer to save all presets.
# 3. Apply a background preset to a section (Elementor)
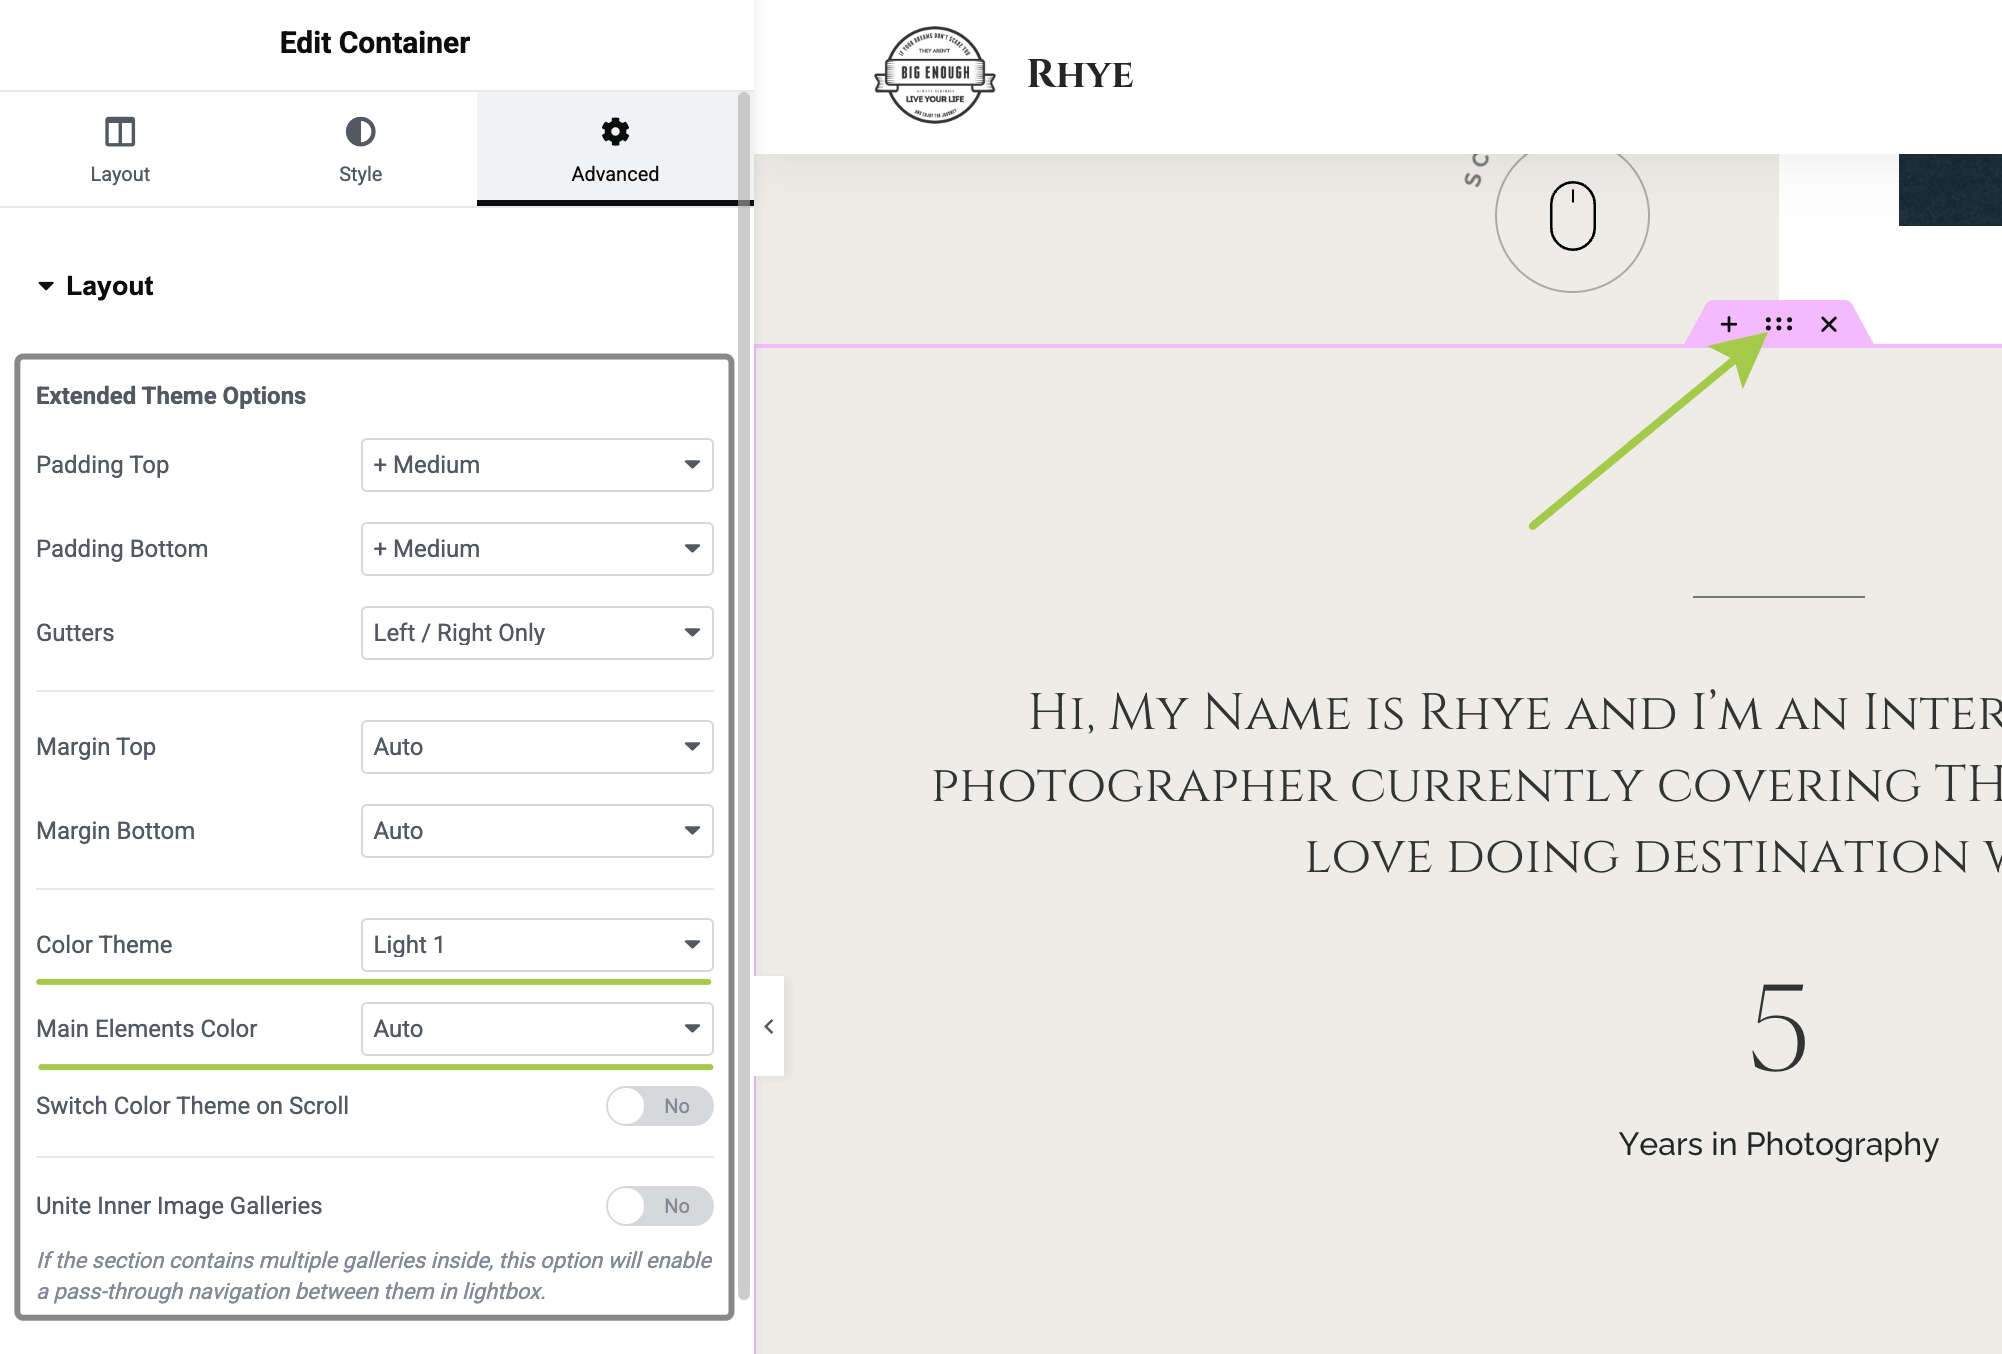
- Edit the page in Elementor.
- Select the Section / Container.
- Go to Advanced -> Extended Theme Options.
- Pick a Color Theme (your background preset).
- Choose Main Elements Color:
- Dark — force widgets inside to use the dark text color.
- Light — force light text color.
- Auto — fall back to the theme default (dark text on light background in most cases).
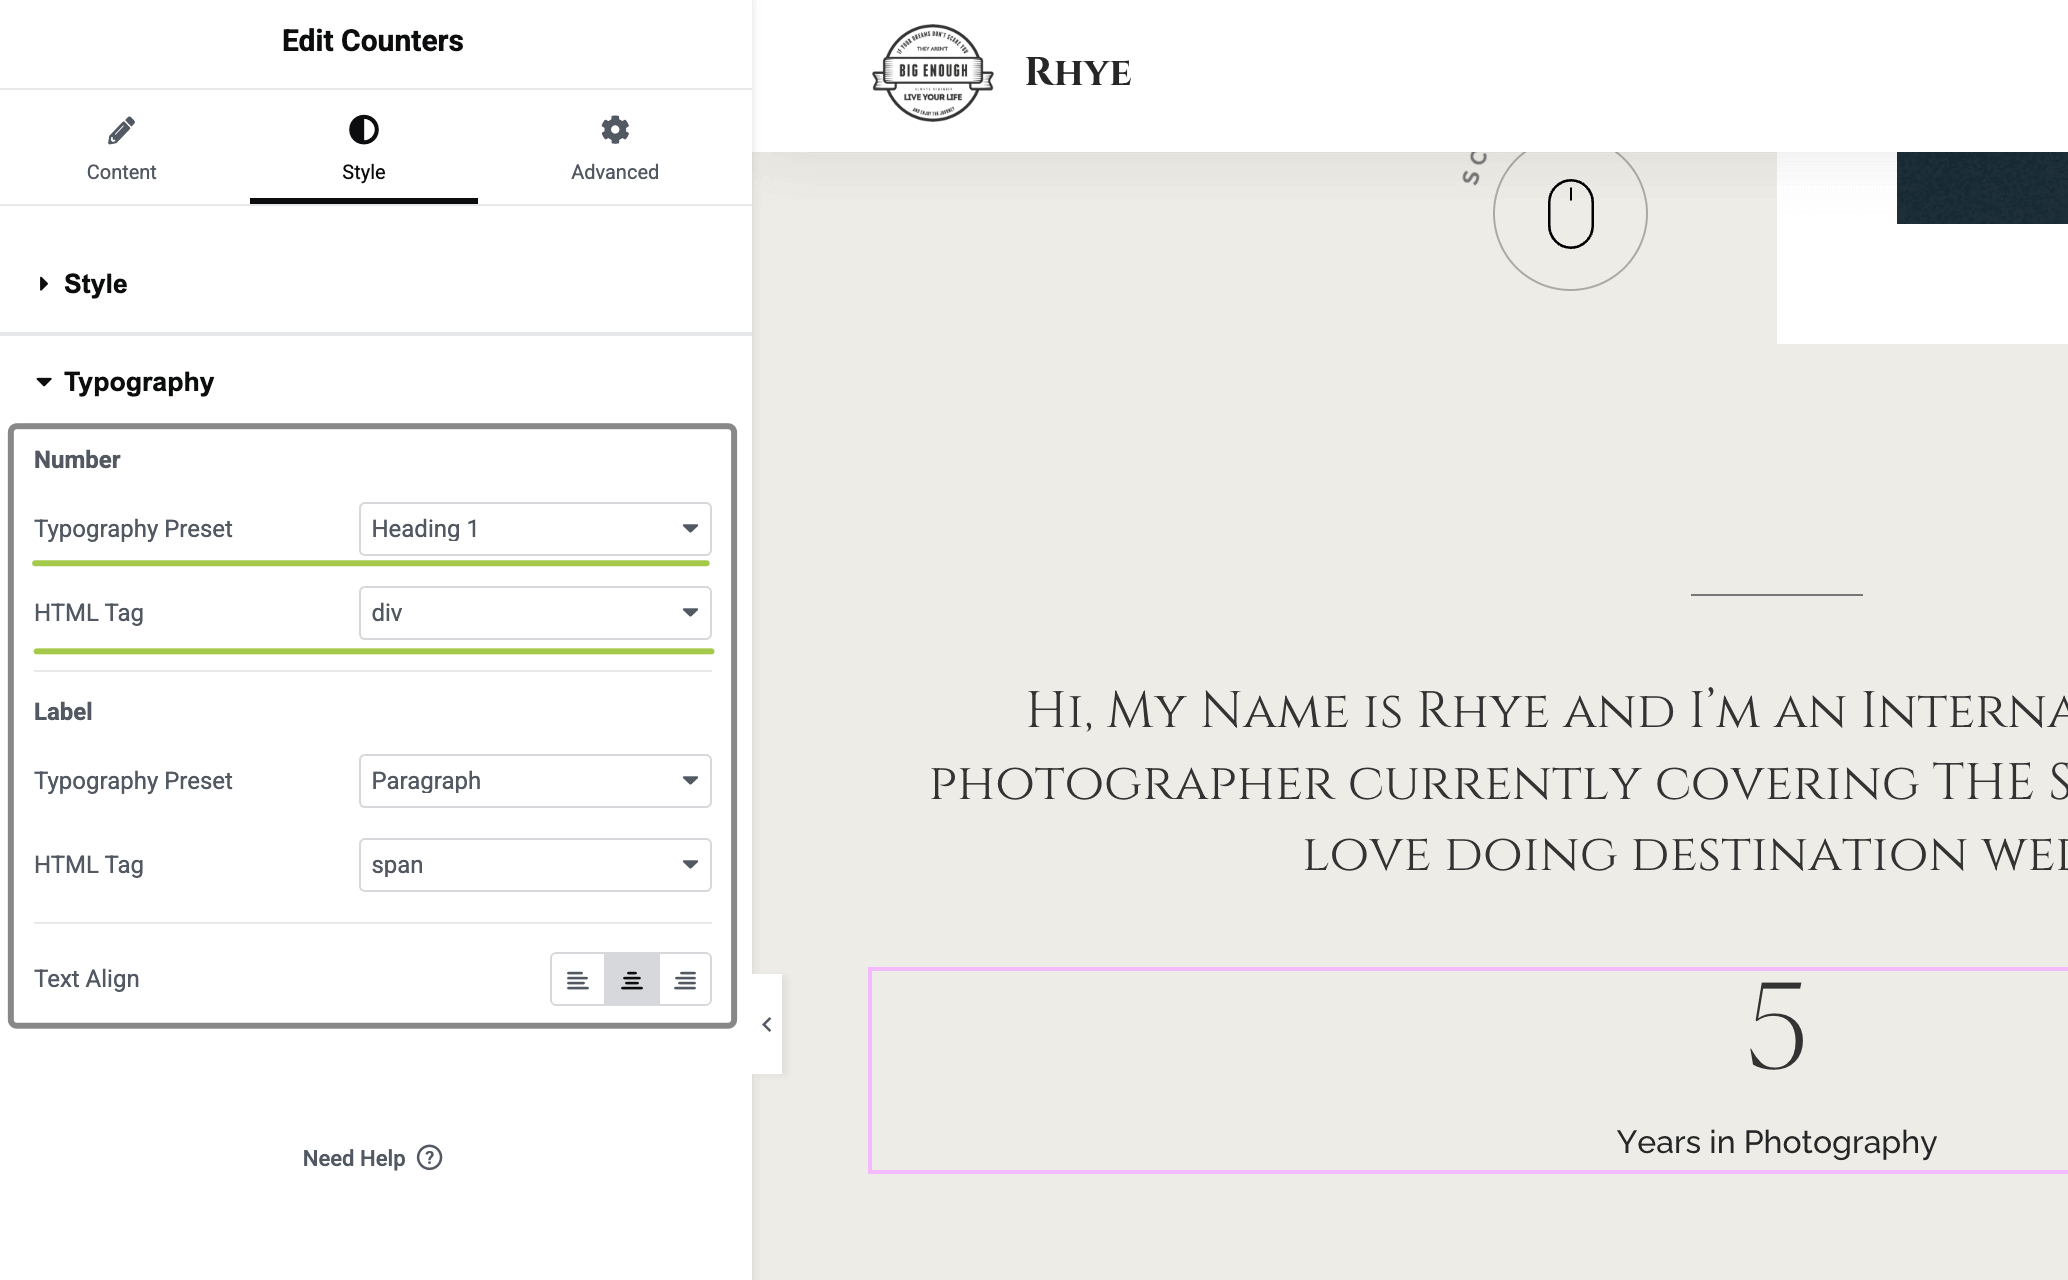
# 4. Set typography for individual widgets
- Select widget that is a custom made one for the theme (e.g., Portfolio Fullscreen Slider, Albums Covers List, Services Grid).
- Open the Style tab in that widget.
- Under Typography panel, pick a Typography Preset (e.g., Heading 2).
- (Optional) Choose an HTML Tag for SEO — this will not change the visual style of the widget element. Available tags:
<div>,<span>,<h1>–<h6>,<p>,<blockquote>.